There’s something magical about transforming an ordinary pumpkin into a glowing masterpiece. Whether you’re a first-timer with a basic carving kit or a seasoned artist with specialized tools, the possibilities are endless. Simple ghost faces and spider webs welcome beginners, while haunted houses and candy corn patterns challenge those ready to level up.
For the truly ambitious, layered portraits and grim reaper figures await. The key is matching your design to your available time and patience. After all, Halloween only comes once a year—why not make your porch the talk of the neighborhood?
Before You Carve: Tools and Prep
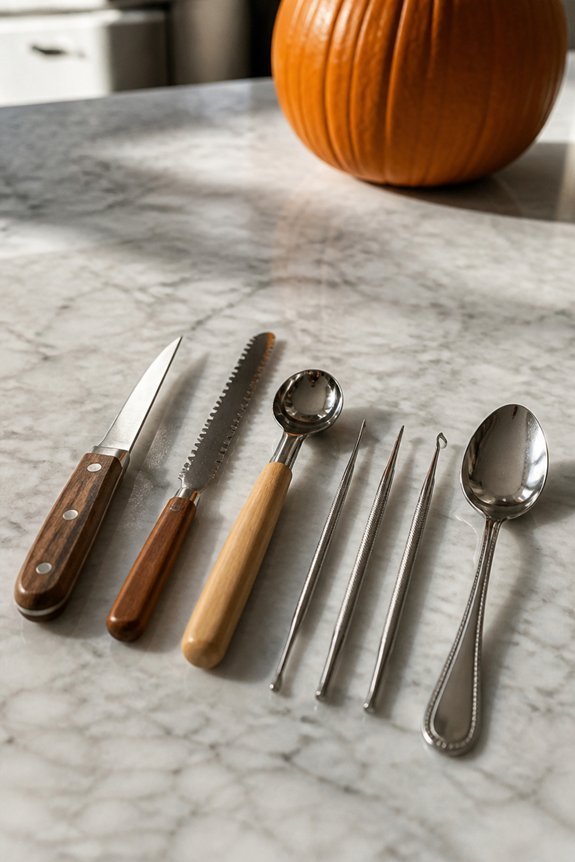
Before carving begins, the right tools and preparation make the process more efficient and safer. Gather a serrated knife, scoop, marker, and small saw. Select a firm pumpkin without soft spots.
Place newspaper or a tarp underneath to contain seeds and debris.
Sketch the design with a marker first, ensuring visibility from all angles.
Classic Jack-O’-Lantern Face
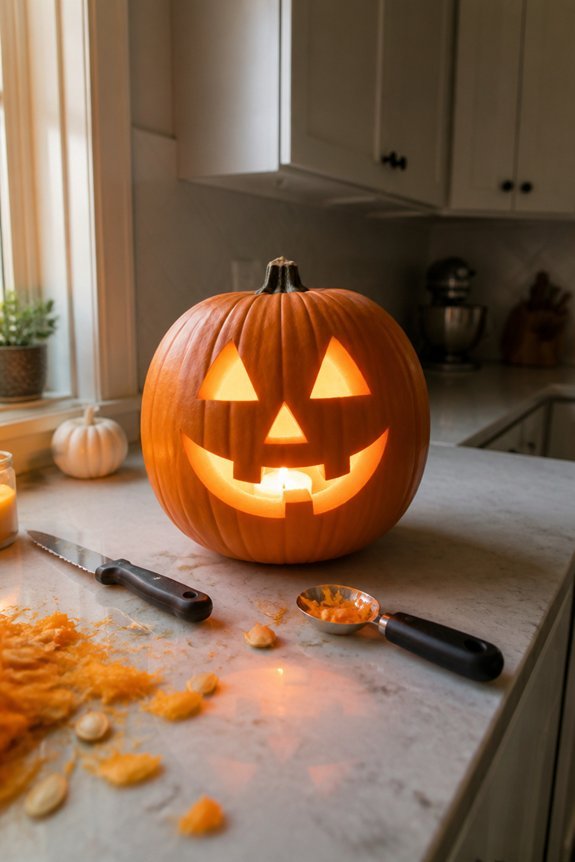
The classic jack-o’-lantern face remains the most recognizable pumpkin carving design, featuring two triangular eyes, a triangular or oval nose, and a wide grin. This design works well for beginners because the shapes are simple and forgiving.
Carvers can adjust the mouth size and eye angles to create different expressions, from friendly to menacing, using the pumpkin’s natural contours as guides.
Haunted Ghost With Hollow Eyes
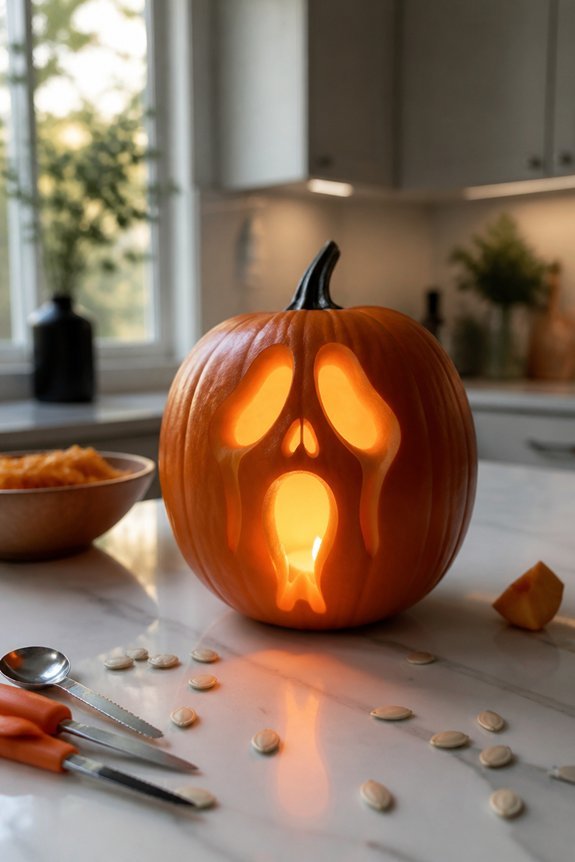
For a simpler yet striking alternative, carvers can create a ghost design featuring two large, hollow eye sockets and a subtle mouth or no mouth at all.
This approach requires minimal detail work, making it suitable for beginners.
The design relies on negative space and shadows to produce an eerie effect. Carvers should sketch the eye placement symmetrically before cutting to make certain balanced proportions throughout the pumpkin.
Spider Web Design
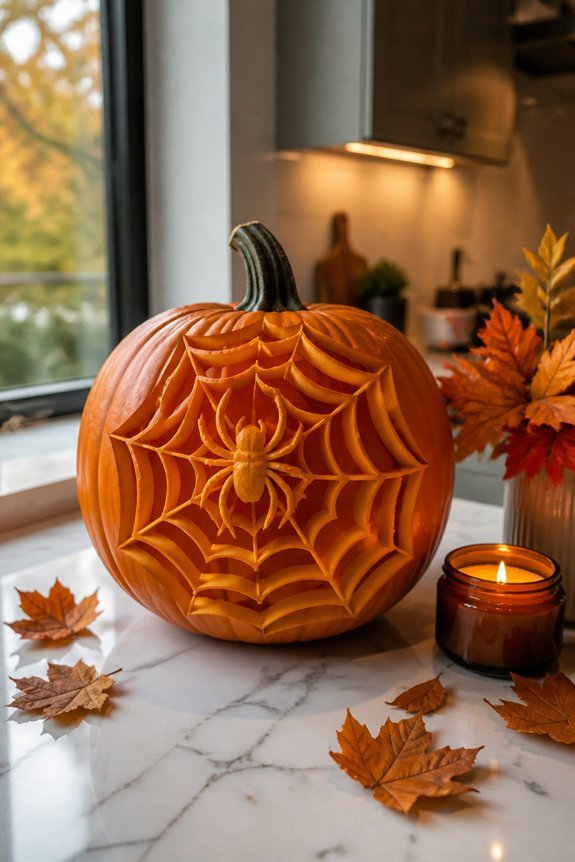
Spider web designs offer another popular pumpkin carving option that combines geometric patterns with thematic appeal. Carvers create interconnected lines radiating from a central point, forming the web structure.
A spider figure, positioned near or on the web, completes the design.
This pattern works well on medium to large pumpkins, providing adequate surface area for detailed line work and clear visibility of the finished design.
Candy Corn Pattern
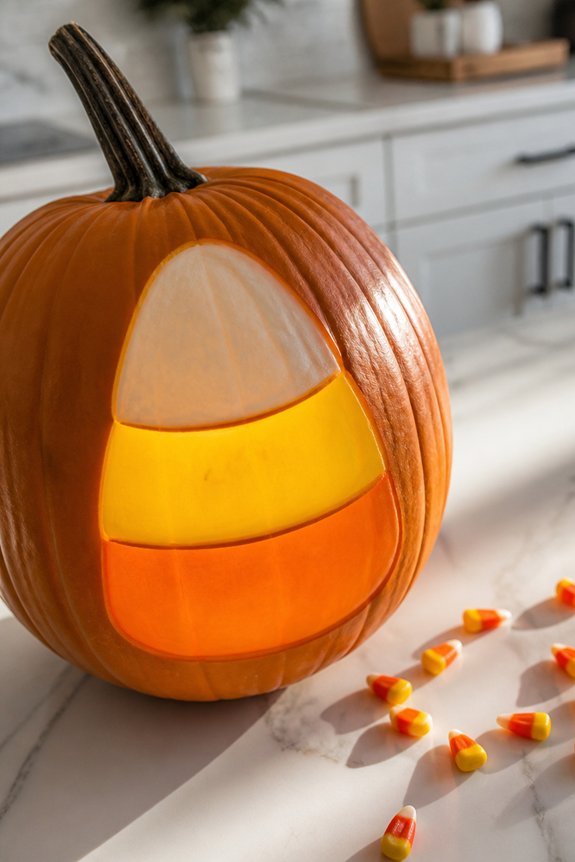
Candy corn patterns offer a simpler carving alternative to intricate geometric designs like spider webs.
Carvers can create three horizontal stripes using yellow, orange, and white sections, or stack triangular shapes to resemble individual candy pieces.
This design requires basic knife skills, making it accessible for beginners.
The pattern works well on medium to large pumpkins, providing clear visibility and straightforward execution without complex detailing or precise measurements.
Spooky Skeleton Carving
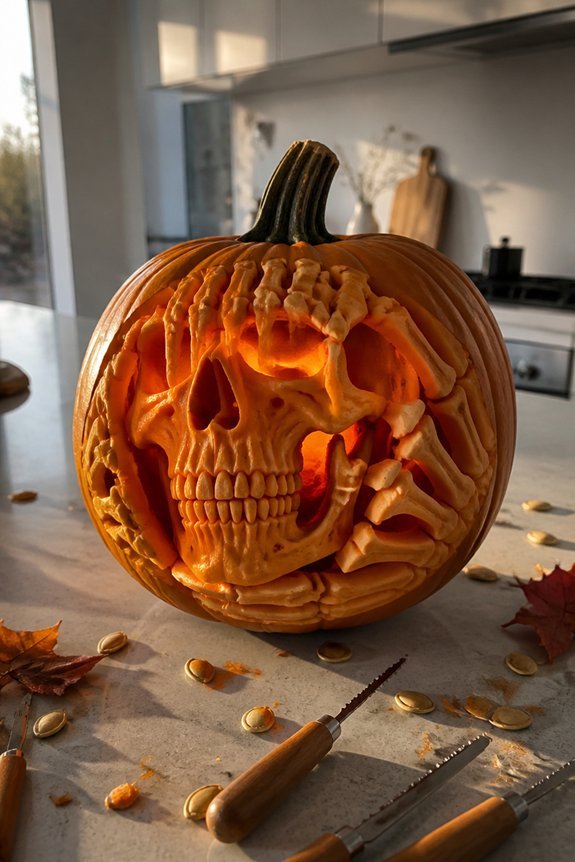
Skeleton designs offer intermediate carving difficulty, requiring more precision than candy corn patterns but remaining manageable for experienced beginners.
Carvers can create skull faces with hollow eye sockets and defined teeth, or full-body skeletons across the pumpkin surface.
Templates are available online to guide the carving process. Sharp tools, steady hands, and adequate lighting improve results markedly.
Wicked Witch Profile
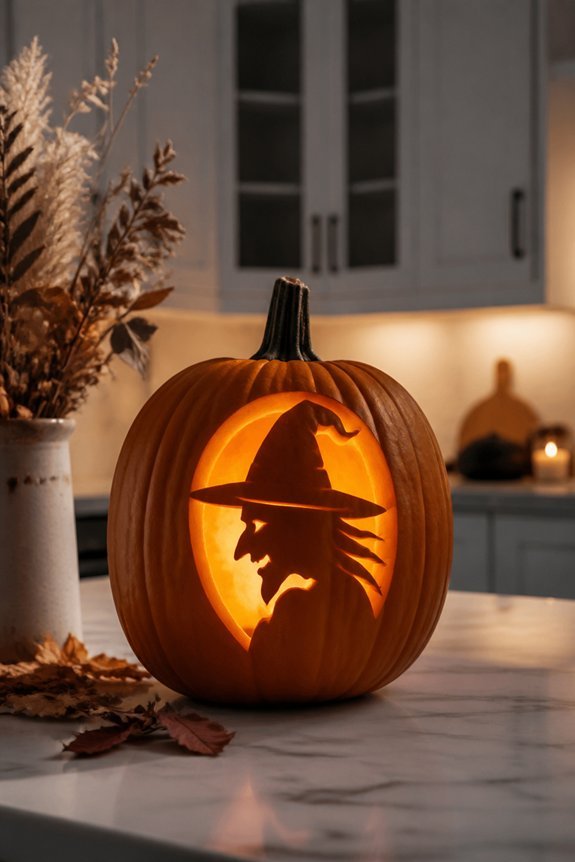
While skeleton designs emphasize facial symmetry and bone structure, witch profiles require a different carving approach, focusing on the side view of a face with exaggerated features. A prominent hooked nose, pointed chin, and wart placement create the characteristic witch appearance.
Carvers should angle the knife to shade cheeks, emphasizing hollowed cheekbones.
A tilted hat or crooked smile enhances the profile’s menacing quality.
For added ambiance, display your finished witch pumpkin alongside glowing potion bottles filled with colored water and LED lights to create an authentic apothecary atmosphere.
Black Cat Silhouette
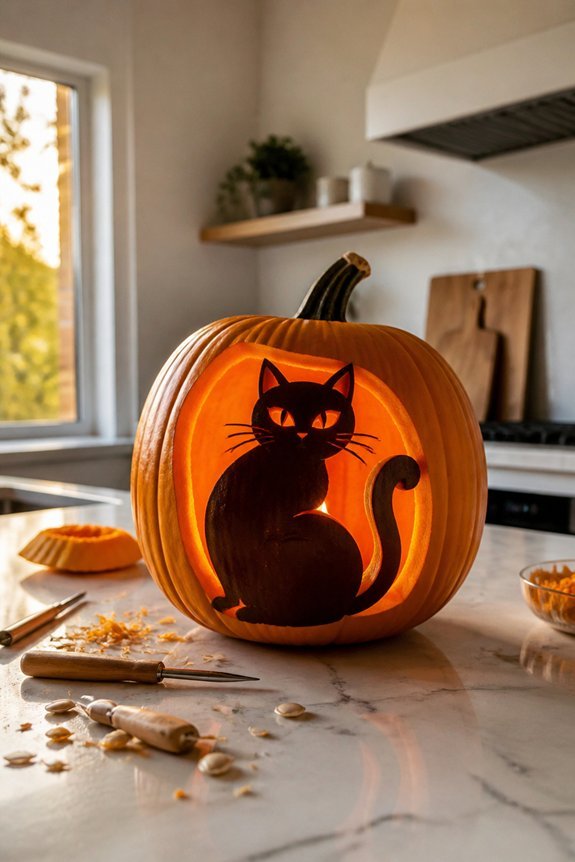
Many carvers prefer black cat silhouettes for their simplicity and recognizable shape. The design features a cat’s profile, including pointed ears, curved back, and extended tail.
Carvers can adjust the pose, making the cat standing, sitting, or arched.
Templates are widely available online, or carvers can sketch their own version. This design works well for beginners and experienced carvers alike.
Bat Wings and Moon
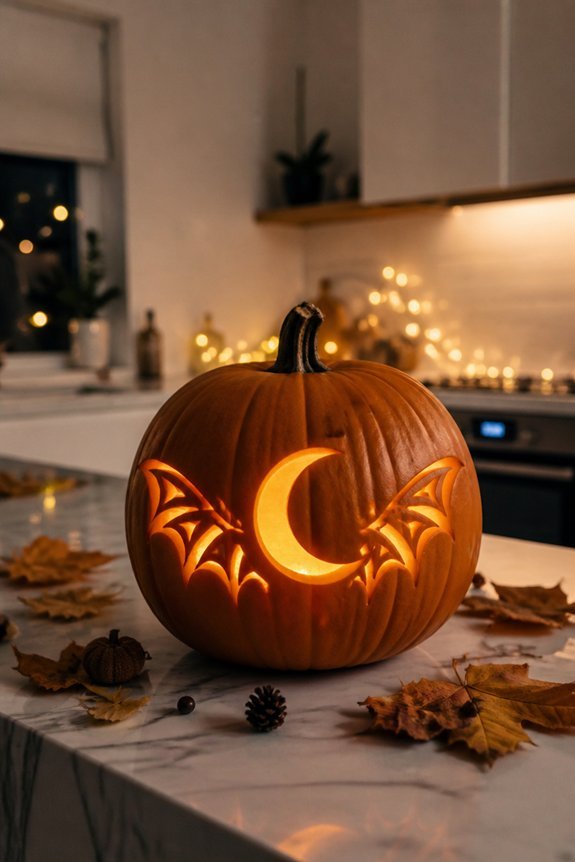
For a design with more dramatic flair, bat wings and moon patterns offer an engaging alternative. Carvers can sketch symmetrical wings on either side of the pumpkin’s face, adding curved crescent moons nearby. This combination creates visual balance and depth.
The contrast between solid wing shapes and lighter moon sections produces striking shadows when illuminated from inside, enhancing the overall spooky effect.
Grim Reaper With Scythe
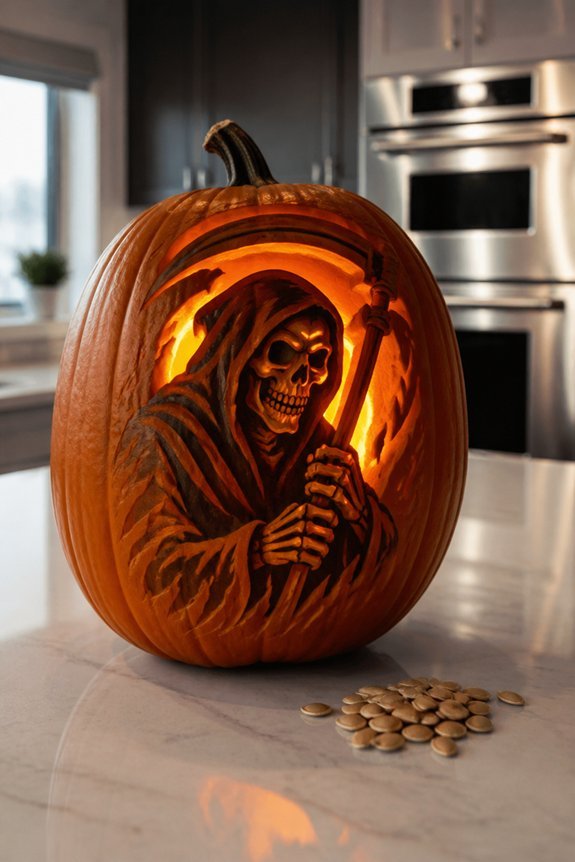
A grim reaper design presents a classic Halloween option that combines skeletal facial features with a curved scythe across the pumpkin’s surface.
Carvers can sketch a skull face with hollow eye sockets, a nasal cavity, and a grimacing mouth on the front.
The scythe curves along the pumpkin’s side, requiring careful blade work to achieve the tool’s distinctive crescent shape and handle detail.
Mummy Wraps and Bandages
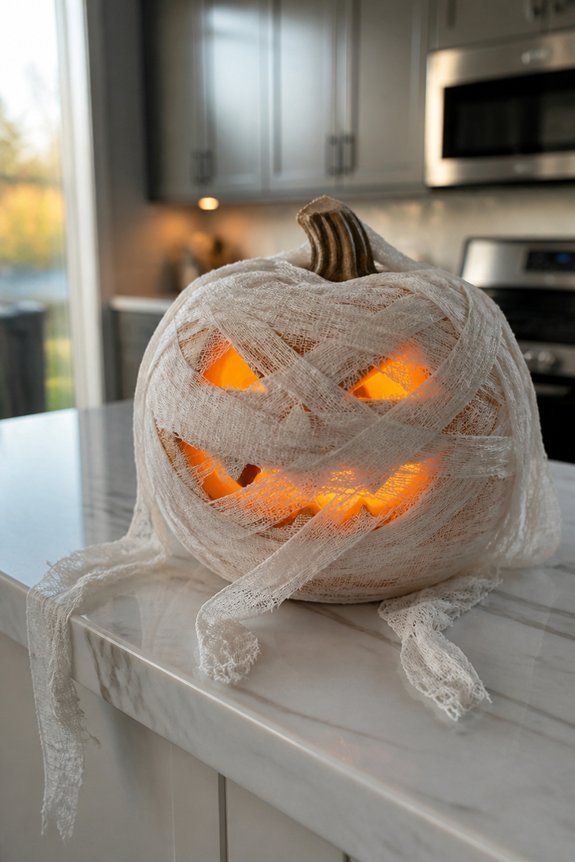
Mummy designs offer an alternative approach to pumpkin carving that emphasizes wrapping patterns rather than carved details.
Creators wrap white gauze or cloth strips around the pumpkin, leaving gaps to reveal the orange surface beneath. Black markers or paint add eye details.
This method requires no carving tools, making it accessible for various skill levels.
The wrapped texture creates a recognizable mummy appearance suitable for Halloween displays.
Vampire With Fangs
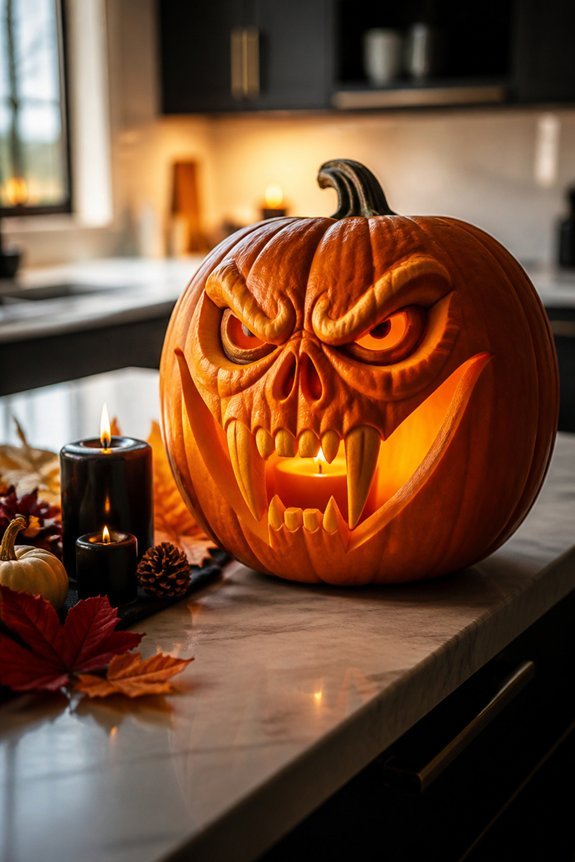
Carving a vampire pumpkin requires attention to facial features, particularly the distinctive fangs and expression.
Carvers should outline the face shape, eye sockets, and nose cavity first.
The fangs, typically two pointed teeth, extend downward from the upper jaw area. Shading techniques using a saw or knife create depth around the mouth region.
Adding a cape silhouette or widow’s peak enhances the vampire aesthetic effectively.
Werewolf Howl
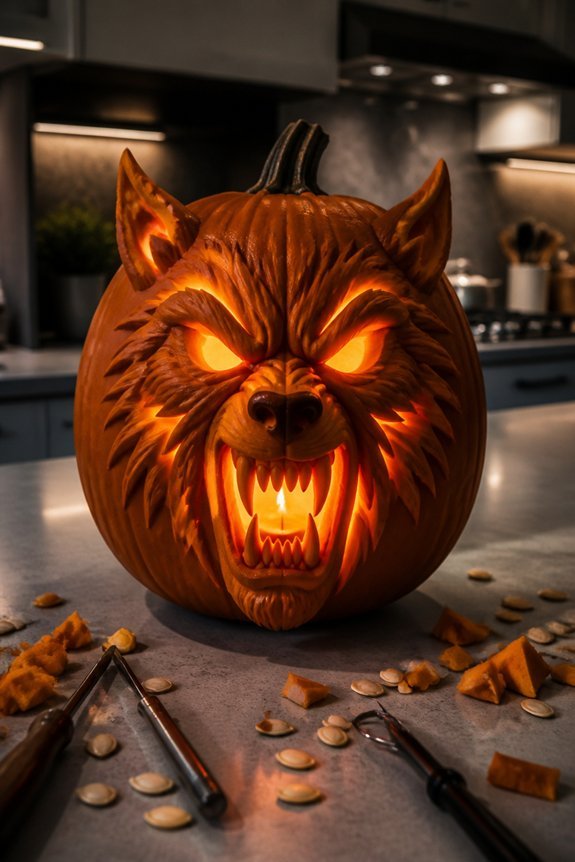
How does one capture the feral nature of a werewolf pumpkin? Carvers should emphasize sharp, angular facial features, including pointed ears, a pronounced snout, and an open mouth showing teeth. Deep-set eyes create an aggressive expression.
Use jagged carving lines for fur texture across the face and neck.
A crescent moon positioned behind the werewolf design enhances the nighttime transformation theme effectively.
Zombie Face With Sunken Eyes
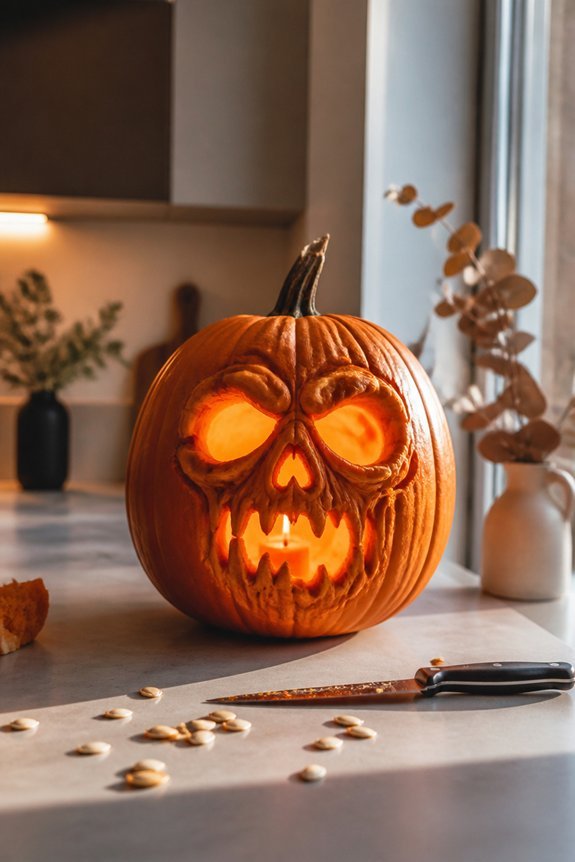
Decomposed facial features characterize the zombie design, requiring carvers to hollow out the eye sockets deeply and unevenly.
The nose can be partially carved away, and the mouth should appear slack or drooping. Asymmetrical placement of these elements enhances the decayed appearance.
Using a serrated knife creates jagged edges around the mouth and eye areas, mimicking rotted tissue effectively.
Creepy Clown Portrait
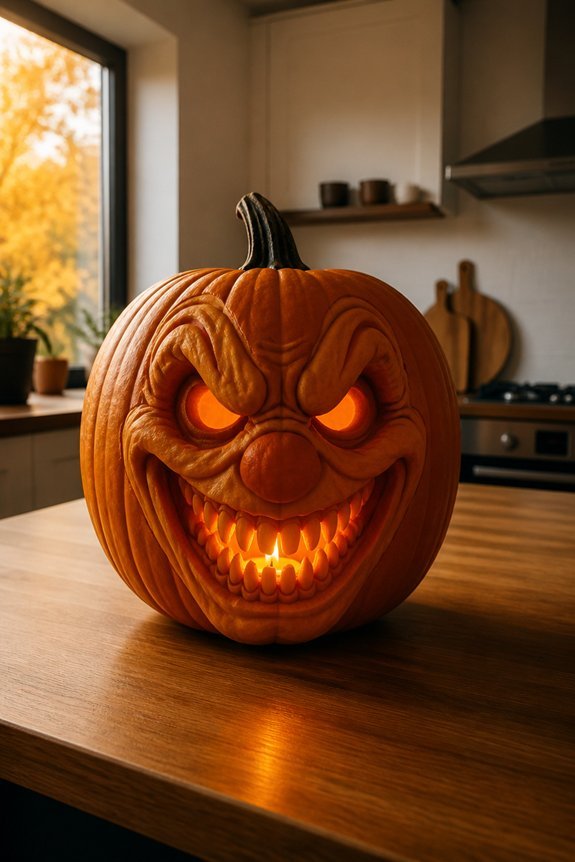
While zombie designs emphasize decay and deterioration, clown portraits require a different approach, focusing instead on exaggerated facial features and unsettling expressions.
Carvers should create an oversized smile, wide eyes, and sharp cheekbones. Red triangles or diamonds around the eyes enhance the eerie effect.
Asymmetrical features, such as one larger eye than the other, increase discomfort.
Strategic shading with shallow cuts produces dimensional results.
Frankenstein’s Monster
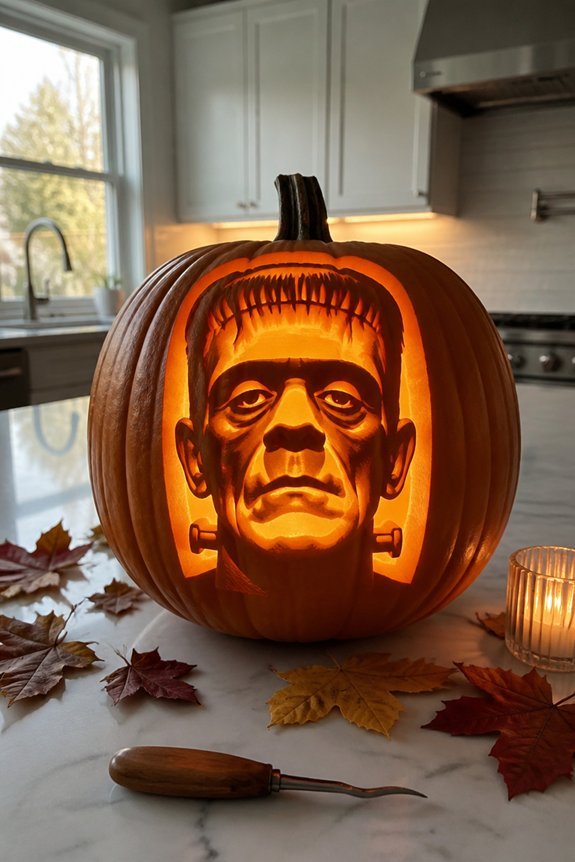
Frankenstein’s monster requires a flat-topped head, bolts protruding from the neck, and a rigid, expressionless face to capture the classic movie appearance.
Carvers should etch deep-set eye sockets, a straight mouth line, and angular cheekbones.
The bolts, positioned on either side of the neck, can be carved as simple circles or rectangles.
Green paint applied after carving enhances the traditional monster aesthetic.
Devil Horns and Evil Eyes
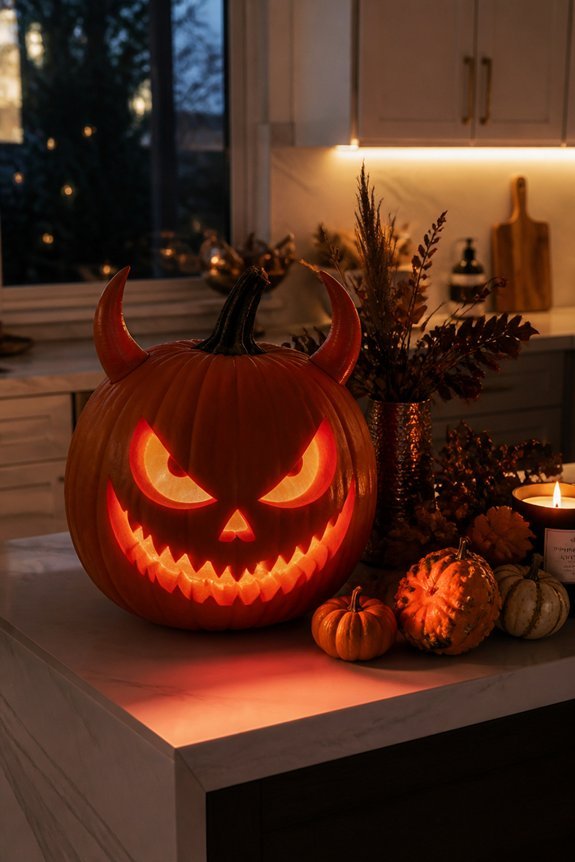
A menacing pumpkin design can be achieved through devil horns and evil eyes, which transform a basic jack-o’-lantern into a sinister character.
Carvers create curved horn shapes at the pumpkin’s top, then carve downward-angled eyes with sharp corners. Adding a twisted mouth enhances the effect.
Red food coloring or paint inside the carved sections intensifies the appearance, producing a threatening expression suitable for Halloween displays.
Alien With Large Eyes
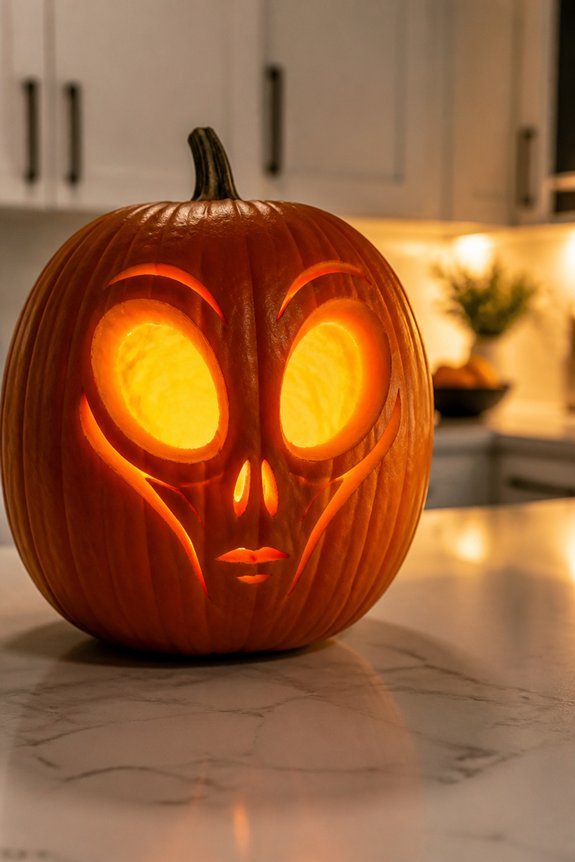
For those seeking extraterrestrial designs instead of demonic ones, carving an alien with large eyes offers a distinctly different Halloween aesthetic.
The design requires two oversized circular eye shapes, a small triangular nose, and a thin mouth line. Carving concentric circles within the eyes creates dimension.
Consider adding an oval head shape, slanted features, or antenna protrusions for enhanced alien characteristics. This moderate-difficulty design appeals to science fiction enthusiasts.
Skull and Crossbones
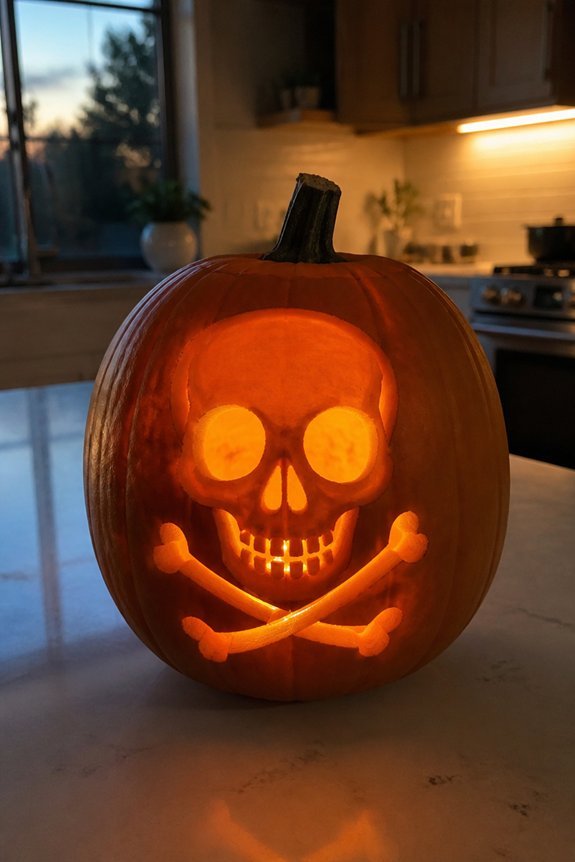
The skull and crossbones design represents a classic pirate symbol, recognizable to most observers.
Carvers can create this pattern by sketching the skull shape first, then adding the two crossed bones behind it.
The design requires moderate carving skill, using both large cuts for the main outline and smaller details for eye sockets and bone texture.
This pattern works well on standard pumpkins.
Tessellating Triangles and Diamonds
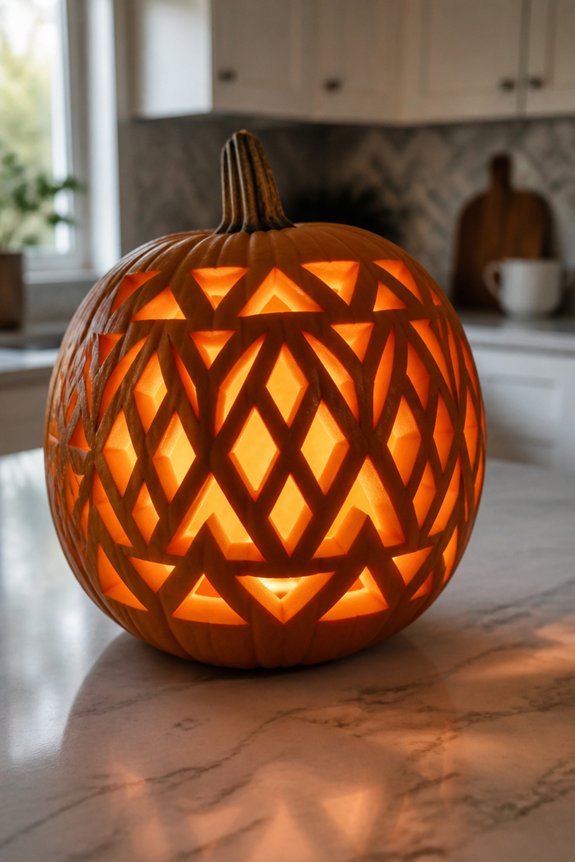
Geometric patterns offer a different approach compared to recognizable images like pirate symbols. Tessellating triangles and diamonds create repeating designs across the pumpkin’s surface.
Carvers can arrange these shapes in alternating rows, creating optical effects through depth variation.
This pattern type requires precision marking but minimal artistic skill, making it accessible for most carvers seeking structured, modern aesthetics.
Pop Culture Icons: Pennywise, Michael Myers, Freddy Krueger
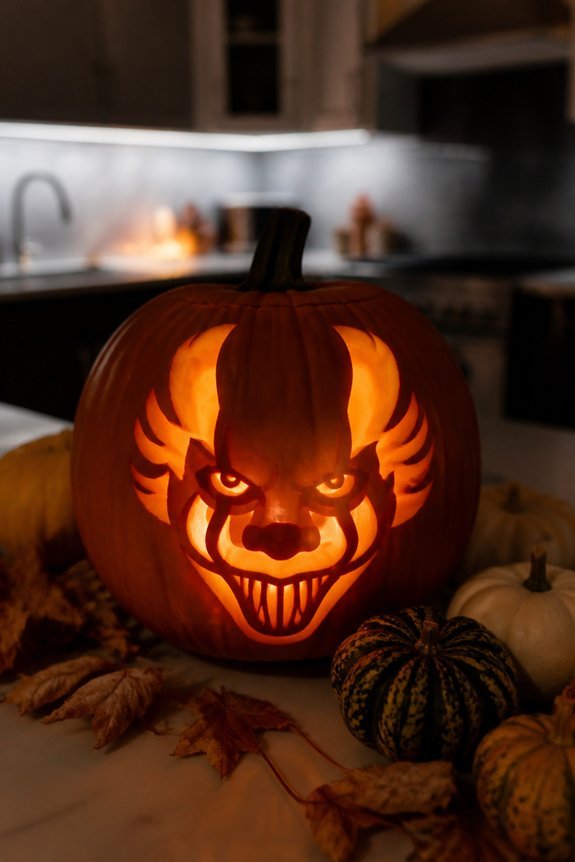
Carvers can elevate their pumpkins by depicting recognizable horror characters, such as Pennywise from It, Michael Myers from Halloween, and Freddy Krueger from A Nightmare on Elm Street.
These designs require attention to distinctive features: Pennywise’s makeup and ruffled collar, Myers’ blank mask, and Krueger’s scarred face and fedora.
Stencils and detailed carving tools help achieve precision with these complex character likenesses.
Layered Relief Portraits
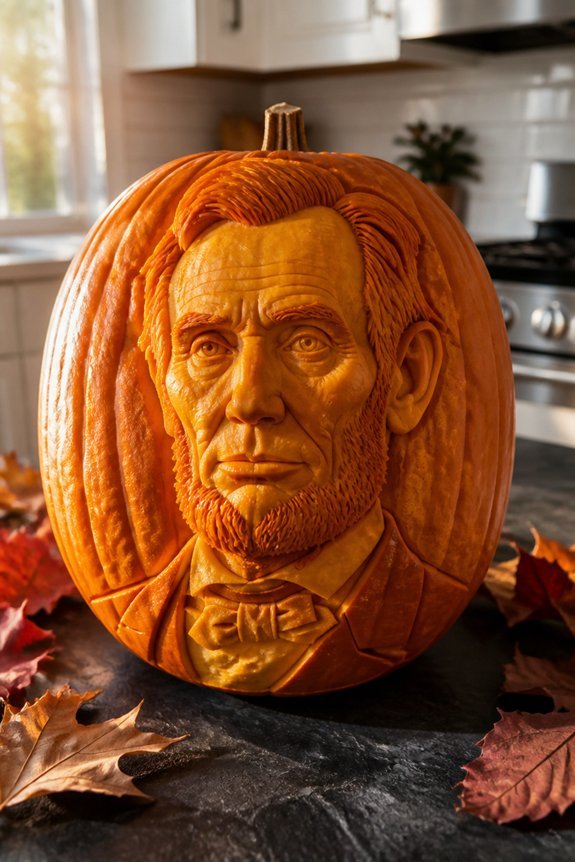
While character portraits demand precision with surface details, relief carving techniques offer a different approach by creating depth through multiple pumpkin layers.
Carvers remove outer skin to expose inner flesh, revealing lighter tones beneath. This method works well for faces, profiles, and shadowed areas.
Popular subjects include historical figures, animals, and detailed landscapes. The technique requires sharp tools, steady hands, and patience to avoid cutting completely through the pumpkin wall.
Haunted House Scene
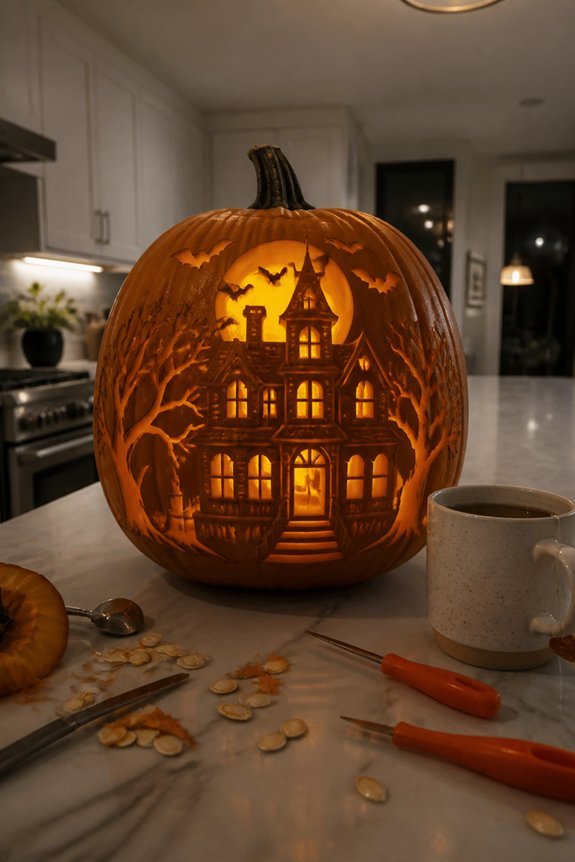
A complete miniature haunted house offers multiple carving opportunities across a single pumpkin’s surface. Carvers can depict a two-story structure with windows, a front door, and a peaked roof.
Adding details like bare tree branches, flying bats, or a crescent moon enhances the scene.
Combining shallow relief carving with deeper cuts creates dimensional effects. This design requires moderate skill and planning before beginning the work.
Glowing Galaxy Scene
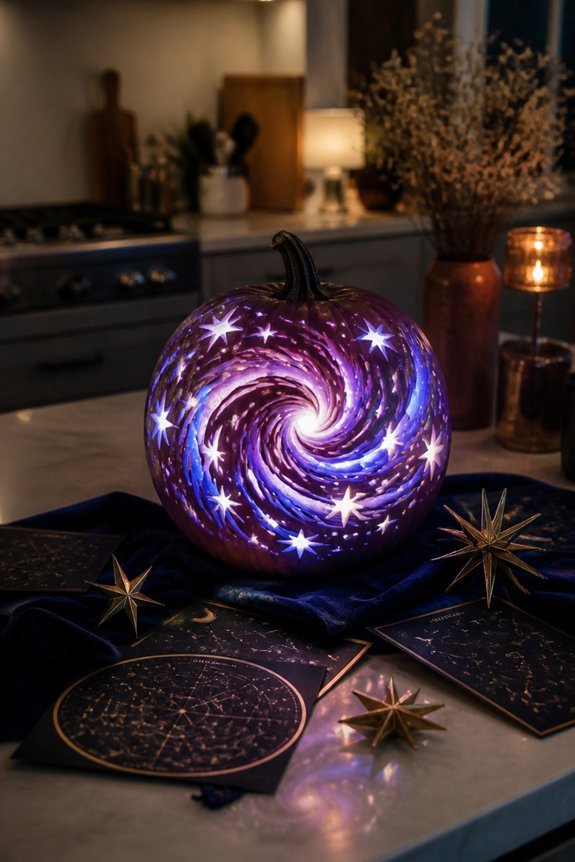
Creating a cosmic scene on a pumpkin involves carving stars, planets, and nebula patterns across the surface. Carvers can use small drill bits, saw tools, and stencils to achieve detailed designs.
LED lights placed inside the pumpkin illuminate the carved sections, creating a glowing effect.
Common galaxy elements include Saturn rings, crescent moons, and swirling cloud formations. This technique produces a visually striking, space-themed decoration suitable for Halloween displays.
LED Lights and Glow Effects
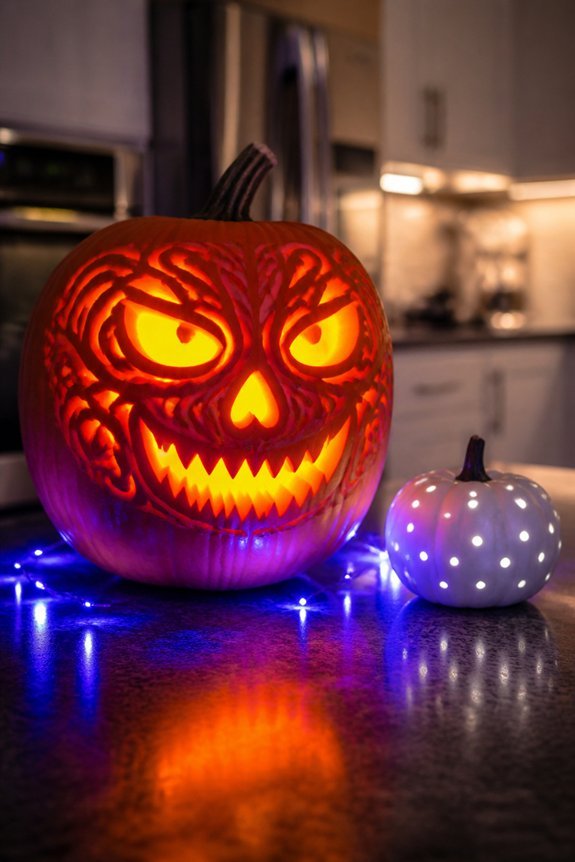
Several types of LED lights can enhance pumpkin carvings, each producing different effects and intensity levels. String lights, spotlights, and color-changing options offer distinct appearances. Battery-operated LEDs provide convenient placement without cords.
Warm white lights create traditional effects, while colored LEDs produce modern aesthetics.
Placing lights inside the pumpkin illuminates carved sections, enhancing visibility and visual impact during evening hours.
Frequently Asked Questions
How Long Will a Carved Pumpkin Last Before It Starts to Rot or Decompose?
A carved pumpkin typically lasts five to ten days before deterioration begins, depending on environmental conditions. Cooler temperatures extend its lifespan, while warm weather accelerates decay. Applying preservative solutions can help extend freshness slightly longer.
Can I Carve a Pumpkin Days in Advance, or Should I Carve It the Night Before?
One might think carved pumpkins improve with age, yet they deteriorate fastest when carved early. Carving the night before Halloween proves ideal, as pumpkins last approximately three to five days after cutting before visible rot emerges noticeably.
What’s the Best Way to Preserve a Carved Pumpkin to Extend Its Lifespan?
One should store the pumpkin in a cool environment, apply petroleum jelly to carved edges, mist it daily with water, and keep it away from direct sunlight and heat sources. These methods effectively slow decomposition and decay.
Are There Pumpkin Varieties Better Suited for Carving Than Standard Orange Pumpkins?
Like sculptors selecting marble over clay, carvers find certain pumpkin varieties superior for their craft. Howden and Jack-O’-Lantern pumpkins offer thinner walls and flatter surfaces, making detailed designs more achievable than standard orange varieties.
How Do I Safely Dispose of Pumpkin Seeds and Flesh After Carving?
One can compost pumpkin seeds and flesh in a backyard compost bin or municipal composting program. Alternatively, they may be disposed of in green waste bins or buried in garden soil where they naturally decompose and enrich the earth.
Conclusion
Pumpkin carving ranges from simple jack-o’-lanterns to complex relief portraits, offering options for all skill levels. Beginners benefit from basic designs, while experienced carvers tackle geometric patterns and detailed scenes. Essential tools include scoops, saws, and LED lights for effects. Proper preparation prevents mistakes. Whether choosing classic faces or pop culture references, carvers can create displays that balance simplicity with visual impact, transforming ordinary pumpkins into Halloween decorations.