

A shade sail canopy has a way of transforming an outdoor space without putting much of a dent in the budget.
Sagging fabric that pools water after storms is a familiar frustration for plenty of homeowners, usually the result of skipping proper tensioning somewhere along the way.
The right approach turns a simple piece of fabric into shade that actually lasts. Planning anchor points matters more than most people realize going in.
Digging posts too shallow or placing them at awkward angles creates headaches down the road, and triangular sails consistently handle wind better than square ones.
Each step builds on the last: secure footing first, then hardware, then fabric pulled drum-tight. Rush this sequence and adjusting anchors for weeks becomes the new normal.
A Few Things Worth Knowing First
Anchor point planning deserves attention before any hardware gets purchased, since attachment locations determine sail shape, size, and tension angles from the very start.
Sail shape should match wind exposure more than aesthetic preference alone. Triangular sails hold up noticeably better than squares in areas that see regular gusts.
Tension needs a second look after the first rainfall, since wet fabric stretches slightly before contracting again as it dries. Checking early prevents bigger adjustments later.
Tools and Materials You Need Before Installing a Shade Sail
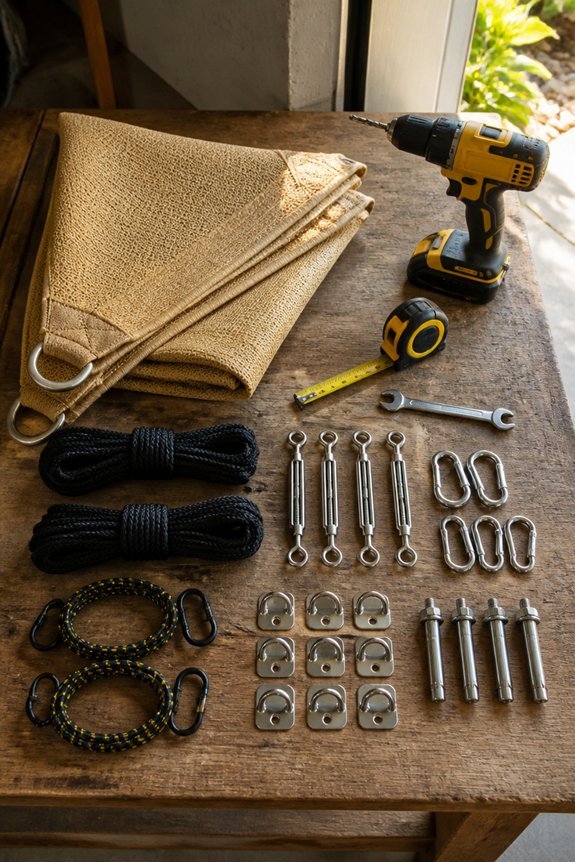
Before installing a shade sail, gathering the right tools and materials saves time and prevents unnecessary delays. Several items are needed to complete the job correctly.
Tools required:
Drill with masonry or wood bits. Wrench and pliers. Measuring tape and level. Ladder.
Materials required:
Shade sail fabric, typically polyethylene or HDPE. Stainless steel hardware, including turnbuckles, carabiners, and eye bolts. Mounting posts, such as steel or treated timber. Concrete mix for setting posts. Lag screws or anchor bolts for wall mounting.
Choosing stainless steel hardware over standard steel prevents rust and extends the canopy’s lifespan. The shade sail size determines how much hardware and how many anchor points are necessary.
Measuring the installation area before purchasing materials avoids costly errors.
Also read: How to Set Up a Canopy for an Outdoor Wedding
Pick the Right Shade Sail for Your Space
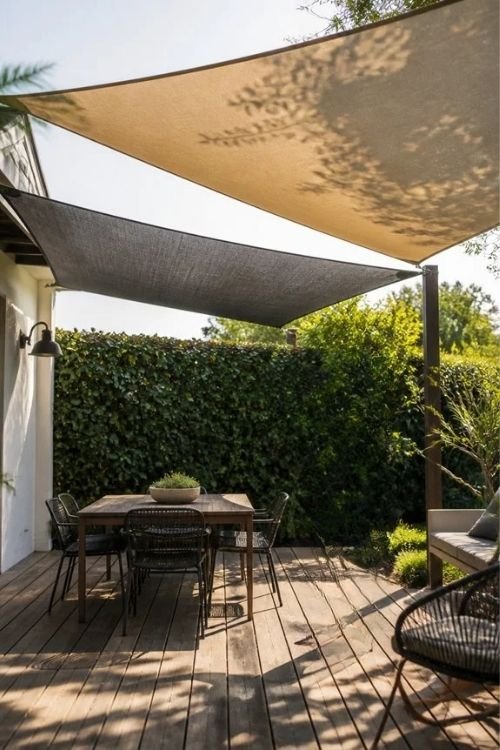
Choosing the right shade sail depends on the size, shape, and layout of the space it will cover. Square and rectangle sails work well for patios, driveways, and pool areas with defined edges. Triangle sails fit smaller or irregular spaces, such as corners, garden beds, or side yards.
The sail should extend beyond the area it covers, since fabric pulls inward when tensioned. A 12-foot triangle covers roughly 72 square feet, while a 16-foot square covers around 160 square feet. UV-blocking fabric rated at 90% or higher offers better protection than standard mesh.
Color also affects heat absorption, with lighter shades reflecting more sunlight. Matching sail shape to anchor point locations reduces installation difficulty and improves overall tension across the fabric.
Plan Your Shade Sail Layout and Anchor Points
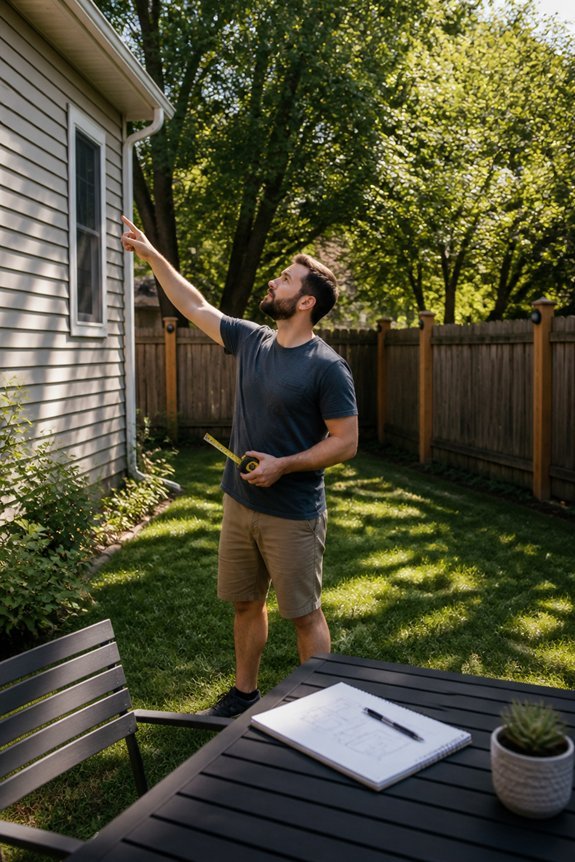
Planning the anchor point layout usually happens before any hardware is purchased, since the attachment locations determine the sail shape, size, and tension angles. Homeowners should mark potential anchor points using stakes, tape, or chalk lines before committing to any structure.
Key factors to evaluate during layout planning include sun angle throughout the day, since morning and afternoon shade coverage differs greatly. Clearance height at each anchor point affects drainage slope and headroom. Distance between points must match the sail dimensions closely. Existing structures like fences, walls, and pergolas can serve as anchor hosts.
A minimum pitch of 20 degrees helps water run off effectively. Anchor points set too close together reduce tension and cause sagging, making proper spacing a critical early decision.
Install Your Posts or Anchor Hardware
Securing anchor hardware correctly determines whether the finished shade sail holds tension or fails under wind and weather. Posts made from steel or treated timber are common choices, and each requires concrete footings set at least 24 inches deep. The post must lean slightly away from the sail to counteract pulling force.
Wall-mounted hardware, such as stainless steel eye bolts or swivel plates, works well when attaching to masonry or timber framing. Lag bolts and expanding anchors hold reliably in concrete block or brick walls. Each anchor point must align with the planned attachment height from the layout stage.
Turnbuckles or tensioning rings are added later, but the anchor hardware itself must be rated for the expected load before installation is complete.
Attach Your Shade Sail and Tension It Correctly
With anchor hardware in place and rated for load, the shade sail can be connected and pulled into position. Most sails attach using stainless steel snap hooks, D-rings, or carabiner-style clips at each corner.
One corner is connected first, then the sail is stretched diagonally toward the opposite anchor point. Turnbuckles are used to increase tension gradually and evenly across all attachment points. The sail should appear taut, with no visible sagging or loose fabric between corners.
Proper tension prevents pooling during rain and reduces flapping in wind. Over-tightening, however, can stress the hardware, fabric, and anchor posts beyond safe limits. Tension should be checked and adjusted again after the first rainfall, since wet fabric stretches slightly and then contracts as it dries.
Fix Common Shade Sail Tension Problems
Even a well-installed shade sail can develop tension problems over time, especially after rain, wind, or seasonal temperature changes. Sagging is the most common issue, and it usually means the turnbuckles need tightening or the attachment points have shifted.
Wrinkles that run diagonally across the fabric often signal uneven tension between corners. Adjusting one turnbuckle at a time, rather than all at once, helps isolate the problem. If a sail feels overly tight and pulls hardware away from the wall, the mounting posts or anchor bolts may be undersized.
Pooling water in the center indicates insufficient pitch or slope. Repositioning one corner higher can redirect drainage. Regular seasonal checks, particularly before winter and summer, help catch minor tension issues before they cause permanent fabric damage or hardware failure.
Clean and Store Your Shade Sail to Make It Last
Keeping a shade sail clean and properly stored extends its lifespan well beyond what tension maintenance alone can achieve. Dirt, mildew, and bird droppings break down fabric fibers over time, so regular cleaning prevents long-term damage.
A mild soap solution, soft bristle brush, and garden hose remove most surface buildup without harming the material. Owners should avoid bleach on HDPE or PTFE fabrics, as harsh chemicals weaken the weave.
Before storage, the sail must be fully dry to prevent mold growth during off-seasons. Folding loosely and placing the sail in a breathable storage bag, rather than a sealed plastic container, reduces moisture buildup. Storing the sail indoors, away from direct sunlight and pests, preserves color and structural integrity across multiple seasons.
Frequently Asked Questions
Can Shade Sails Be Used During Winter or Snowy Conditions?
Winter and snowy conditions generally aren’t a good match for shade sails, since heavy snow accumulation can cause real structural damage or even collapse.
Most manufacturers recommend removing the sail during harsh weather stretches rather than leaving it up and hoping for the best.
Taking it down for the season adds a small chore to the calendar, but it extends the fabric’s overall lifespan considerably.
Do Shade Sails Require a Building Permit Before Installation?
Permit requirements shift quite a bit depending on location, so it’s worth checking rather than assuming either way.
Some municipalities require a permit, especially when permanent posts or structural anchoring come into play as part of the installation.
Reaching out to the local building department before starting the project is the safest way to confirm what applies to a specific setup.
Are Shade Sails Safe for Areas With High Wind Speeds?
Shade sails can hold up well in high-wind areas, provided they’re installed with heavy-duty hardware, tensioned correctly, and made from wind-rated materials.
That said, even a properly installed sail benefits from being taken down during severe storms, since no setup is completely immune to extreme conditions.
Regular inspection of hardware and tension throughout windy seasons helps catch problems before they turn into real damage.
Can Multiple Shade Sails Be Overlapped for Better Coverage?
Yes, overlapping multiple shade sails is a common and effective way to improve overall coverage.
Layering sails at varying heights helps eliminate gaps, maximizes shade across a larger area, and creates a visually interesting canopy design in the process.
Each sail still needs its own proper tensioning and anchoring, even when working as part of a larger overlapping layout.
What UV Protection Rating Should a Quality Shade Sail Have?
A quality shade sail should block at least 90 percent of UV rays, which typically corresponds to a UPF 50+ rating.
Settling for less protection means exposing anyone underneath to more UV radiation than the sail appears to be blocking.
Checking the fabric’s rating before purchase is a simple step that makes a real difference in long-term sun protection.
Conclusion
One of the simplest backyard additions somehow ends up requiring the most precise planning of the bunch.
A shade sail that hangs crooked, sags under rain, or tears in wind almost always points back to a skipped step somewhere in the process, not bad luck.
Proper anchor placement, correct tension, and routine cleaning are what determine whether a sail lasts one season or closer to ten.
The fabric itself does surprisingly little of the actual work. Hardware, pitch, and maintenance carry most of the load, both literally and figuratively.
A well-installed shade sail tends to make all of that effort disappear into the background, leaving behind exactly what it was meant to provide in the first place.
Have questions about your own shade sail setup? Share the details in the comments below.