


Small entryways bring their own set of challenges when adding a canopy. Wall space runs tight, door width matters more than expected, and overhead clearance leaves little room for error.
Flat canopies and domed designs each suit different homes, so choosing wisely from the start matters more than it might seem.
The real headaches tend to show up later. Picking the wrong material or rushing the sealing stage often leads to leaks or a wobbly fixture down the road.
Fixing methods deserve just as much attention as the canopy style itself, since a beautiful design means little if it isn’t secured properly.
Taking time to measure twice and plan thoroughly saves a homeowner from a poor fit or costly repairs later. Getting it right the first time is always worth the extra patience upfront.
A Few Things Worth Knowing First
Door width and wall space should shape the canopy style chosen, not the other way around. A flat or lean-to design tends to suit tight entryways far better than a bulkier dome.
Material choice deserves real thought based on local climate. Polycarbonate holds up well in rainy regions, while fabric options need seasonal removal in areas with harsh winters.
Sealing every wall penetration matters more than most first-time installers expect. Skipping this step is one of the most common reasons a canopy develops leaks or structural issues within the first year.
Porch Canopy Styles That Work for Small Entryways
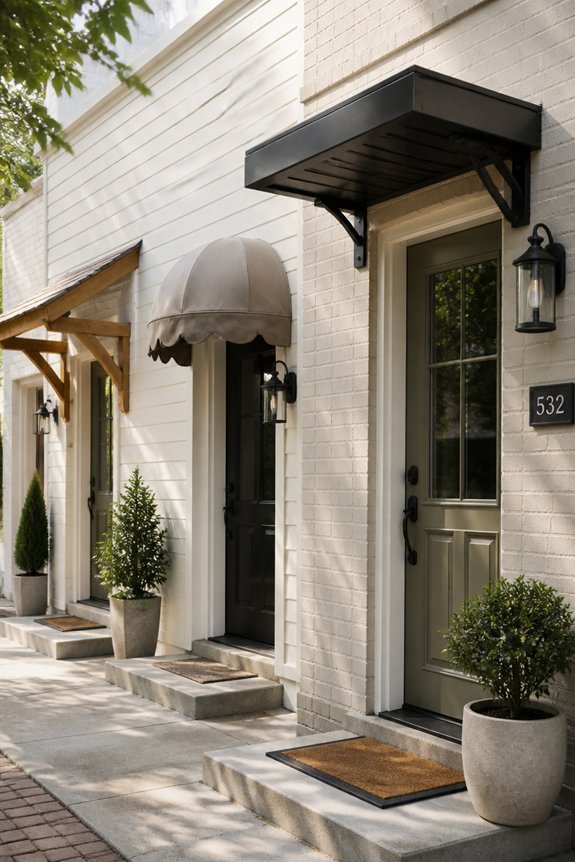
Small entryways benefit from canopy styles that add protection without overwhelming the space. A flat or shed-style canopy works well because it sits low and keeps a clean, simple profile. Dome canopies add slight curve without taking up extra width. Lean-to styles attach directly to the wall and extend outward just enough to cover a standard door.
Fabric canopies, such as retractable awnings, offer flexibility for tight spaces. Metal or polycarbonate materials keep the structure lightweight and durable. Key styles that suit small entryways include flat panel canopies, small dome canopies, lean-to brackets with polycarbonate panels, and retractable fabric awnings.
Each option provides weather coverage while keeping the entryway visually open. Choosing the right style depends on door width, wall material, and local weather conditions.
Also read: How to Decorate a Party Canopy on a Budget
How to Measure Your Small Entryway for a Porch Canopy
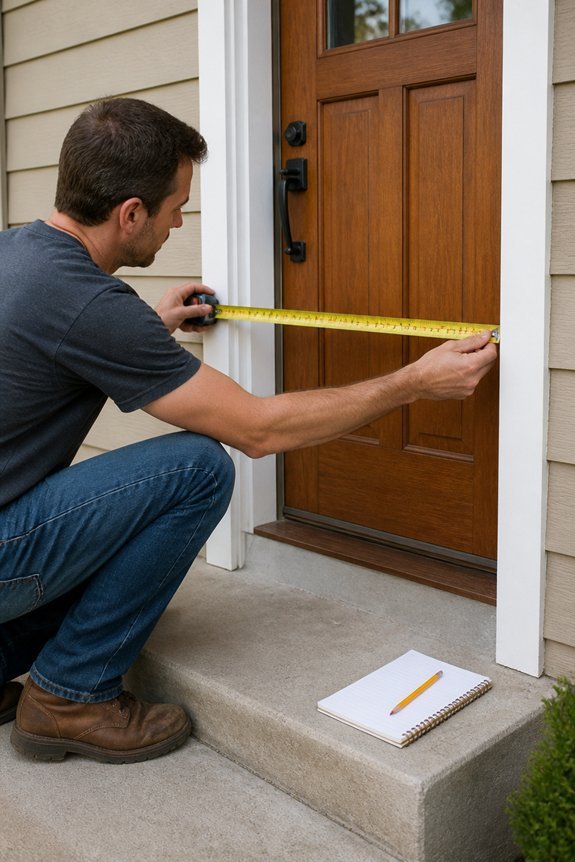
Accurate measurements help guarantee a porch canopy fits the entryway without blocking light, crowding the door frame, or creating installation problems. Homeowners should measure the door width, the wall space on each side, and the height from the mounting point to the ground. Standard doors range from 32 to 36 inches wide, so the canopy should extend beyond that width by at least 6 to 12 inches on each side.
Projection depth, meaning how far the canopy extends outward from the wall, should also be recorded. A depth of 24 to 36 inches suits most small entryways. Wall material, mounting surface condition, and bracket spacing requirements affect which measurements matter most during planning. Recording all figures before purchasing prevents sizing errors and reduces installation delays.
How to Choose the Right Porch Canopy Materials
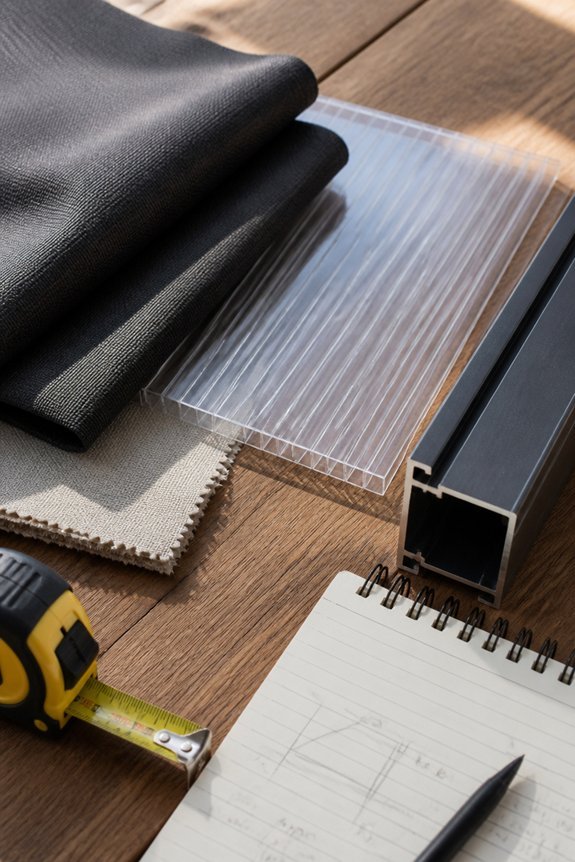
Several material options exist for porch canopies, and each one performs differently depending on weather exposure, maintenance needs, and budget. Polycarbonate panels offer durability and light transmission, making them a practical choice for rainy climates. Metal frames, such as aluminum or steel, resist rust and support heavier canopy structures without frequent replacement.
Fabric canopies, including acrylic and polyester options, suit smaller entryways and cost less upfront, though they require seasonal removal in harsh winters. Wood frames add visual appeal but demand regular sealing and painting to prevent rot.
Homeowners should consider local weather patterns, the entryway’s size, and long-term maintenance costs before selecting a material. Matching the canopy material to the existing exterior finish also improves the overall appearance of the home.
Tools and Fixings You Need Before Installation Day
Once the right materials have been chosen, gathering the correct tools and fixings before installation day saves time and prevents delays. A standard drill, spirit level, and tape measure are essential for most canopy installations.
Fixings should match the wall material, so masonry walls require rawl plugs and masonry screws, while timber frames need wood screws of appropriate length. Stainless steel fixings resist rust and suit outdoor conditions better than standard zinc-plated alternatives.
A silicone sealant gun and exterior-grade silicone are needed to weatherproof joints and brackets. Safety equipment, including work gloves and safety goggles, should be prepared in advance. Having all items collected and checked before work begins reduces interruptions and keeps the installation process straightforward and efficient.
How to Install a Porch Canopy Step by Step
With all tools and materials gathered, installation begins by marking bracket positions on the wall using a pencil and spirit level. Accurate markings guarantee the canopy sits level and drains water correctly.
A drill creates pilot holes at each marked point, preventing masonry from cracking during screw insertion. Wall plugs are tapped into each hole before brackets are secured with stainless steel screws.
The canopy frame then attaches to the mounted brackets, with bolts tightened firmly using a wrench. Two people make this stage easier, as one holds the frame steady while the other fastens the fixings.
Once the frame is secure, the polycarbonate or fabric panel slots into position. Sealant is applied along wall edges, blocking moisture from entering behind the mounting points.
Porch Canopy Installation Mistakes and How to Avoid Them
Even careful installers make common mistakes during porch canopy fitting, and most problems trace back to a few repeated errors. Skipping wall anchor checks is one of the most frequent issues, as brackets fixed into hollow sections or weak mortar will fail under load. Incorrect measurements cause misaligned frames, uneven canopy pitch, and poor water runoff.
Many installers also forget to seal around wall fixings, allowing moisture to enter and damage the structure over time. Using mismatched hardware, such as combining steel brackets with aluminum frames, accelerates corrosion. Overlooking local building codes can result in fines or forced removal.
Checking wall material, measuring twice, sealing all penetrations, matching compatible materials, and reviewing permit requirements before starting will prevent the majority of these avoidable installation problems.
How to Keep Your Porch Canopy in Good Shape Year-Round
Maintaining a porch canopy through all four seasons prevents early deterioration and keeps repair costs low. Each season brings different hazards, and owners should address each one directly.
In spring and summer, UV exposure fades fabric canopies, so applying a UV-resistant spray every few months extends color and material life. In fall, leaves and debris collect on flat surfaces, trapping moisture and promoting mold growth, so clearing them weekly is necessary. In winter, heavy snow loads stress brackets and frames, making regular removal with a soft broom important.
Year-round tasks include checking screws and mounting hardware for rust, inspecting fabric for small tears, and rinsing the canopy surface with mild soap and water monthly. Addressing minor issues early prevents larger structural failures later.
Frequently Asked Questions
Do I Need Planning Permission to Install a Porch Canopy?
In most cases, planning permission isn’t required for a porch canopy, since it typically falls under permitted development rights.
That said, checking local regulations is still worth doing, particularly for homes in conservation areas or those classified as listed buildings.
A quick call to the local planning office ahead of time confirms whether any restrictions apply before construction begins.
Can a Porch Canopy Increase My Home’s Resale Value?
Yes, a porch canopy can genuinely add to a home’s resale value, and the appeal of a sheltered entryway hasn’t really changed over time.
Modern buyers still respond to covered entryways, since they enhance curb appeal and suggest a level of quality upkeep throughout the property.
That kind of welcoming first impression can influence a buyer’s overall perception before they’ve even stepped through the door.
Are Porch Canopies Covered Under Standard Home Insurance Policies?
Coverage for porch canopies varies quite a bit depending on the insurer, so there’s no single answer that applies across the board.
Reviewing the specific policy details is the best starting point, since some providers include permanently attached structures like canopies while others don’t.
Reaching out directly to the insurance provider clears up any confusion and confirms exactly what’s covered before an installation begins.
Can I Install a Porch Canopy on a Rented Property?
Consulting the landlord before installing a porch canopy on a rented property is an essential first step, regardless of how simple the project seems.
Written approval matters here, since unauthorized modifications could breach the tenancy agreement and lead to costly restoration obligations down the line.
Getting that permission in writing protects both the tenant and the landlord if any questions come up later.
How Long Does a Typical Porch Canopy Installation Usually Take?
Most porch canopy installations take somewhere between two and four hours for a typical homeowner working through the process.
Professional installers often move faster thanks to experience and specialized tools, completing the job in less time than a first-time DIYer might.
A full day is realistic for anyone newer to this kind of project, especially if the structure involves a more complex design.
Conclusion
A well-fitted porch canopy turns a bare entryway into a sheltered threshold, the kind of space where rain slides away and visitors pause comfortably before stepping inside.
Proper measurements set the foundation for everything else, since even small errors early on tend to compound once installation actually begins.
Durable materials like polycarbonate or coated metal make a real difference over time, holding up against weather in a way cheaper alternatives simply can’t match.
Secure fixings and sealed joints matter just as much as the materials themselves, since a canopy is only as reliable as its weakest connection point.
Seasonal checks round out the whole process, catching small problems before they grow into something more serious and expensive to fix.
Have questions about installing a canopy for your own small entryway? Share the details in the comments below.


