
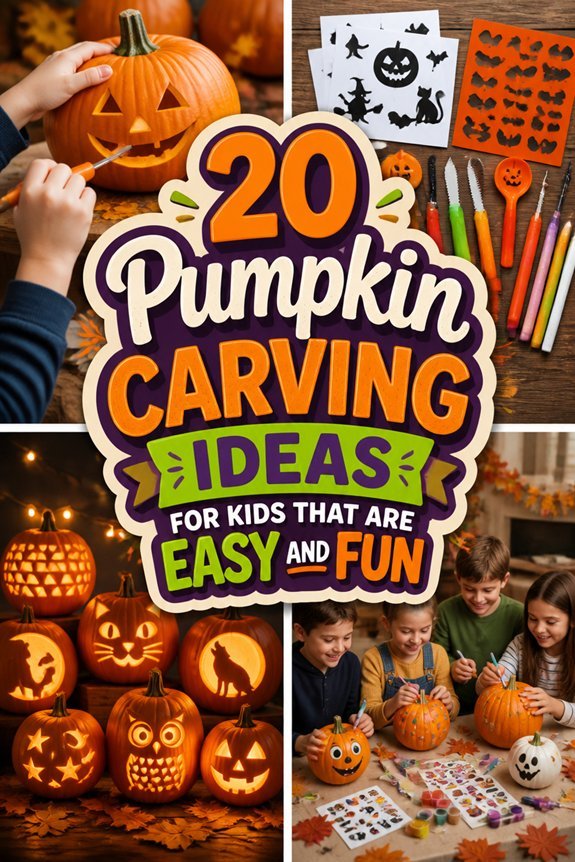
Kids love getting their hands messy with pumpkin guts, and there’s something magical about watching their faces light up when that candle flickers to life. Simple shapes like triangle eyes and crooked grins build confidence for little ones just starting out.
For families ready to branch out, friendly ghosts and goofy monsters add personality without demanding expert skills. Grab those basic carving tools and pick a design that matches your child’s patience level. Some evenings call for quick victories; others welcome longer creative sessions together.
Friendly Ghost Design
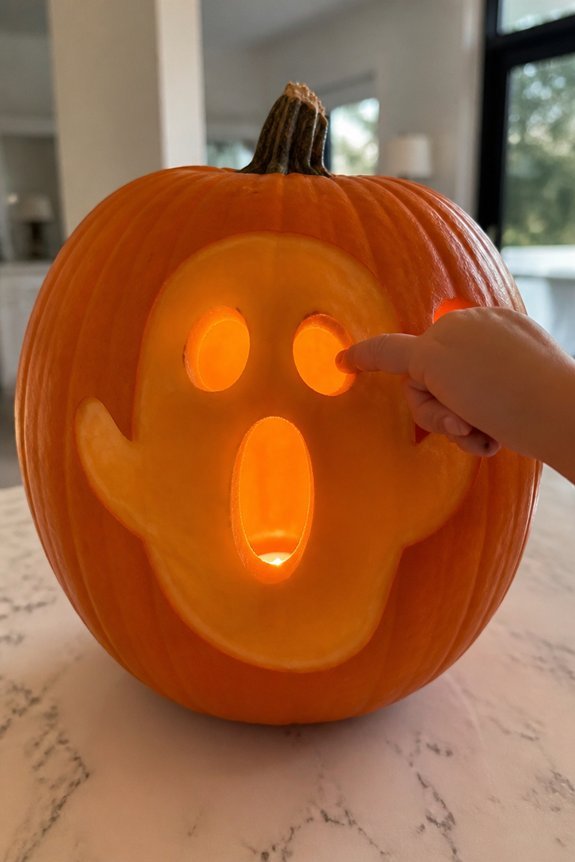
Creating a friendly ghost pumpkin requires carving two large circles for eyes, a triangular or oval shape for the nose, and a curved line for a smiling mouth.
A white marker can outline the design before carving begins. This design works well for small to medium pumpkins.
The ghost face remains visible from several feet away, making it suitable for porch displays.
Simple Black Cat Silhouette
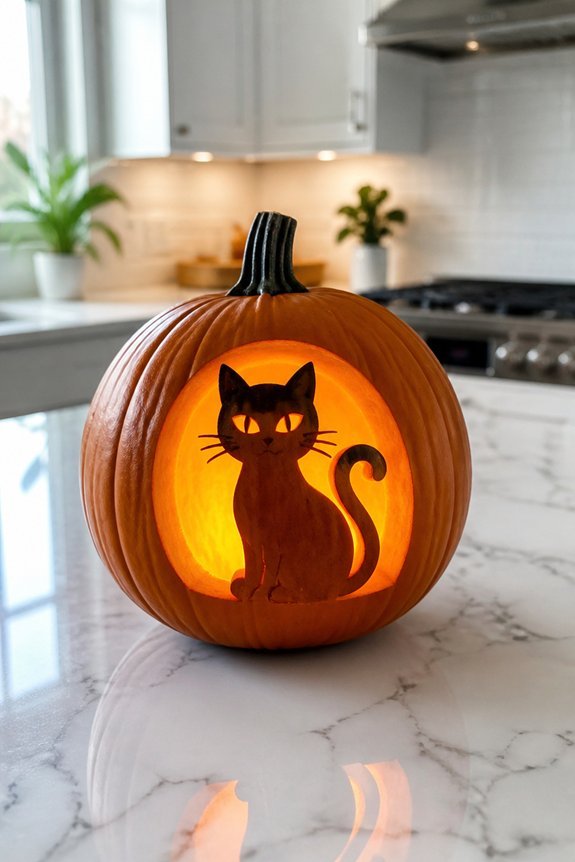
A black cat silhouette offers a straightforward pumpkin design that requires carving out the cat’s head, ears, and body as one connected shape.
Children can sketch the outline using a marker before carving.
The design works best on medium to large pumpkins, providing enough surface area for clean lines.
This option requires basic carving tools: a small serrated knife, a scoop, and a marker for initial sketching.
Classic Jack-O’-Lantern Face
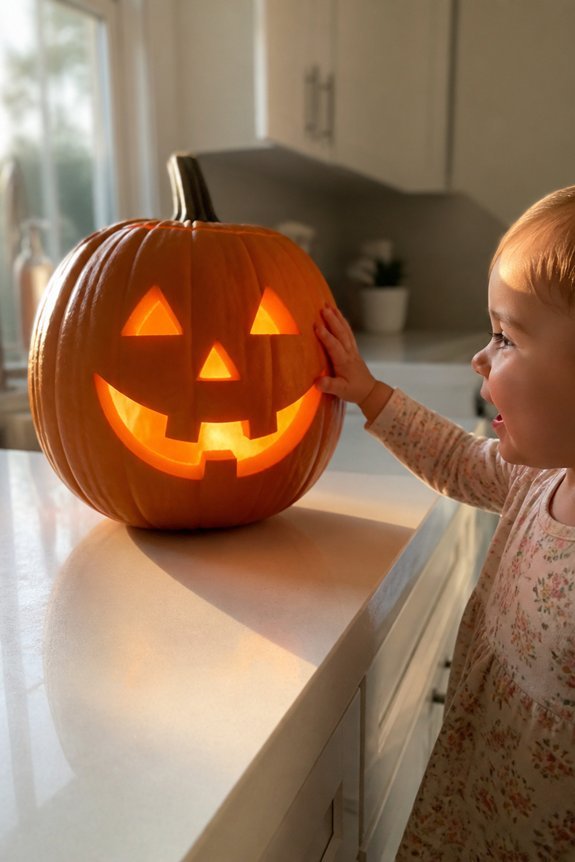
The jack-o’-lantern face remains the most recognizable pumpkin design, featuring triangular eyes, a triangular or diamond-shaped nose, and a carved mouth that can range from a simple line to a toothy grin.
Children can draw the design with a marker before carving, ensuring proper placement.
The triangular shapes are easier to cut than curved lines, making this design suitable for beginners with basic carving tools.
Glowing Moon and Stars
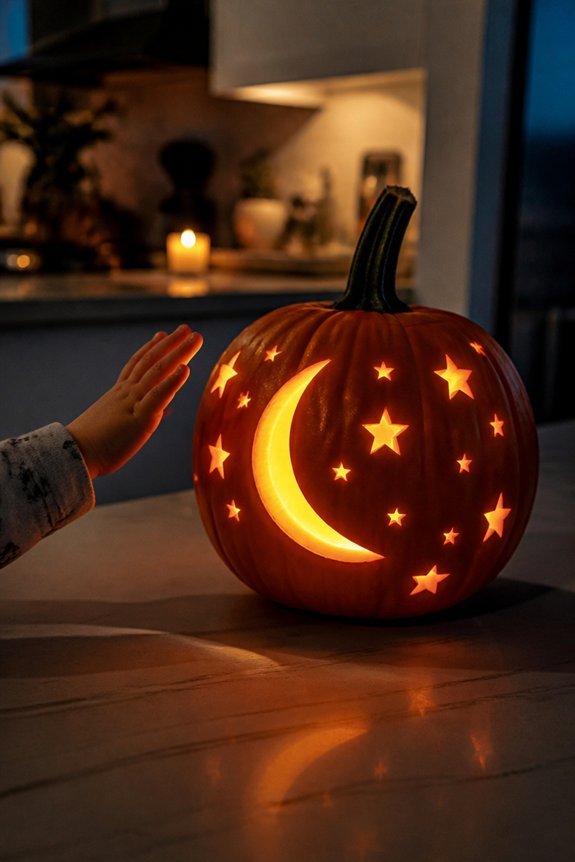
Celestial designs offer an alternative to traditional face patterns, allowing children to carve a crescent moon, various star shapes, and scattered dots across the pumpkin surface.
This approach requires less detail work than facial features, making it suitable for younger carvers.
A light source placed inside the pumpkin will illuminate the carved openings, creating a nighttime sky effect on the porch.
Spooky Skeleton Smile
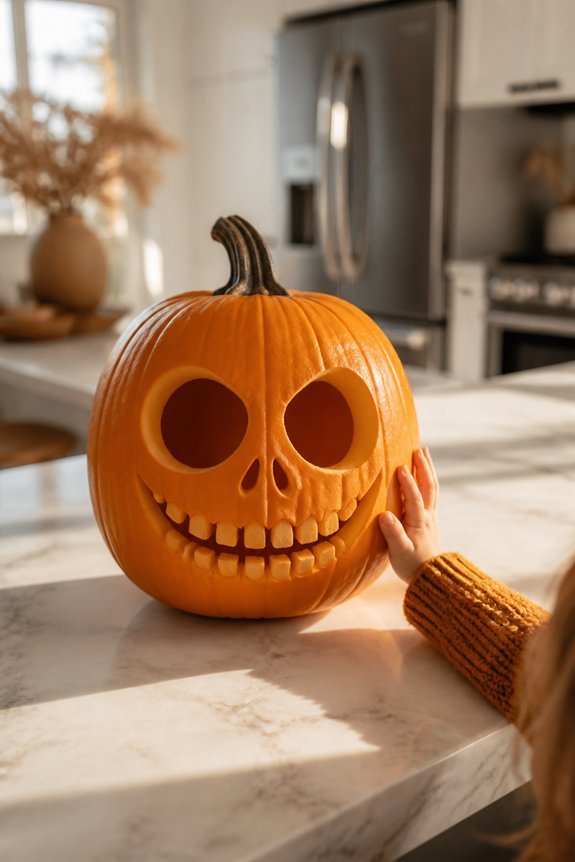
For carvers ready to move beyond celestial themes, skeleton designs offer a more recognizable Halloween motif that remains manageable for young hands. A simple skull face requires carving two eye sockets, a triangular nose hole, and a curved mouth with teeth.
Carvers can sketch the design beforehand, using a marker to outline shapes before cutting, ensuring proportional features and balanced placement across the pumpkin’s surface.
Cute Bat Wings
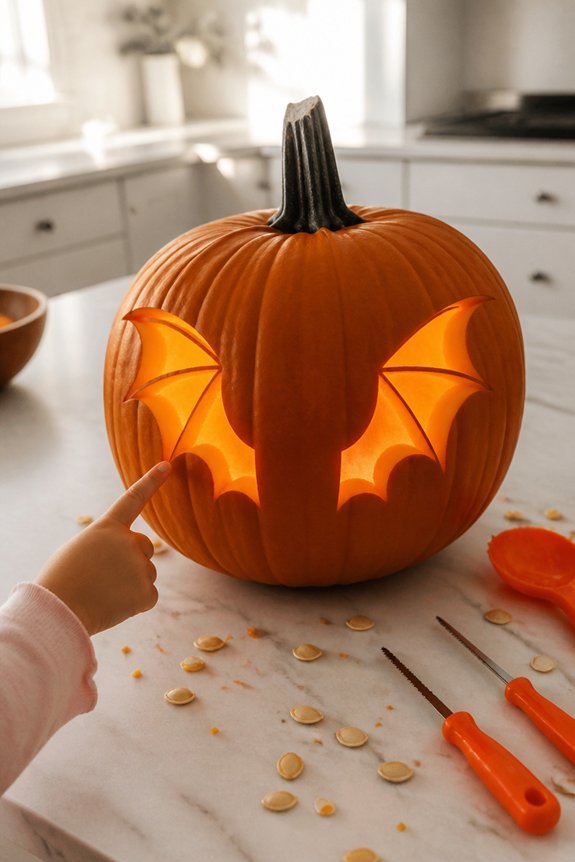
Bat designs present another accessible Halloween option for young carvers seeking to move away from facial features.
Children can carve simple wing shapes, positioning them symmetrically on either side of the pumpkin. A small triangular head with pointed ears completes the design.
Bats require basic curved lines and angular cuts, making them suitable for beginners with moderate carving experience.
Candy Corn Stack
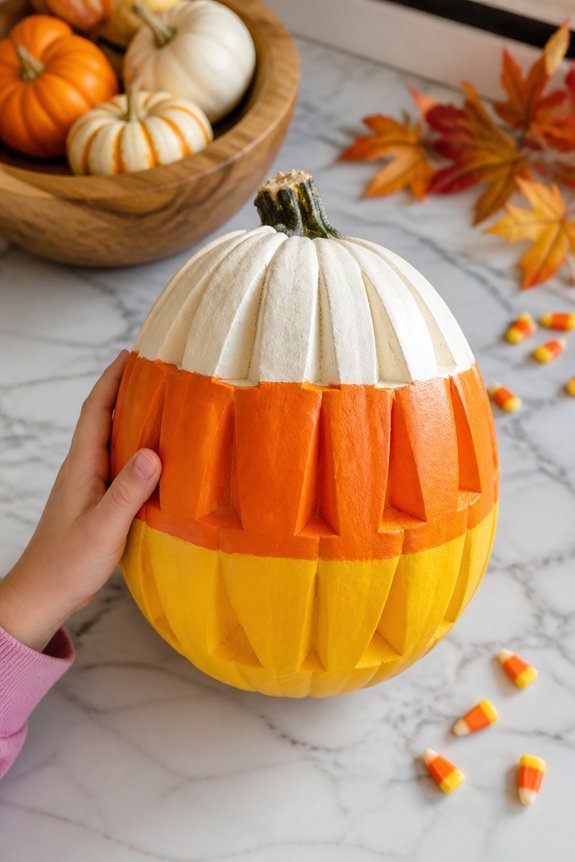
A candy corn design offers a straightforward carving project that relies on geometric shapes rather than intricate details. Carvers stack three horizontal triangles, creating yellow, orange, and white sections from top to bottom.
This stacked approach requires only a knife and steady hand positioning.
The design works well for beginners since curved lines are minimal, making execution simpler than detailed facial features.
Spider Web Design
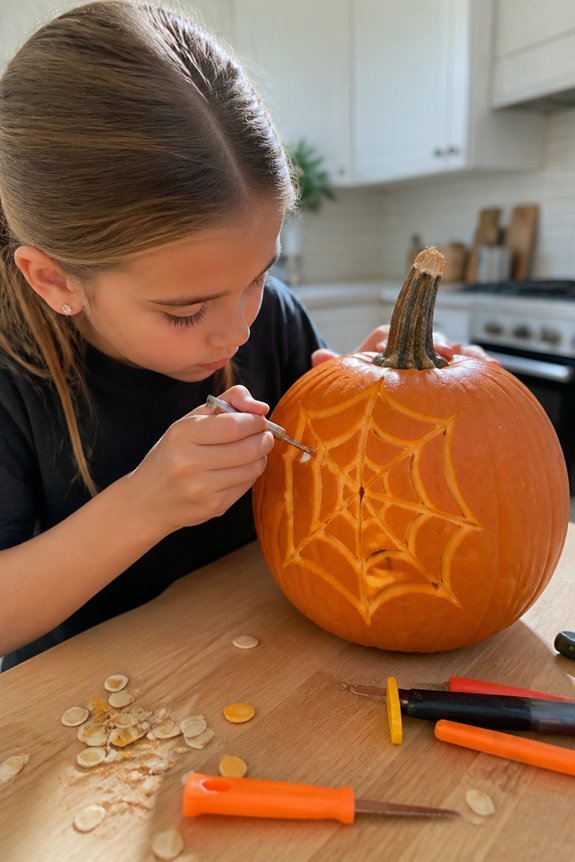
Intricate lines radiating from a central point create the classic spider web pattern, offering an intermediate carving challenge that builds on basic skills.
Carvers draw concentric circles, then cut straight lines from center to edge, forming the web structure. A small spider figure positioned nearby completes the design.
This pattern requires steady hand control and careful planning before cutting begins.
Owl With Big Eyes
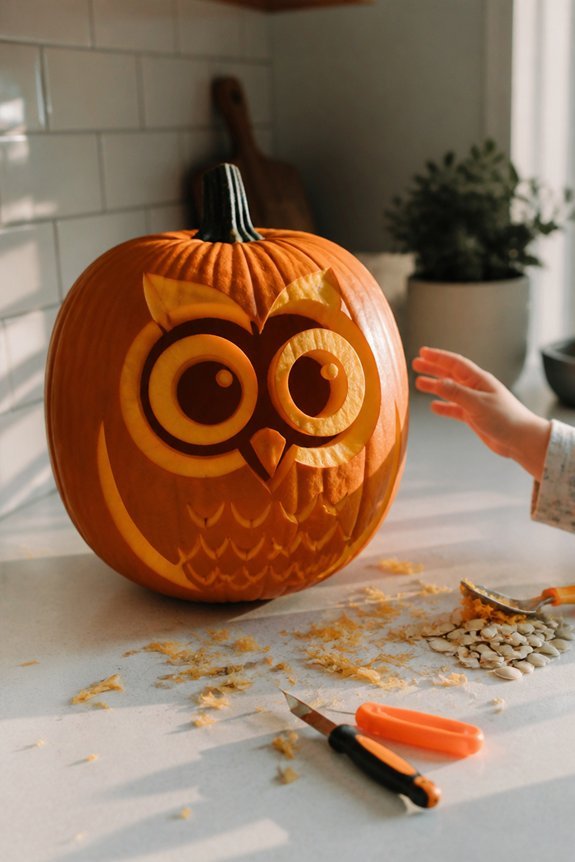
Owl designs offer carvers a chance to work with bold, recognizable features like large circular eyes, a pointed beak, and feathered details.
Carvers can create two large circles for eyes, adding smaller circles inside for pupils. A triangular beak sits between the eyes. Simple curved lines suggest feathers on the body and wings.
This design works well for pumpkins of various sizes and skill levels.
Scarecrow Character
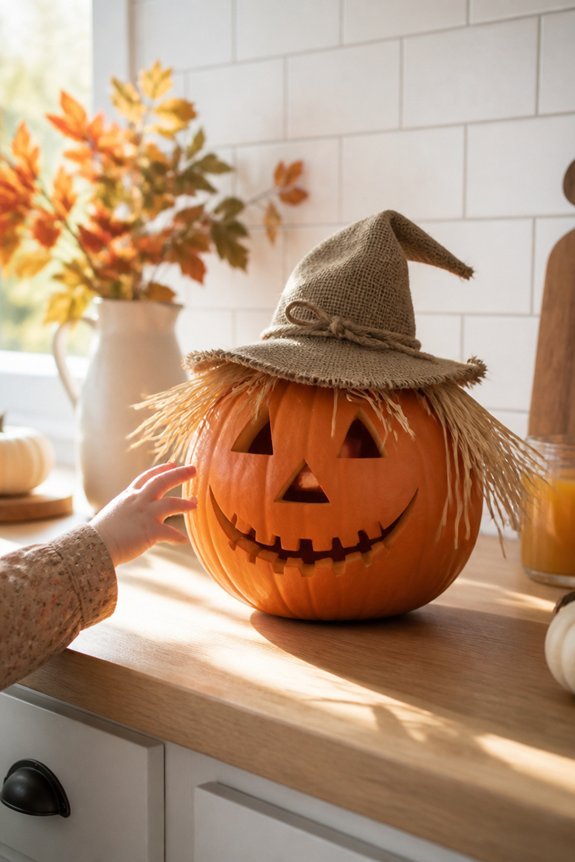
Scarecrow designs offer carvers a straightforward approach to pumpkin decoration, featuring a round face with simple expressions and a straw-like appearance.
Carvers can create triangular eyes, a curved mouth, and a nose using basic cutting techniques.
Adding straw protruding from the pumpkin’s sides, along with a small carved hat or drawn-on details using markers, completes the scarecrow character effectively.
Witch Hat and Face
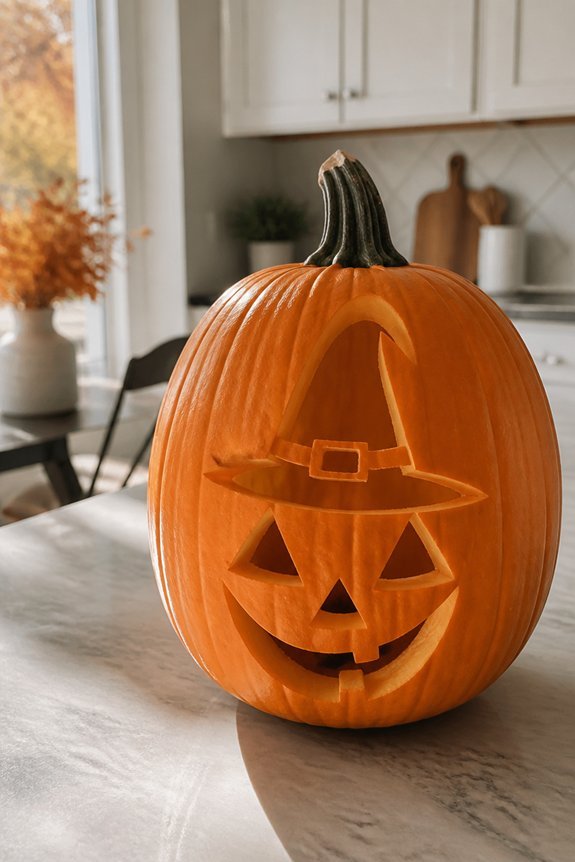
A classic Halloween character, the witch provides another accessible pumpkin carving option for young decorators.
Carvers can create a pointed hat shape at the top, then add triangular eyes, a crooked nose, and a curved mouth below.
The hat design requires straight lines and angles, making it straightforward for beginners.
Adding warts or a chin completes the witch’s face effectively.
Creepy Zombie Expression
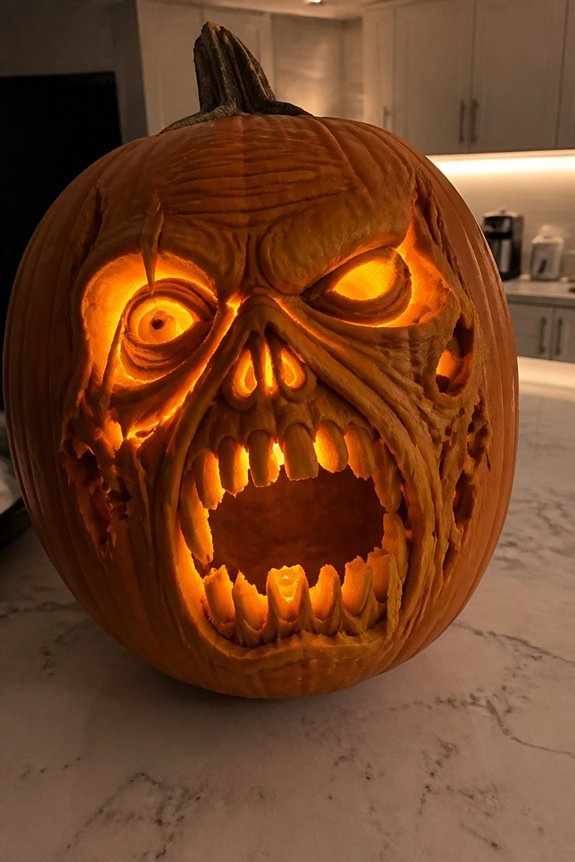
Zombie designs offer another accessible pumpkin carving option for young decorators seeking a more unsettling appearance.
Carvers can create sunken cheeks, a slack jaw, and hollow eye sockets using basic cuts and scooping techniques.
Adding asymmetrical features, like one eye larger than the other, enhances the disheveled effect.
Simple details such as protruding teeth or exposed brain patterns require minimal carving skill.
Mummy Wrapped Face
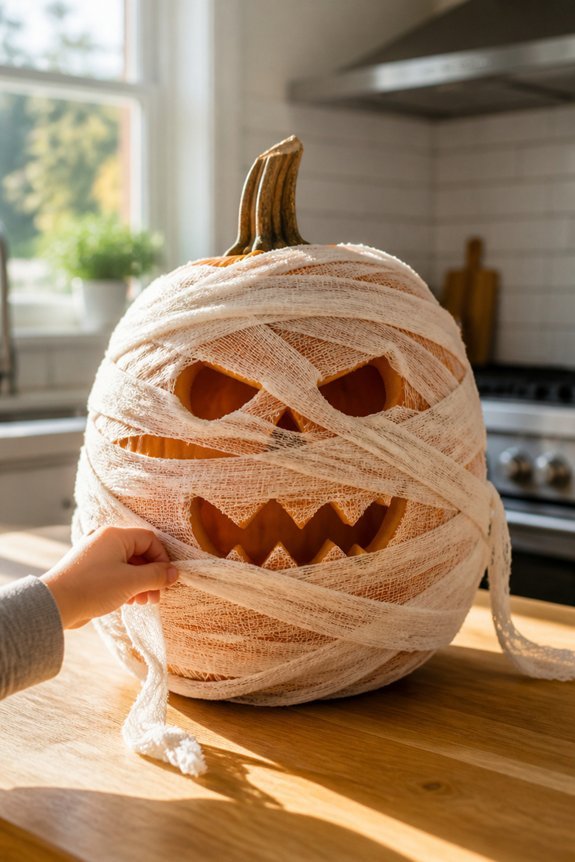
The mummy design provides a straightforward carving approach for young decorators seeking an Egyptian-themed Halloween pumpkin.
Carvers create horizontal lines across the pumpkin’s face, leaving gaps for the eyes and mouth. Using a small knife or pumpkin saw, straight parallel cuts work effectively.
The negative space between carved lines produces the wrapped bandage effect. This design requires minimal artistic skill and works well on pumpkins of various sizes.
Monster Teeth and Tongue
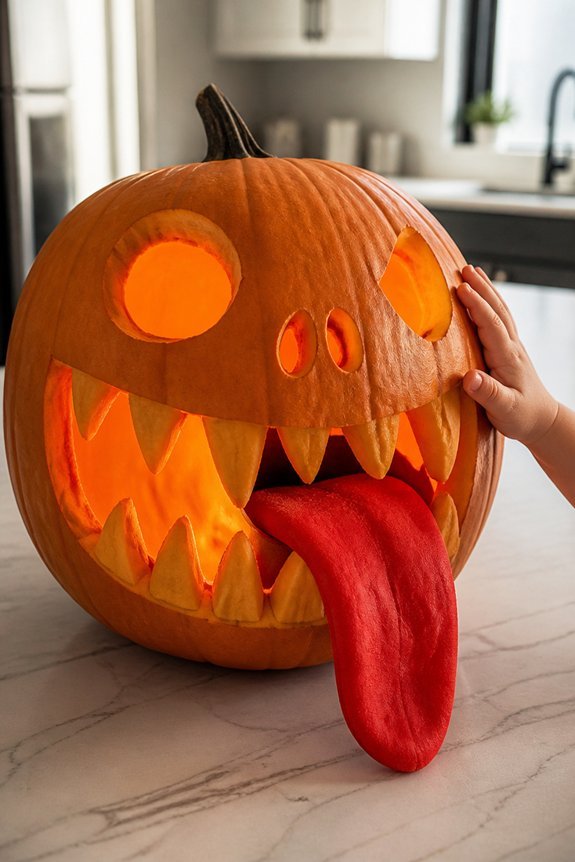
Simplicity and visual impact characterize this pumpkin design, which features a carved mouth with prominent teeth and an extended tongue.
Children can carve triangular teeth along the mouth opening, creating an uneven, jagged appearance. A protruding tongue, shaped from the pumpkin flesh itself or positioned below the mouth, enhances the monster effect.
This design requires basic carving skills and minimal planning, making it accessible for younger participants.
Frankenstein’s Monster
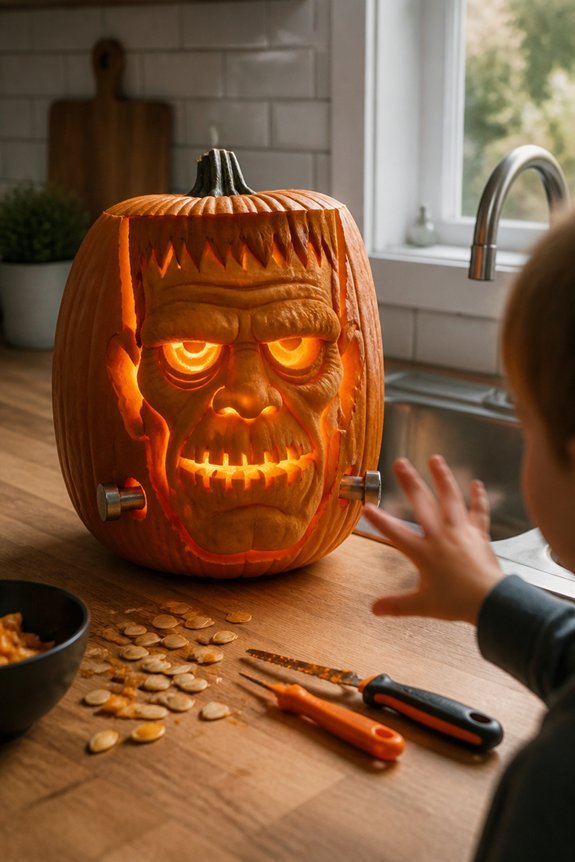
A flat-topped head with bolts protruding from the neck defines this classic monster design, recognizable to most children and straightforward to execute.
Carvers draw two vertical rectangles on either side of the pumpkin’s upper section, representing the characteristic neck bolts. A simple rectangular mouth and triangular eyes complete the face.
The flat top requires careful cutting to create the distinctive silhouette.
Vampire Fangs and Cape
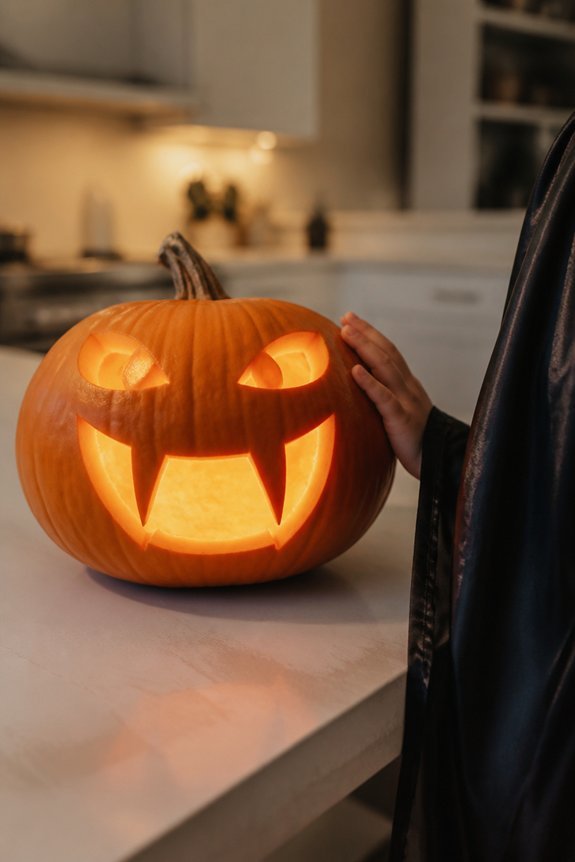
Because vampire designs combine facial carving with costume elements, this approach offers flexibility for pumpkin decorators.
Carvers can etch pointed fangs into the pumpkin’s mouth, then add a black cape using felt or fabric. Red paint highlights the mouth area effectively.
This design requires moderate carving skill, focusing on simple fang shapes and clean lines for maximum visibility.
Dinosaur Head Profile
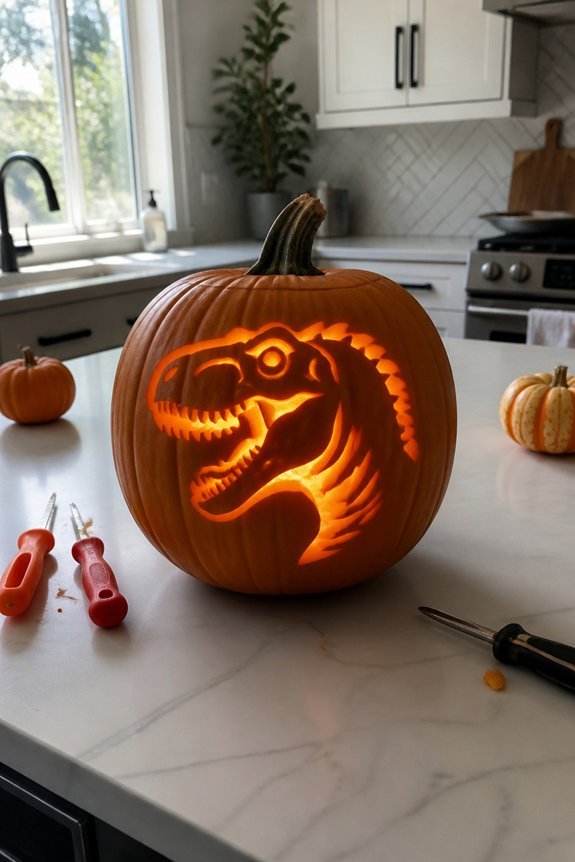
Dinosaur head profiles offer a straightforward carving option for pumpkin decorators seeking a recognizable design.
A T-Rex or Triceratops profile works well, requiring basic shapes like triangles for teeth, horns, or spikes.
Carvers should sketch the outline first, then remove flesh carefully around the profile edges.
This design accommodates various skill levels and pumpkin sizes effectively.
Pumpkin Patch Scene
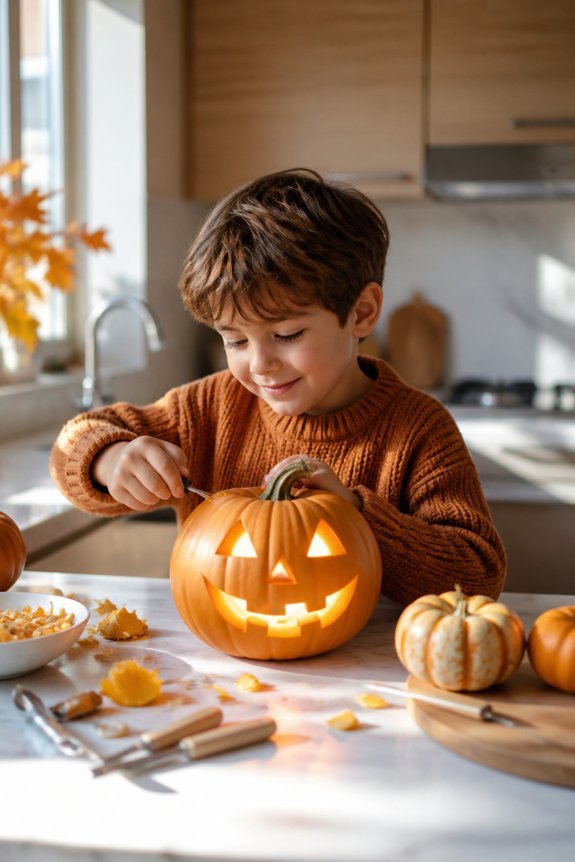
Creating scenes on pumpkins expands beyond single character designs to include multiple elements and settings. A pumpkin patch scene combines hay bales, cornstalks, scarecrows, and pumpkins of varying sizes.
Carvers can arrange these elements across the pumpkin’s surface, using different cutting depths to create dimension. This approach requires planning the layout beforehand, positioning larger objects centrally and smaller details around edges for visual balance.
Haunted Eyes Pattern
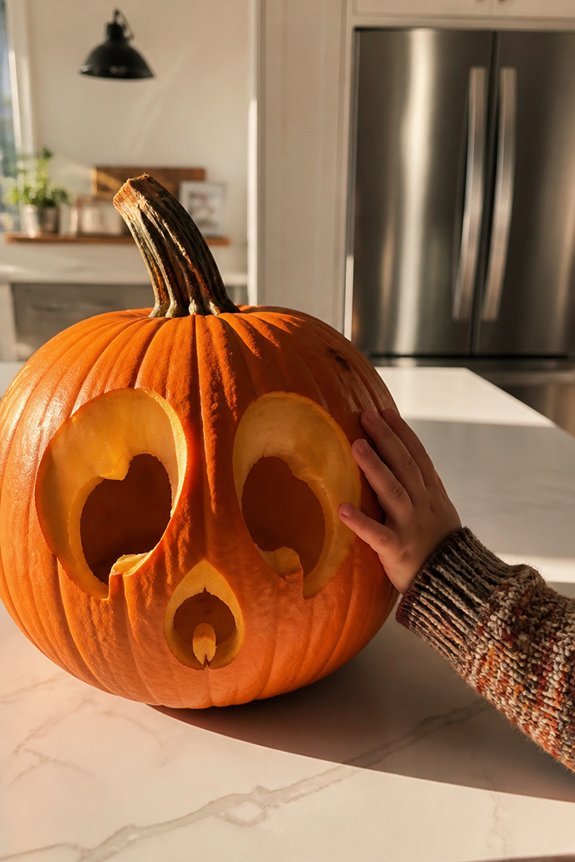
A pair of menacing eyes offers a straightforward, effective design for pumpkin carving. Carvers can create hollow circles, narrow slits, or asymmetrical shapes for varied expressions.
The eyes work independently or paired with other features like a nose or mouth. This pattern requires basic carving skills and minimal planning, making it accessible for beginners.
The design produces dramatic lighting effects when illuminated from inside the pumpkin.
Geometric Triangle Pattern
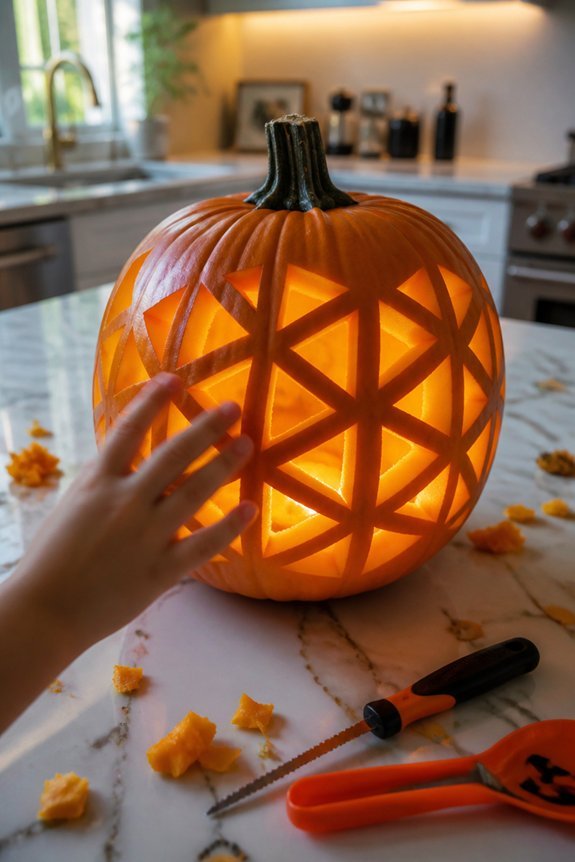
Geometric triangle patterns offer a modern, structured approach to pumpkin carving that differs considerably from traditional face designs.
These patterns involve arranging triangles, diamonds, and hexagons across the pumpkin surface. Carvers can create tessellating designs, where shapes fit together seamlessly, or scattered arrangements for visual interest.
This method requires straight lines and consistent angles, making it suitable for children developing fine motor skills and spatial reasoning abilities.
Frequently Asked Questions
What Tools Work Best for Safely Carving Pumpkins With Young Children?
Plastic carving tools and pumpkin-specific knives work best for child safety. These alternatives minimize injury risk compared to sharp kitchen knives. Scoops help remove seeds easily. Adult supervision remains essential regardless of tool selection.
How Long Do Carved Pumpkins Typically Last Before Rotting or Wilting?
Like autumn leaves surrendering to winter’s inevitable march, carved pumpkins typically last one to two weeks before deteriorating. Factors including temperature, humidity, and direct sunlight greatly influence their lifespan, with cooler conditions extending preservation considerably longer than warm environments.
Can You Carve Pumpkins Days in Advance or Should You Carve Fresh?
Carved pumpkins can be prepared days ahead, though freshly carved ones last longer. For extended preservation, carving three to five days before display is ideal. Storing carved pumpkins in cool conditions and applying petroleum jelly to cut surfaces helps maintain freshness.
What Are Some Safe Alternatives to Traditional Carving for Very Young Kids?
Pumpkin decorating is a goldmine of safer options for toddlers. Children can paint pumpkins with washable markers, apply stickers, glue on googly eyes, or use markers to draw faces. These activities eliminate sharp tools while maintaining festive fun.
How Do You Prevent Carved Pumpkins From Browning or Drying Out Quickly?
One can coat cut surfaces with petroleum jelly or vegetable oil to seal moisture in and prevent browning. Alternatively, storing carved pumpkins in cool temperatures and misting them daily with water helps maintain freshness throughout the season.
Conclusion
These nine designs offer varying difficulty levels, from basic shapes like triangles and eyes to detailed patterns like skeleton smiles and dinosaur profiles. Young carvers can select projects matching their skill level, whether attempting their first pumpkin or refining existing techniques. Each design requires standard carving tools, a stable work surface, and adult supervision for safety. Completing any of these projects creates a functional decoration while building confidence in fine motor abilities.