

Installing a front door awning is one of the simpler exterior upgrades that delivers noticeable everyday value.
Beyond improving curb appeal, it protects visitors and deliveries from rain and provides welcome shade during hot afternoons.
Material choice plays a significant role in long-term performance, with aluminum offering durability, fabric providing a softer aesthetic, and polycarbonate allowing natural light through.
Accurate measurements matter as much as material selection, since an undersized awning looks out of place while an oversized one can overwhelm the facade.
Careful attention to bracket placement and sealing determines whether the finished installation holds up for years to come.
Before You Start Shopping
Confirm the awning size relative to the door frame before purchasing anything. Extending 12 to 18 inches beyond each side of the frame typically provides adequate coverage without overwhelming the entryway.
Check local building codes and permit requirements early in the process. Some jurisdictions require permits for permanent installations, and confirming this upfront avoids complications later.
Locate stud positions using a stud finder before finalizing bracket placement. Anchoring into solid framing rather than drywall or siding alone is essential for long-term stability.
Choose the Right Front Door Awning for Your Home
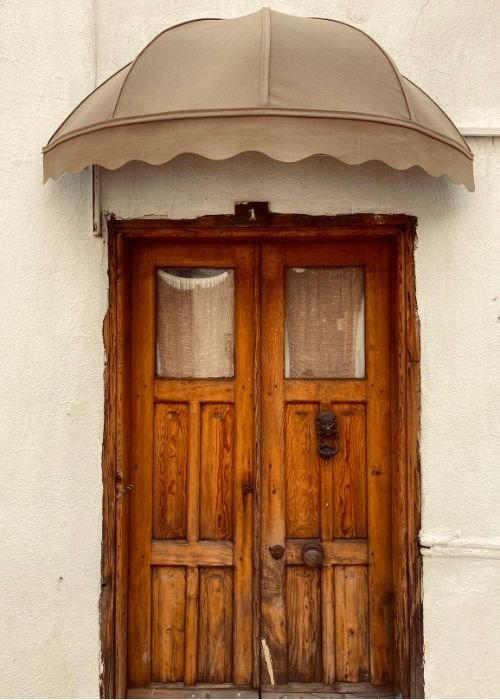
Before purchasing a front door awning, homeowners should consider several key factors, including size, material, and style. The awning should extend at least 12 to 18 inches beyond the door frame on each side for adequate coverage. Common materials include aluminum, polycarbonate, fabric, and steel, each offering different levels of durability and maintenance.
Aluminum and steel work well in harsh weather, while fabric suits milder climates. Style should complement the home’s exterior, whether traditional, modern, or craftsman. Homeowners should also check local building codes, as some areas require permits for permanent awning installations.
Budget plays a role too, since metal awnings typically cost more than fabric options. Measuring the door opening accurately before shopping helps narrow down suitable choices.
Also read: 18 Boho Canopy Bed Ideas for a Relaxed Bedroom
Tools and Materials You’ll Need Before Starting
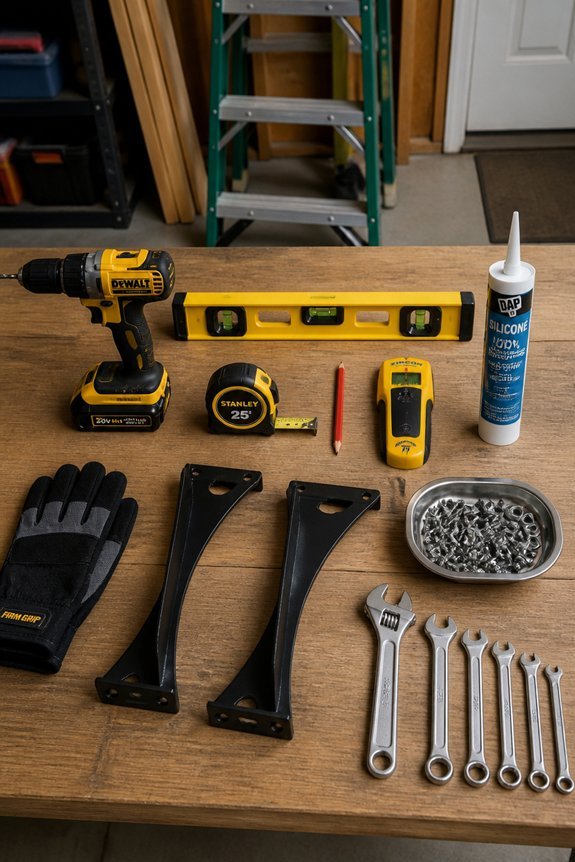
Once the right awning has been selected, gathering the correct tools and materials saves time and prevents delays during installation. Most projects require a power drill, a level, a tape measure, and a pencil for marking anchor points. Lag bolts, wall anchors, and mounting brackets typically come with the awning kit, but verifying this before starting is recommended.
A stud finder helps locate solid framing behind the exterior wall. For masonry surfaces, a hammer drill and masonry bits are necessary. A ladder provides safe access to higher mounting positions. A caulking gun with exterior-grade sealant helps weatherproof the bracket connections after installation.
Having a second person present during the process makes handling the awning frame considerably easier and safer throughout the job.
Mark and Measure Your Mounting Location
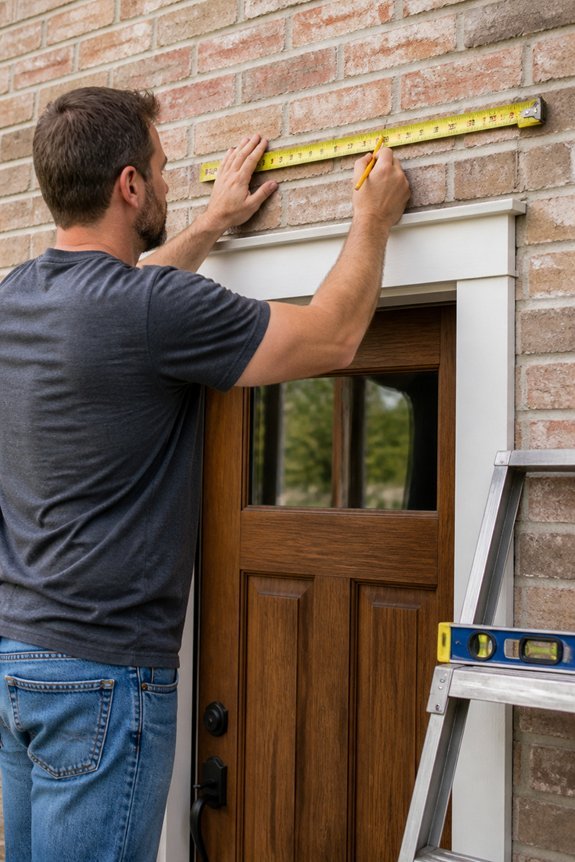
Accurate measurements at three key points, the top of the door frame, the left edge, and the right edge, help guarantee the awning sits level and centered. A tape measure, pencil, and level are the core tools needed for this stage.
The installer should mark the centerline of the door frame first, then measure outward equally on both sides to match the awning’s listed width. Most awnings require mounting brackets spaced according to the manufacturer’s bracket layout chart. A chalk line or laser level confirms horizontal alignment across all bracket points.
Stud locations behind the exterior wall matter here, since brackets anchored into studs hold far better than drywall anchors alone. Marking stud centers with a pencil before drilling saves time and prevents misalignment later.
Attach the Mounting Brackets Securely
Drilling pilot holes at each marked bracket location reduces the risk of splitting wood or cracking masonry. A masonry bit works for brick or concrete surfaces, while a standard wood bit handles timber and fascia boards. Brackets should sit flush against the wall, with no gaps between the mounting plate and the surface.
Stainless steel or galvanized lag screws offer corrosion resistance and long-term holding strength. Each bracket typically requires two to four screws, depending on the awning’s weight and span. A torque wrench or impact driver guarantees screws are tightened evenly, preventing bracket tilt.
Wall anchors should be used when screws fall between studs or mortar joints. Checking bracket alignment with a level after fastening prevents uneven canopy installation later.
Hang and Level the Awning Frame Correctly
With the brackets firmly in place, the awning frame can be lifted and set onto the mounting hardware. Two people are typically needed for this step, as the frame must stay steady while bolts are inserted and hand-tightened. A carpenter’s level should be placed along the front rail to check horizontal alignment before any fasteners are fully tightened.
Most frames allow minor adjustments by loosening bracket bolts and shifting the frame slightly left or right. The standard pitch for an awning slopes downward at roughly one inch per foot, directing water away from the door. Once level and properly pitched, all bolts should be tightened completely using a wrench. The frame must feel solid, with no wobbling or shifting, before installation continues.
Seal the Edges to Keep Water Out
Sealing the edges protects the wall and door frame from water damage that can build up over time. Once the awning frame is secured, all gaps between the mounting bracket and the wall surface need to be filled. A silicone-based caulk or weatherproof sealant works well for most exterior applications.
The sealant should be applied along the top edge and both sides of the bracket, covering any drill holes or open seams. Exterior-grade silicone, such as DAP or GE brand products, bonds to brick, wood, and vinyl siding without cracking in cold temperatures. After application, a smoothing tool or gloved finger can press the caulk into gaps evenly. The sealant requires adequate drying time, typically 24 hours, before exposure to rain or moisture.
Front Door Awning Installation Mistakes to Avoid
Once the sealant has cured, the awning installation is largely complete, but several common mistakes can compromise the result if they occurred during the process.
Skipping a stud finder leads to brackets anchored in drywall alone, which cannot support the awning’s weight. Using non-galvanized screws causes rust, staining the wall and weakening the connection over time. Failing to check level before drilling results in a visibly crooked mount.
Applying sealant over dirty or wet surfaces prevents proper adhesion, allowing water to penetrate. Choosing an awning too wide for the doorframe creates overhang stress on the outer brackets. Ignoring manufacturer torque specifications when tightening hardware can crack mounting flanges.
Reviewing each step against the installation manual before finalizing reduces the likelihood of these errors occurring.
Frequently Asked Questions
How Long Does a Typical Front Door Awning Last Before Needing Replacement?
Most front door awnings last between 10 and 20 years.
Material quality and climate exposure play a large role in determining where a given awning falls within that range. Metal versions generally outlast fabric options, which may need replacement every 5 to 10 years depending on conditions.
Can I Install a Front Door Awning on a Rental Property Legally?
Written permission from the landlord is typically required before installing anything permanent.
Local building codes and HOA regulations may add further requirements on top of that. Consulting a professional before proceeding is generally advisable for rental properties.
Will a Front Door Awning Affect My Home Insurance Policy or Premiums?
It’s possible, depending on the insurer.
Structural additions like a front door awning are sometimes reassessed by insurance providers, which can affect premiums either way. Checking with the insurance provider directly before installation helps avoid surprises later.
Do Front Door Awnings Require a Building Permit Before Installation Begins?
This depends entirely on local regulations.
Some jurisdictions require a permit for any permanent structure attached to a home’s exterior, while others do not. Contacting the local building authority before installation clarifies what’s required in a given area.
Can Extreme Weather Conditions Permanently Damage My Newly Installed Front Awning?
Yes, extreme weather can cause lasting damage if installation or material selection falls short.
Choosing weather-resistant materials and following proper installation steps significantly reduces this risk. Regular inspection after severe weather events also helps catch minor issues before they become serious.
Conclusion
A front door awning installation succeeds or fails based on the quality of a few key steps along the way.
Choosing the right size and material for the home’s exterior sets the foundation for the entire project.
Anchoring brackets into solid framing rather than surface material alone determines whether the structure holds up over time.
Sealing all edges properly protects against water infiltration, which remains one of the most common sources of long-term damage.
Skipping any of these steps increases the risk of instability or costly repairs down the line.
Share your experience in the comments below if you’ve completed this project or have questions about your own installation.