

You don’t need a big budget to end up with a pergola that actually looks intentional. Some of the best-looking backyard structures come from reclaimed wood and a bit of patience rather than a big price tag.
I built my first pergola using leftover pressure-treated lumber and a handful of hardware store brackets, and it’s held up better than I expected six years later.
Pressure-treated lumber and reclaimed wood both give you weather resistance without the premium cedar price. A few metal accents added in can keep the whole thing feeling polished instead of thrown together.
Your yard shape will steer a lot of this too. Corner installations make the most of compact spaces, while lean-to designs attached to a fence save you the cost of extra posts entirely.
The Basics That Make Everything Else Work
Picking your spot matters before anything else. Look for afternoon shade, some shelter from wind, and a clear sightline from your house so the structure actually gets used.
Sizing should match your yard, not just what looks impressive online. A 10-by-12-foot pergola suits most yards, while compact spaces do better with an 8-by-8-foot footprint.
Don’t skip the boring stuff either. Checking for utility lines and watching how water drains around your chosen spot saves you real headaches during construction.
14 Cheap Pergola Ideas
Building a pergola on a budget doesn’t mean settling for something that looks unfinished. A little creativity with materials, whether that’s reclaimed wood or simple metal accents, goes a long way toward a polished result.
I’ve mixed full DIY builds with smaller upgrades like curved roofs and built-in seating, so you can pick projects that match your time, skill level, and wallet.
Scroll through and find the build that fits your budget and your weekend availability.
Size, Style, and Where to Build It
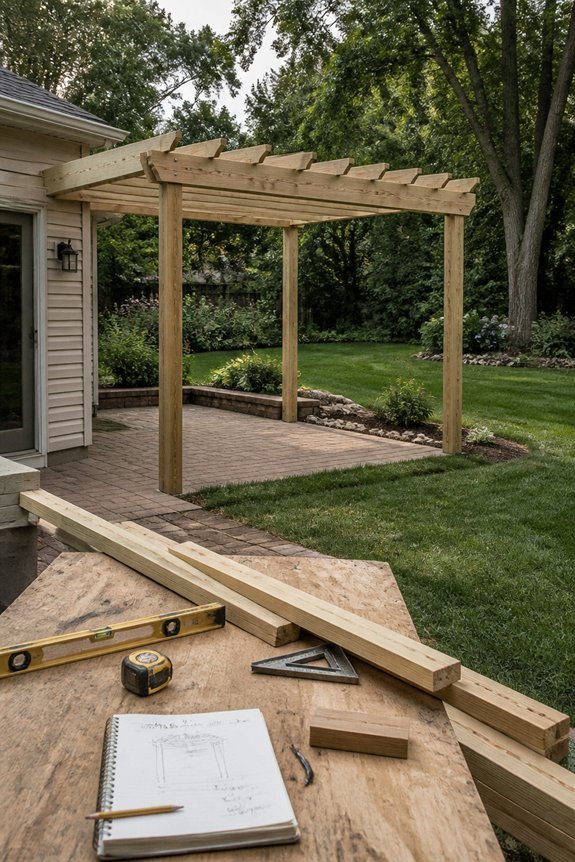
Start by finding the right spot. Look for afternoon shade and shelter from strong winds. You’ll also want clear views from your house. Most yards work well with a 10-by-12-foot pergola. It gives you plenty of covered space without taking over. Compact yards can use 8-by-8-foot designs instead.
Your style choices range from sleek modern frames to classic lattice or rustic wood. Pick something that matches your home and garden. Think about materials too. Pressure-treated wood, cedar, and vinyl each need different levels of upkeep.
Building next to a patio stretches your living space outward. Placing one along a property line defines your yard naturally. Check for utility lines before you dig. Watch how water drains and track the sun’s path. Nearby trees add bonus shade without extra work.
Also read: 10 Patio Pergola Ideas That Look Stylish
DIY Post-and-Beam Pergola for Beginners
Start with the Frame
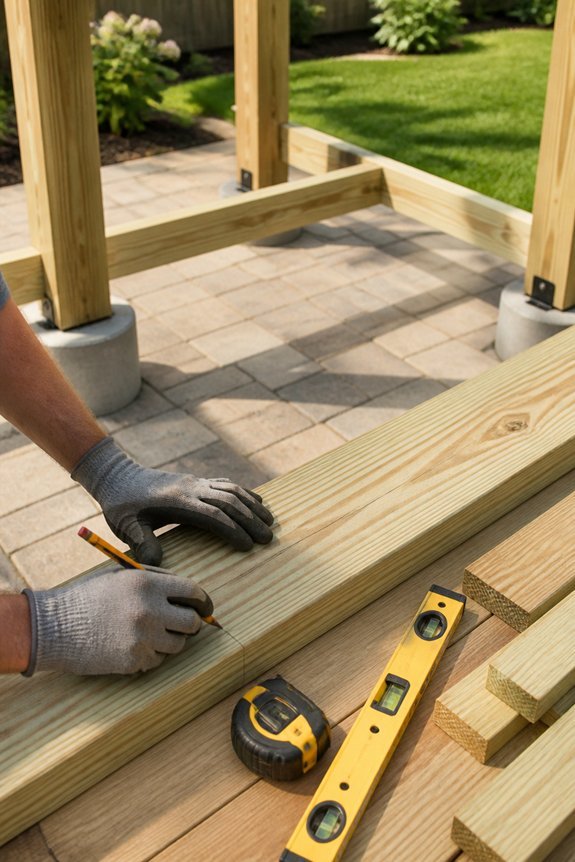
Building begins once you pick your spot and design. The post-and-beam system is simple. Vertical posts go into concrete footings. Horizontal beams connect them. Crossbeams on top create the lattice roof.
A 12-by-12-foot pergola suits beginners well. Use 4-by-4-inch pressure-treated posts for this size. Cedar or redwood beams look beautiful and resist rot well. They do cost more than treated lumber.
Set Your Posts
Dig holes 24 to 30 inches deep. Fill them with concrete for a solid base. Space your posts six to eight feet apart. This spacing keeps the structure strong without extra support.
Connect Everything
Galvanized bolts and brackets join posts to beams. Hardware from the big box stores works fine. Check that each connection is tight before adding weight above.
This basic frame sets you up for shade later. Add climbing vines, shade cloth, or retractable fabric when you are ready. The hard part will already be done.
Reclaimed Wood Pergola: Budget-Friendly Design
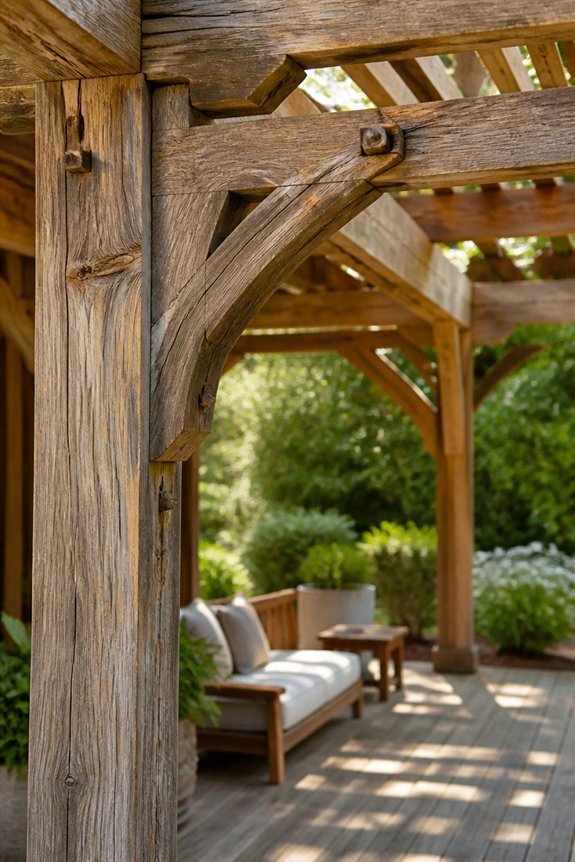
Reclaimed wood cuts costs while adding unique character to your pergola. Salvaged materials from old barns and warehouses bring weathered beauty at a fraction of retail lumber prices.
Start your search on Craigslist, at local salvage yards, or architectural reclamation centers. Old beams, joists, and boards work perfectly for frames and cross-beams.
Always inspect wood carefully before buying. Check for rot, pest damage, and structural soundness. Weathered surfaces need little treatment, though light sanding removes splinters. Make sure your materials can handle your local weather loads.
Factor in transportation and cleaning costs when budgeting. Mixing reclaimed and new wood gives you authentic looks plus reliable structure. This approach keeps spending in check without sacrificing style.
Lean-to Pergola Against Your Home or Fence
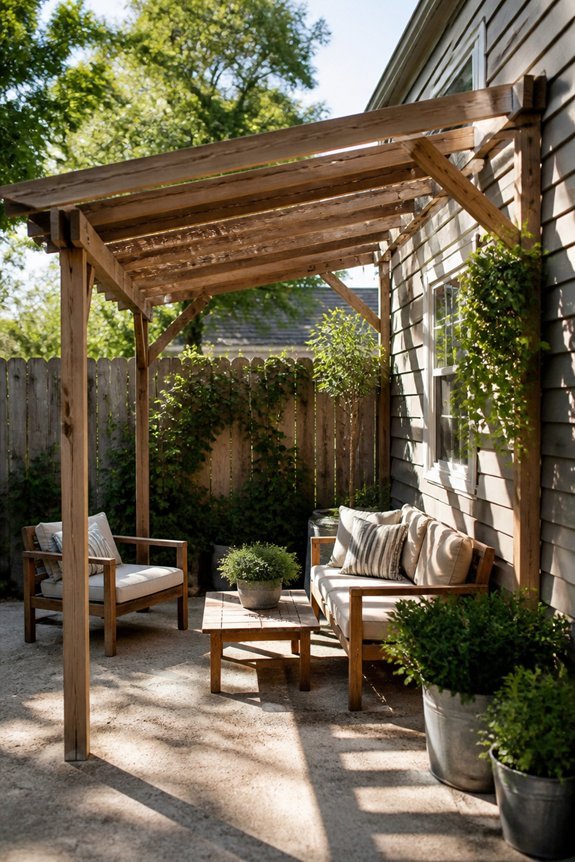
Easy on Your Budget
A lean-to pergola attaches right to your home, garage, or fence. You only need posts on one end. This cuts both material costs and building time significantly.
What You’ll Need
Pressure-treated lumber forms the frame. Bolts and brackets connect everything securely. Pour concrete footings to keep the posts stable and level.
Best Places to Build
These pergolas fit nicely over patios, decks, or garden walkways. Match the roof angle and overhang to your local weather and how much shade you want.
Before You Start
Most areas require permits for attached structures. Call your local building office first. This simple step saves you from expensive fixes later.
Where the pergola meets your house or fence, install proper flashing. This small detail protects against water damage and rot.
Budget-Friendly Metal Accents for Modern Pergolas
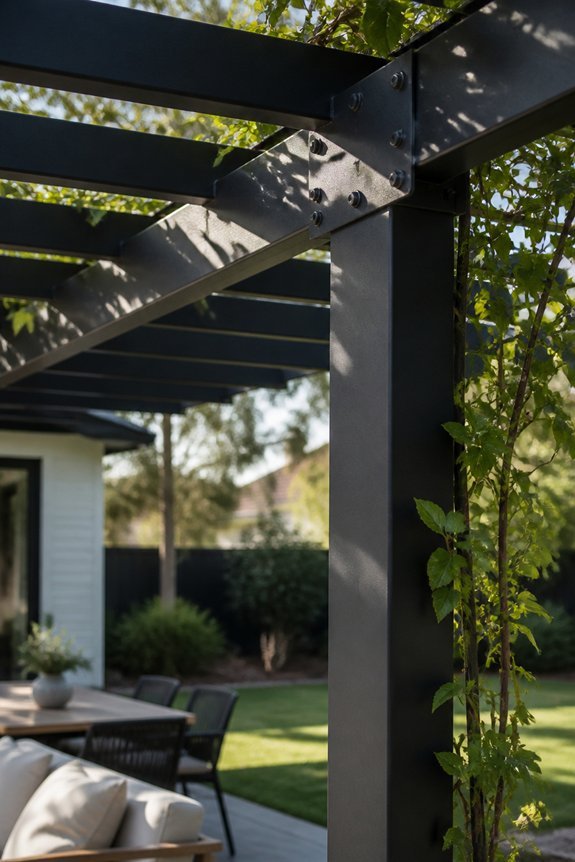
Metal accents add visual interest and durability to modern pergolas without breaking the bank. Steel brackets, aluminum trim, and iron corner reinforcements look sharp while serving real structural purposes.
These materials stand up to weather with little upkeep. They also pair naturally with contemporary designs.
Smart Sourcing Options
Reclaimed steel beams from salvage yards offer character at low cost. Pre-fabricated aluminum connectors speed up assembly. Steel cable railings create clean sightlines. Metal lattice panels work well as decorative infill.
Each option brings its own texture and appeal.
Simple Installation Tips
Basic fastening methods attach metal directly to existing pergola frames. Powder-coated finishes protect surfaces and let you match exterior colors. Standard hardware store components keep costs reasonable for DIY builders.
Mixing metal with wood creates balanced structures that age beautifully together.
Curved Roofs: Adding Visual Interest Without Breaking the Bank
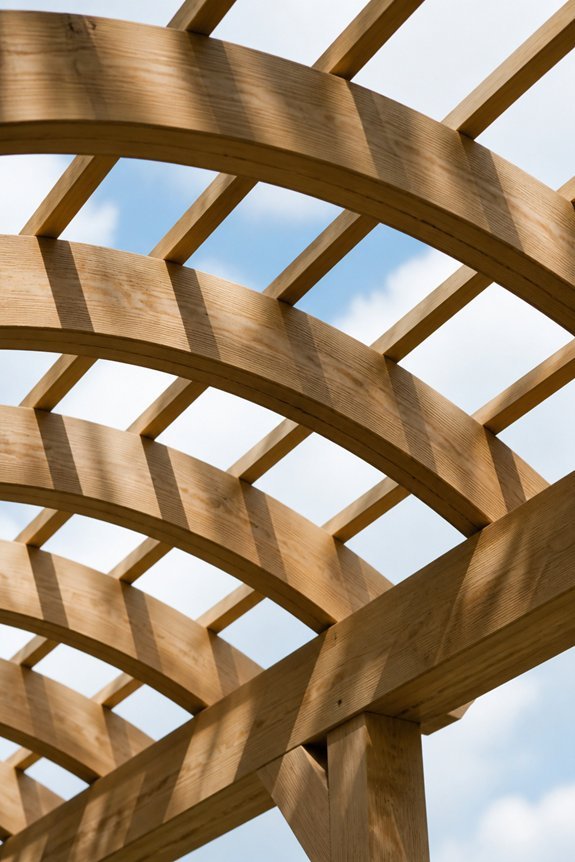
Curved roofs bring new life to pergola designs. They add architectural depth and visual appeal without a hefty price tag.
Homeowners have several options for achieving this look. Flexible materials like PVC pipes, aluminum rods, or bendable wood strips work beautifully. These choices cost far less than traditional curved beams. The visual impact remains just as striking.
Installation starts with anchoring your chosen material to the pergola frame. Use multiple anchor points spaced closely together. This spacing ensures smooth, flowing curves.
PVC pipes complement modern designs perfectly. Curved wood pieces feel right at home in traditional settings.
Builders on a budget can find materials at hardware stores or salvage yards. Pre-made curved brackets simplify the installation process.
The finished design blocks some sunlight while keeping that open-air feeling. You get a functional outdoor space with enhanced character. All it takes is a modest investment and a bit of creativity.
Pergolas With Built-In Seating and Planters
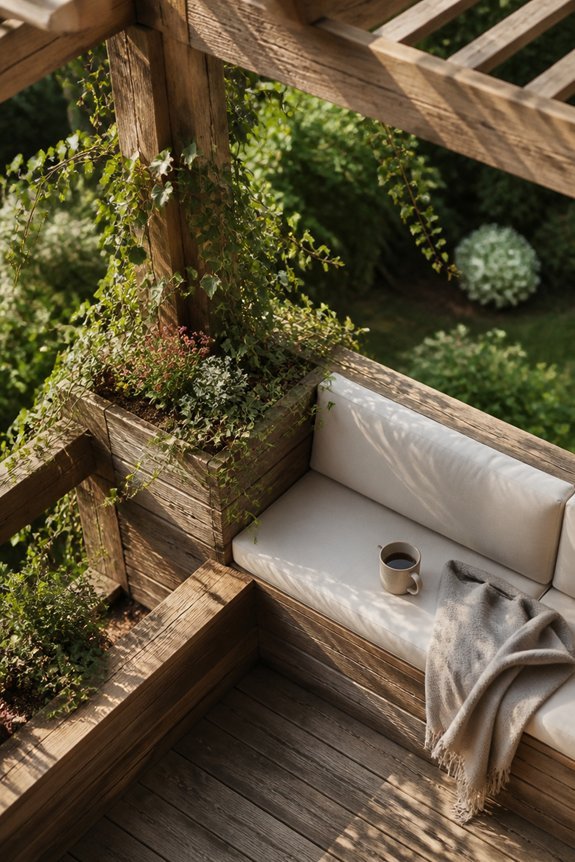
Integrating seating and planters directly into pergola structures maximizes outdoor space. You won’t need to buy separate furniture pieces. Built-in benches along the perimeter provide comfortable seating. They also keep the look clean and streamlined.
Planters at the base or attached to posts grow climbing vines and flowers. These plants enhance shade coverage and add natural beauty. Wood construction gives bench frames lasting durability. Concrete footings prevent settling over time. Pressure-treated lumber resists moisture and extends the structure’s lifespan.
Raised planter boxes work best at 12 to 18 inches deep. This depth accommodates herbs, vegetables, and ornamental plants. The integrated approach reduces clutter in your yard. It also saves money on outdoor furniture. You get a functional gathering space that feels intentional.
Homeowners can customize the dimensions and materials. Planting arrangements can match your specific yard size and personal style.
Low-Cost Shade Solutions: Fabric and Shade Cloth
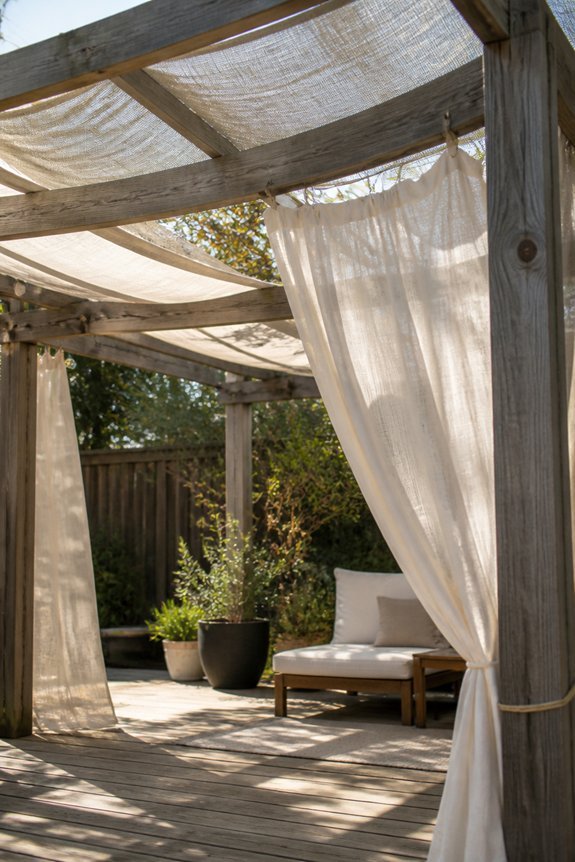
Shade cloth and fabric offer affordable alternatives when budget limits pergola choices. These materials provide good coverage without the cost of permanent structures.
Shade cloth comes in different densities. Options range from 30 to 90 percent light blockage. Homeowners can pick the right coverage level for their needs.
Retractable fabric systems add flexibility. Users adjust shade based on weather and time of day.
Common materials include canvas, polyester, and mesh. These resist UV damage and moisture well.
Installation needs only basic hardware. Eye bolts, carabiners, and rope or cable attach to existing frames or posts.
These solutions cost much less than solid roofing. They keep outdoor spaces looking good too.
Regular cleaning and seasonal storage help fabrics last longer. This approach works well for temporary setups or quick, budget-friendly shade fixes.
Corner Pergolas for Small Yards
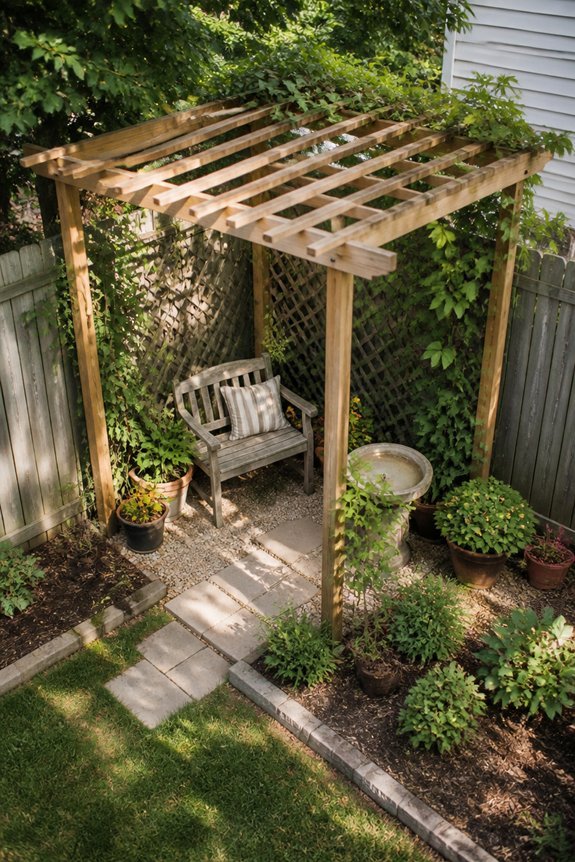
Corner pergolas make great use of tight spaces. They tuck neatly into yard corners that often go unused. This placement gives you shade without taking over your open lawn area.
You can install them along fences, property lines, or next to your house. The corner spot works especially well for creating a cozy, defined outdoor room.
Materials and Installation
Pressure-treated lumber, vinyl, and metal are all solid choices for corner frames. You can attach one or two sides to existing structures like your home or fence. This means fewer posts to buy and install, which saves money.
Design Possibilities
Add climbing vines, shade cloth, or a retractable canopy for cover. The three-sided layout feels naturally intimate and enclosed. It turns an overlooked corner into a shaded spot for morning coffee or evening meals. Small yards gain function without losing breathing room.
Split-Level Pergolas for Sloped Backyards
Working With Uneven Terrain
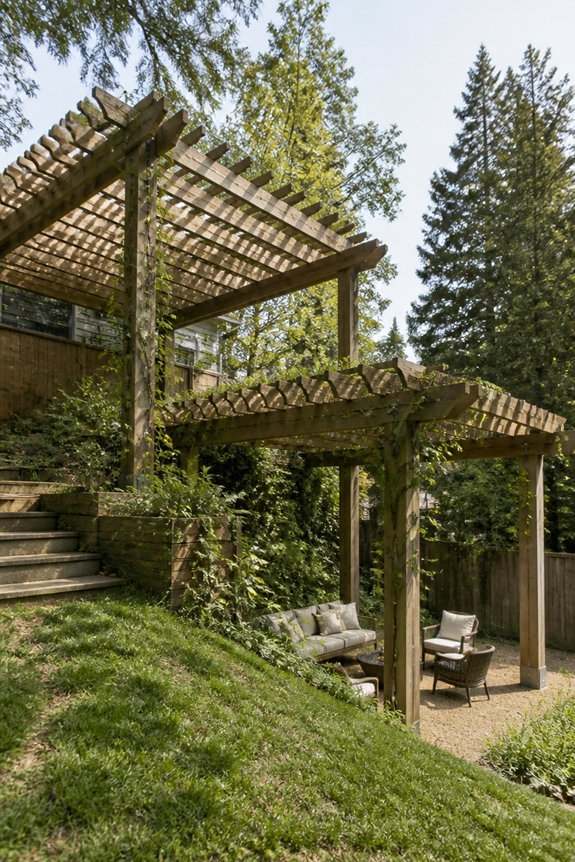
Sloped backyards pose unique challenges. Split-level pergolas solve these issues through stepped construction and tiered platforms. This approach embraces natural grade changes. You avoid excessive digging and complex foundations.
Builders position the structure at varying heights to match your yard’s slope. Posts anchor at different depths into the hillside. Each level gets proper concrete footings. Upper sections align with higher ground. Lower sections sit flush with downhill areas.
Materials and Drainage
Pressure-treated lumber, composite beams, and steel posts all suit sloped installations. Hillside drainage matters greatly. Plan for water runoff patterns around your structure.
Split-level pergolas turn challenging terrain into functional outdoor living space.
Seal and Protect Your Pergola: Stain, Paint, and Weatherproofing
Why Wood Needs Protection
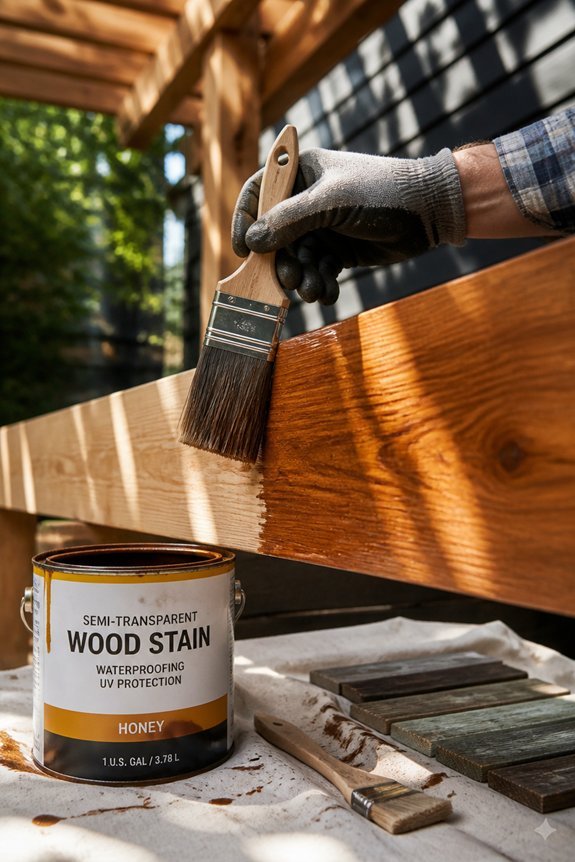
Moisture seeps into unprotected boards. UV rays drain their color. Temperature shifts make them expand and contract. Over time, this leads to rot, cracks, and fading. A quality coating stops this damage and adds years to your pergola’s life.
Your Coating Options
Stain sinks deep into wood fibers. It highlights the natural grain while blocking water. Paint sits on the surface and shields against sun damage. It also opens up endless color choices. Sealers work on their own or underneath other finishes. They block moisture and stop mold before it starts.
Choosing for Your Wood Type
Cedar and redwood fight decay on their own. They need less attention than other materials. Pressure-treated lumber requires upkeep every two to three years. Always pick products made for outdoor use. Two coats deliver the best shield against the elements.
The Payoff
Sealing now prevents expensive fixes later. Your pergola stays sturdy and looks sharp through every season.
Frequently Asked Questions
How Long Does a DIY Pergola Typically Last Without Maintenance?
Without any upkeep, you’re generally looking at 3 to 5 years before real deterioration sets in. That number shifts quite a bit depending on the material you choose.
Wood tends to wear down faster than metal or vinyl if you skip maintenance entirely. Regular sealing or staining stretches that lifespan considerably, so a little effort really pays off here.
What Tools and Equipment Do I Need to Build a Pergola Myself?
You really just need a modest set of basics for most builds. A saw for cutting lumber, a drill for fastening everything together, and a tape measure for accuracy will get you through most of the project.
A level keeps your structure straight, and a pencil for marking cuts and placement rounds out what you need. None of this requires specialty equipment, which is part of what keeps a DIY build affordable.
Do I Need a Permit or Professional Inspection for a Backyard Pergola?
This depends a lot on your location and how big your structure ends up being. Most areas require permits for permanent installations over a certain height or size.
Your local building department can tell you exactly what applies to your project. It’s worth that quick call before you start buying lumber, since fixing an unpermitted structure later costs a lot more than checking first.
How Much Weight Can a Pergola Roof Safely Support?
Most pergola roofs support around 20 pounds per square foot, though this depends on your frame material and how well it’s built. Climate conditions in your area matter too.
If you’re planning to add heavier features like hanging planters or a fabric shade system, it’s worth checking your specific structure’s guidelines before loading it up. Better to confirm early than deal with sagging later.
Can I Install a Pergola Myself or Should I Hire Professionals?
If you’ve got basic carpentry skills and the right tools, a DIY installation is genuinely doable for most standard designs. Plenty of homeowners handle this themselves without issue.
That said, bringing in a professional makes sense for anything involving structural calculations, electrical work, or a more complex design. It’s the safer route when you want guaranteed code compliance and don’t want to risk a costly mistake.
CONCLUSION
A budget-friendly pergola still takes real planning, even if the materials cost less. Cutting corners on price doesn’t mean cutting corners on the work itself.
That first pergola I built with reclaimed lumber taught me this the hard way. I underestimated how much time sealing and staining would actually take, and I’m glad I budgeted extra weekends for it.
Reclaimed wood, lean-to designs, and simple shade cloth all bring the cost down without making your yard look unfinished. The trick is choosing where to save money and where it’s worth spending a bit more.
Metal accents and curved rooflines are proof that small upgrades can make a huge visual difference without blowing your budget. Sometimes it really is the little details that make a build feel intentional rather than thrown together.
Ongoing maintenance is part of the deal too, especially with wood. A quality seal or stain applied every couple of years keeps your investment looking sharp for a long time.
I’d love to hear what budget-friendly pergola build you’re planning, or what’s worked well for your own backyard project. Leave a comment and let me know how it turned out.


