
A cramped, overlooked patio can become the neighborhood’s favorite hangout spot with the right canopy overhead.
Weighing options from sleek shade sails to sturdy pipe-frame structures reveals one key lesson early on: matching the choice to local weather patterns matters more than following whatever trend looks good online.
Freestanding pergolas offer timeless charm but demand real carpentry skills, while attached shade sails provide quicker wins for anyone newer to building.
Budget constraints don’t have to stand in the way either. Pipe-frame kits deliver surprising durability without draining the wallet.
Success ultimately comes down to honest pre-planning. Measuring twice, checking wind loads, and never underestimating proper anchoring separate a canopy that holds up from one that wobbles from day one.
A Few Things Worth Knowing First
Local weather patterns should guide the canopy style chosen far more than personal taste alone. A design that thrives in a dry climate may struggle badly somewhere windier or wetter.
Permits and zoning rules are worth checking before any post goes into the ground. Skipping this step is one of the most common reasons DIY projects hit costly delays.
Anchoring deserves more attention than most first-time builders expect. A canopy that looks solid on a calm day can shift or wobble the moment real wind arrives without it.
What Type of Outdoor Canopy Should You Build?
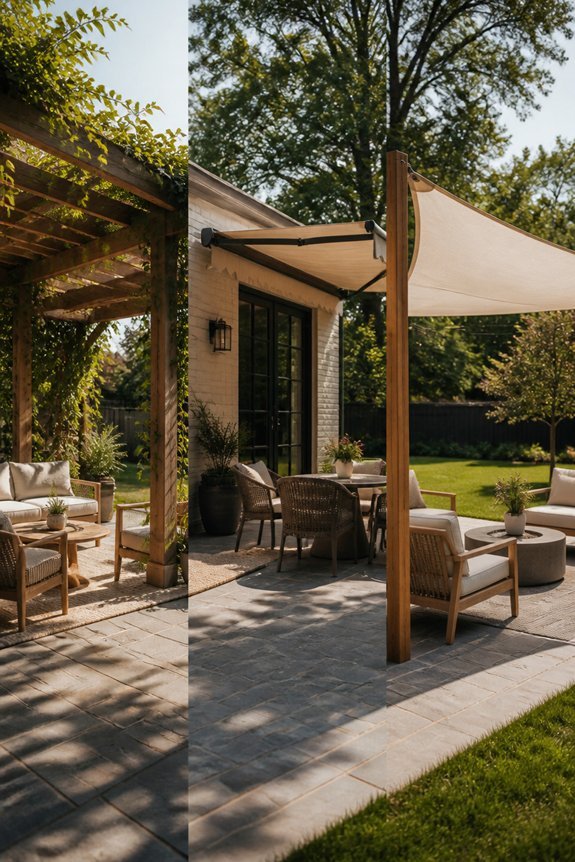
Before building an outdoor canopy, a person must decide which type best suits their space, budget, and intended use. Several common options exist, each with different materials and structures.
A freestanding pergola uses wooden or metal posts and open beams, providing partial shade. A shade sail stretches fabric between anchor points, offering a low-cost, flexible solution. A retractable awning attaches to a wall or existing structure, allowing adjustable coverage. A simple pipe-frame canopy uses PVC or metal conduit with a fabric top, making it affordable and easy to build.
Each type varies in permanence, cost, and weather resistance. Choosing the right option depends on available space, local climate, and how often the canopy will be used throughout the year.
Also read: 14 Small Backyard Canopy Ideas for Tight Outdoor Spaces
Gather Your Tools and Materials Before You Start
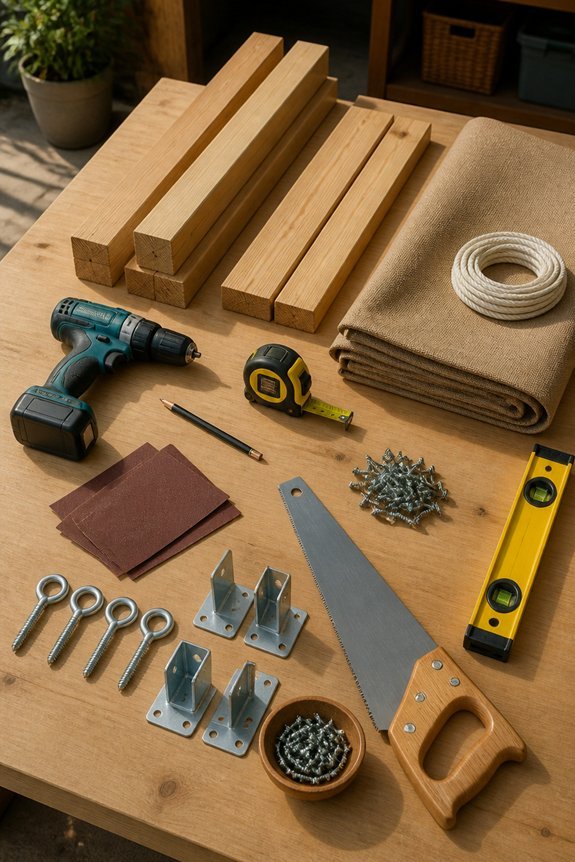
Once the canopy type has been chosen, gathering the right tools and materials becomes the next step before any building begins. Having everything ready before starting saves time and prevents unnecessary delays during the build.
Common tools needed include a drill, measuring tape, level, saw, and wrench set. Materials will vary based on the chosen canopy style, but most projects require lumber or metal posts, concrete mix, lag bolts, and weather-resistant fabric or polycarbonate panels.
Builders should also have safety gear on hand, including work gloves and safety glasses. Checking local building codes before purchasing materials is a practical step, as some areas require permits for permanent outdoor structures. Buying slightly more material than estimated helps account for mistakes or cuts.
Plan Your Canopy Size, Placement, and Permits
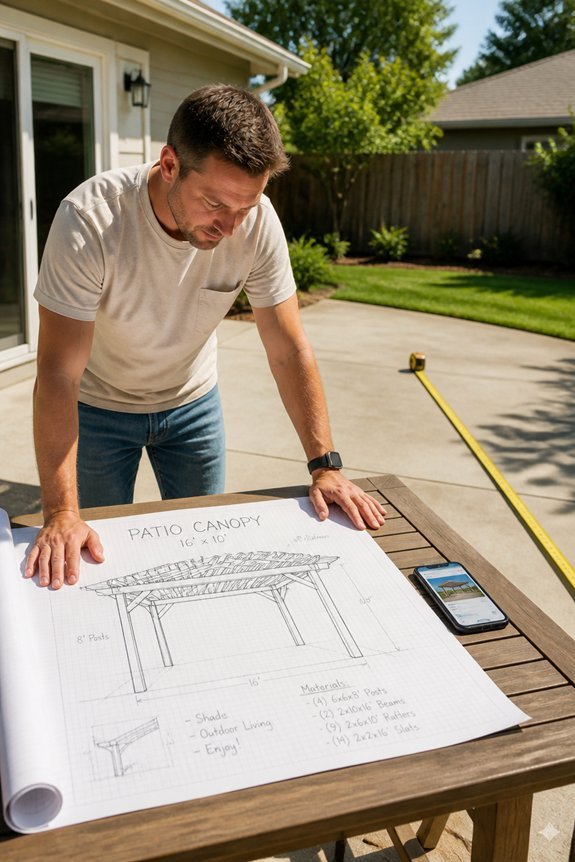
Planning the canopy’s size and placement early helps avoid costly changes later in the build. Builders should measure the patio area carefully, accounting for furniture, foot traffic, and shade coverage needs. A 10×12 foot canopy suits most standard patios, while larger spaces may require a 14×20 foot structure.
Placement affects drainage, sun exposure, and structural anchoring. Canopies placed near walls or fences often provide better wind resistance and easier post anchoring.
Builders should also check local zoning codes, HOA rules, and permit requirements before breaking ground. Many municipalities require permits for permanent structures exceeding a certain square footage, commonly 120 square feet. Checking these regulations early prevents fines, forced removal, or rebuild costs. Contacting the local building department by phone or online portal simplifies the permit inquiry process.
Choose the Right Canopy Fabric for Your Climate
With permits secured and dimensions set, builders can turn their attention to selecting the right fabric for the canopy. Climate plays a major role in this decision, as different materials perform better under specific conditions.
In hot, sunny regions, solution-dyed acrylic fabrics like Sunbrella offer strong UV resistance and breathability. In rainy climates, polyester with a PVC coating provides waterproof protection and resists mildew growth. In windy areas, open-weave shade cloth allows air to pass through, reducing wind load on the frame. In mixed climates, olefin fabric balances moisture resistance, fade resistance, and moderate airflow.
Fabric weight also matters. Heavier fabrics add durability but increase structural load. Builders should match fabric choice to local weather patterns before purchasing materials.
Build Your Patio Canopy Frame Step by Step
Building the frame is the most structural phase of the project, and getting it right determines how safe and stable the finished canopy will be. Most patio canopy frames use pressure-treated lumber, galvanized steel pipes, or aluminum tubing as primary materials.
Posts are typically set into concrete footings or secured with metal post anchors, depending on the surface. Horizontal beams connect the posts at the top, creating a rectangular or square perimeter. Cross supports or rafters run between the beams, giving the fabric a surface to rest on.
Hardware like carriage bolts, joist hangers, and lag screws hold the joints together firmly. Builders should check for level and square at each stage, as small errors compound quickly and affect the entire structure.
Anchor and Secure Your Outdoor Canopy Properly
Once the frame is built, anchoring it correctly keeps the canopy from shifting, tipping, or collapsing under wind and weather. Posts set into concrete footings provide the strongest base, especially for permanent structures. For freestanding canopies on patios, heavy-duty anchor plates bolted into concrete offer solid support. Ground stakes work on grass or soil, though they suit temporary setups better than permanent ones.
Tension matters as well. Guy wires or rope ties connected to nearby fences, walls, or separate ground anchors reduce movement during gusts. Cross-bracing between posts adds lateral stability. Hardware like galvanized bolts, lag screws, and corner brackets should be rated for outdoor use.
Checking all connections after storms prevents loosened fasteners from becoming safety hazards over time.
Maintain Your Patio Canopy Through Every Season
Seasonal upkeep extends the life of a patio canopy and prevents small problems from turning into costly repairs. Each season brings different demands, and owners should inspect the canopy regularly to catch wear early.
In spring, checking for mold, mildew, and rust on metal frames helps address winter damage quickly. Summer heat can fade fabric and weaken seams, so UV-resistant sprays provide added protection. Before fall storms arrive, tightening all bolts, anchors, and tensioning hardware reduces wind risk considerably.
Winter requires the most planning. Removing fabric panels and storing them in a dry space prevents cracking and discoloration. Aluminum and powder-coated steel frames handle cold better than raw iron, which corrodes faster. Covering frame joints with weatherproof tape adds a simple but effective layer of protection.
Frequently Asked Questions
Can I Add Lighting or Fans to My Outdoor Canopy Structure?
Adding lighting or fans to an outdoor canopy is absolutely doable, and it’s a popular upgrade for good reason.
String lights, solar lanterns, or mounted fans can all attach directly to the frame, giving the space better ambiance and comfort during evening use.
Proper weight distribution and weatherproofing matter here just as much as the installation itself, so it’s worth planning those additions before the frame goes up rather than after.
How Much Does Building a DIY Patio Canopy Typically Cost Overall?
Most DIY patio canopies come together for somewhere between $200 and $800, depending on materials, size, and overall design.
Additional features like lighting or fans tend to add another $50 to $200 on top of that base budget.
Planning for these extras from the start makes it easier to stay within a realistic total rather than adjusting the budget partway through the build.
Are There Child or Pet Safety Concerns With Backyard Canopy Installations?
Yes, a few safety details are worth keeping in mind, especially in households with young kids or curious pets.
Canopy poles should be padded or anchored securely, sharp edges covered, and fabric chosen with non-toxic materials in mind.
Pets in particular may chew on support ropes, so regular inspection helps catch that kind of wear before it becomes a real hazard.
Can My Canopy Double as a Privacy Screen From Neighbors?
Yes, a canopy can absolutely double as a privacy screen with a few small adjustments to the design.
Positioning privacy fabric panels along the sides transforms a standard overhead canopy into a much more secluded space, shielding the patio from unwanted views.
This works especially well for corner lots or homes with closely spaced neighbors, where a fully open patio can feel more exposed than desired.
What Insurance Considerations Apply to Permanent Outdoor Canopy Structures?
Notifying the insurance provider before installing a permanent canopy structure is a smart step that’s easy to overlook.
Additions like this can affect property coverage, sometimes requiring a policy update or resulting in a slightly higher premium.
Some insurers may also ask for documentation confirming professional installation, so it’s worth asking about that requirement ahead of time rather than after the canopy is already built.
Conclusion
A completed canopy stands for more than just shade. It becomes a foundation for outdoor living, the kind of structure that signals real intention behind a backyard space.
With the right materials, proper anchoring, and consistent seasonal care, a well-built canopy holds up reliably for years rather than fading after a single season.
Every bolt tightened and every fabric panel secured adds another layer of protection against weather and time, even if those small steps don’t feel significant in the moment.
Patience during the planning stage tends to pay off more than any single material choice. Rushed measurements and skipped permit checks cause far more headaches than a slower, more deliberate approach ever would.
Anyone willing to build carefully, plan thoroughly, and maintain consistently ends up with a canopy that becomes a genuine symbol of practical craftsmanship rather than a quick weekend fix.
Have questions about your own patio canopy project? Share the details in the comments below.