There’s something special about having a quiet corner in your backyard that feels separate from everything else. A gazebo delivers that retreat without draining your savings or demanding professional skills.
Budget-friendly builds come in all shapes and sizes. PVC pipe frames work beautifully for first-timers who want something simple and lightweight.
For a warmer, more organic look, old pallets can become charming structures with real character baked right in.
Wood remains the most adaptable material, letting you customize as your needs change. Sourcing reclaimed lumber or secondhand supplies cuts costs while keeping things out of landfills.
The real win comes from being honest about your time, your tools, and what you actually want to spend.
Each path has its own appeal. Just remember that the materials you select and how well you seal them against the rain will make or break how long your gazebo stands.
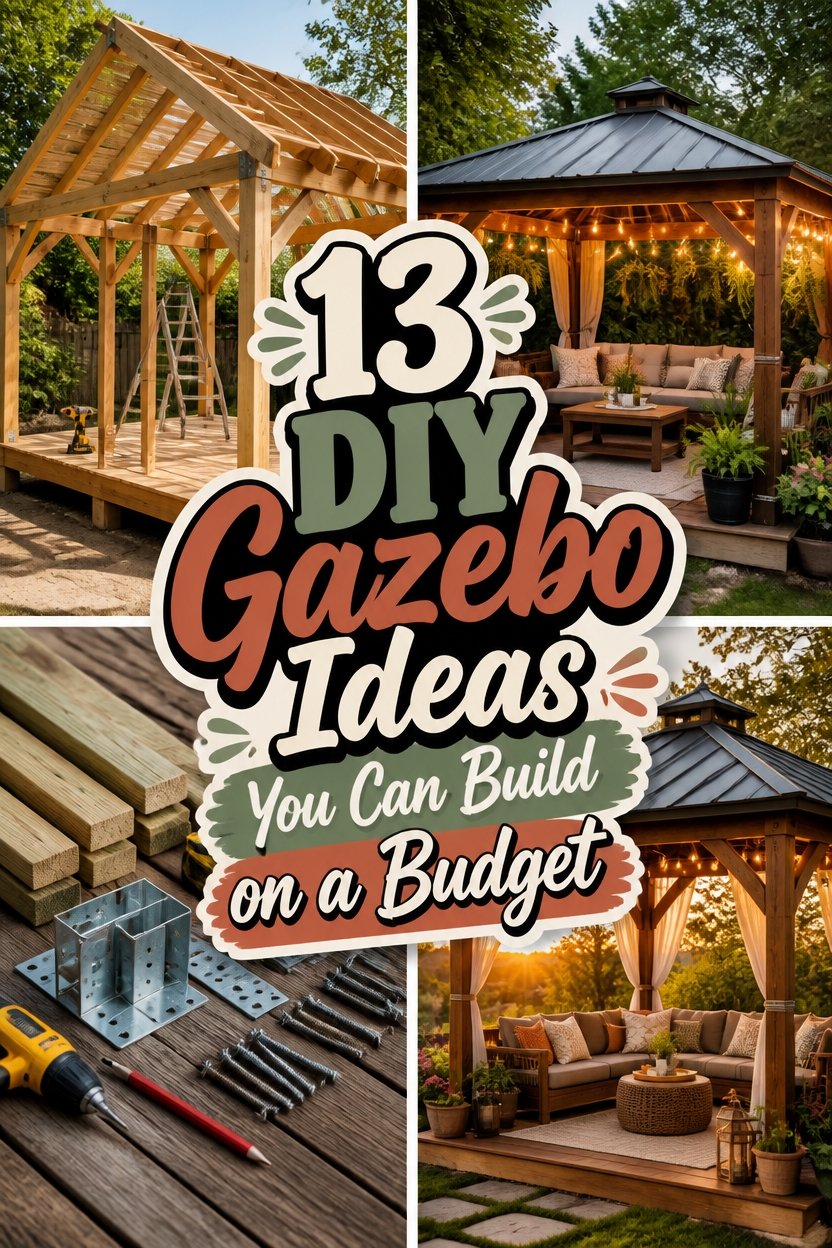
Choosing Your Gazebo: Budget, Skill Level, and Timeline
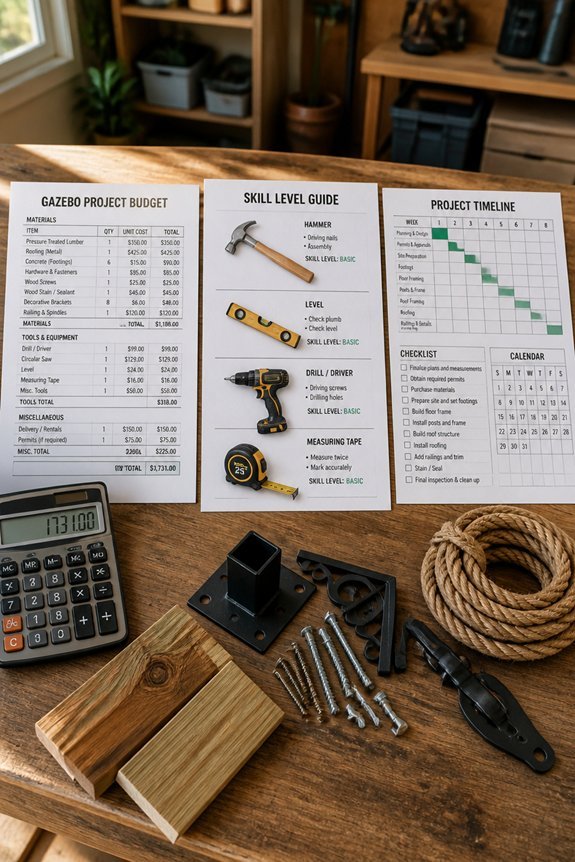
Before selecting a gazebo project, homeowners should evaluate three key factors: available budget, construction skills, and time commitment.
Budget Considerations
Basic wooden frame structures start around $500. Elaborate designs with roofing and electrical components can reach $3,000. Know your limits before you browse.
Skill Level Assessment
Beginners should stick with simple rectangular kits. These require basic cuts and standard hardware. Experienced builders can take on octagonal or pergola-style designs. These involve precise angles and careful joinery.
Timeline Planning
A straightforward 10-by-10-foot wooden gazebo takes 40 to 60 hours. Most people spread this across two or three weekends. Complex projects need 100 hours or more. These often stretch over several months.
Making the Right Choice
Be honest about your carpentry background. Take inventory of your tools. Check your calendar for free weekends. Unrealistic expectations lead to abandoned projects. They also create expensive mistakes that need professional fixes.
Also read: 10 Poolside Gazebo Ideas That Feel Like a Resort
Budget PVC Pipe Gazebo for First-Time Builders
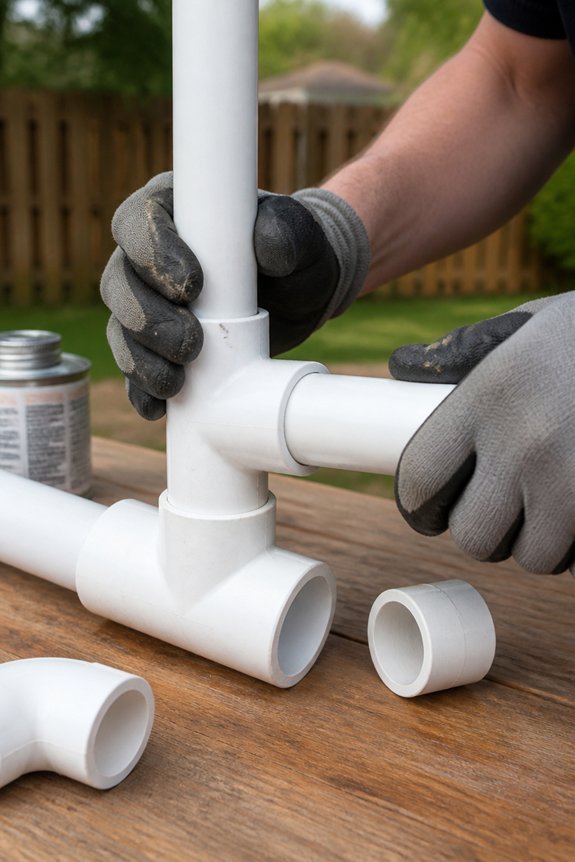
PVC pipe gazebos offer a friendly starting point for new builders. You only need basic tools: a saw, drill, and measuring tape. This keeps things simple for anyone just getting started.
Why PVC Works Well
PVC is light, budget-friendly, and stands up to weather. A basic 8-by-8-foot gazebo runs about $150 to $300 in materials. You connect pipes with fittings and corner brackets. No complex woodworking needed.
Building Basics
Most people finish in one to three days. The time depends on your design and comfort level with tools. Fabric or polycarbonate panels attach easily to the frame. These provide shade and block rain.
You can skip concrete foundations entirely. Advanced carpentry skills aren’t necessary either. This makes PVC gazebos a solid choice for first-time outdoor projects.
Repurposed Pallet Gazebo on a Shoestring Budget
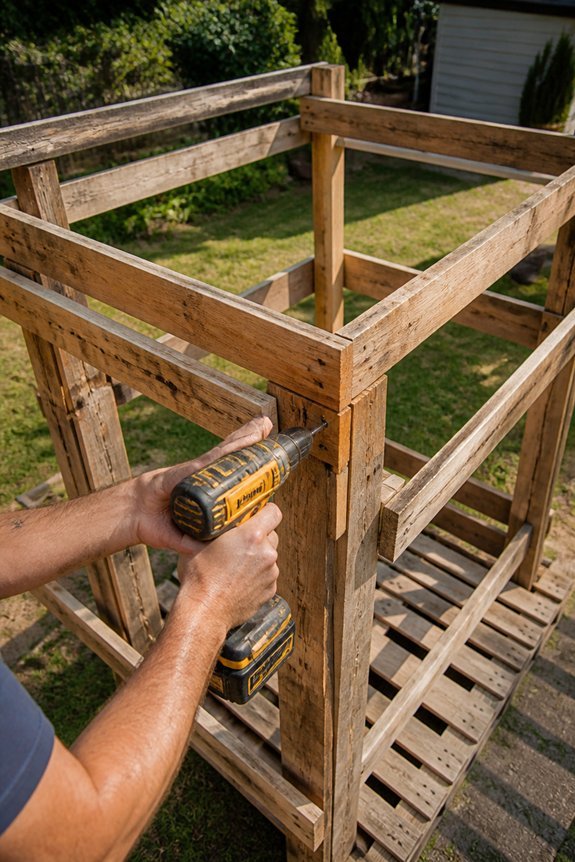
Pallets offer a practical alternative to PVC. They keep material costs minimal.
These wooden platforms are often free. Retailers and warehouses discard them regularly. You can disassemble and reconstruct them into frames, walls, and roofing.
Collect pallets from local sources. Remove nails carefully. Sand the surfaces smooth. Arrange boards into your desired layout.
Apply wood stain or sealant. This protects against weather and extends the wood’s life.
The modular nature of pallets works in your favor. Customize the size and shape as needed. You control the final design.
Add reinforcement for stability. Extra framing prevents wobbling or collapse.
Salvaged materials work well for posts and beams. Cross-bracing adds strength without extra cost.
Choose your roofing style. Corrugated panels shed water best. Tarps offer quick coverage. Extra pallet boards create a rustic look.
This method skips lumber purchases entirely. Budget builders can start right away.
You will need patience for this project. Basic carpentry skills help. Always wear proper safety equipment during construction.
Simple Wooden Frame Gazebo With a Pitched Roof
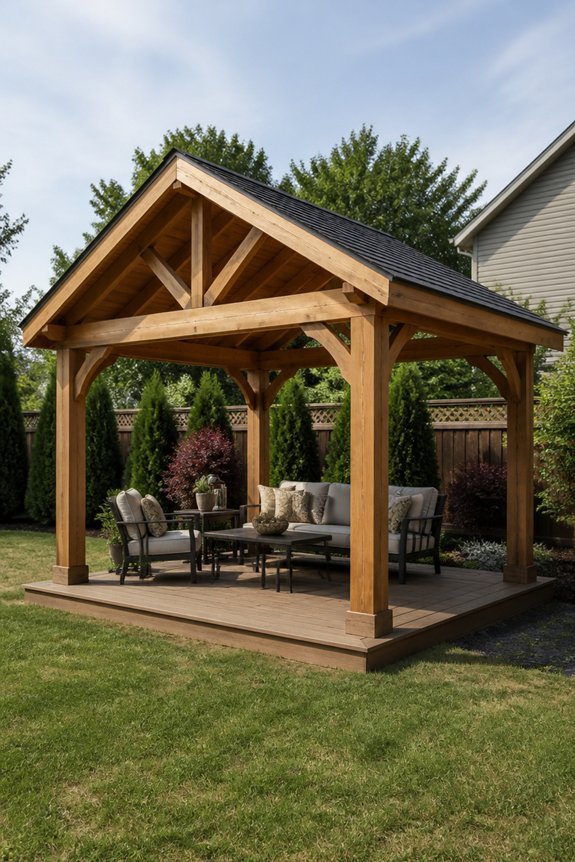
Why Choose a Pitched Roof
A pitched roof moves water away quickly. It also gives your gazebo that classic look. Most people prefer it to flat roofs for these two reasons.
Two angled planes meet at a center peak. Rain slides off to either side. Your structure stays drier inside.
Building Basics
Rafters usually come from two-by-six lumber. Support beams are often two-by-eight. Choose an angle between 30 and 45 degrees. Steeper angles shed water faster. They also give you more headroom inside.
Plywood covers the frame. Asphalt shingles go on top. Metal flashing seals the edges.
Construction Tips
Measure twice when cutting rafters. Both sides must match perfectly. Add vents under the roof. This stops mold and rot.
Best Uses
This style works well in rainy climates. It looks attractive in any yard. You get a practical space for guests. Your outdoor furniture stays protected too.
Rustic Log Gazebo for Woodland Settings
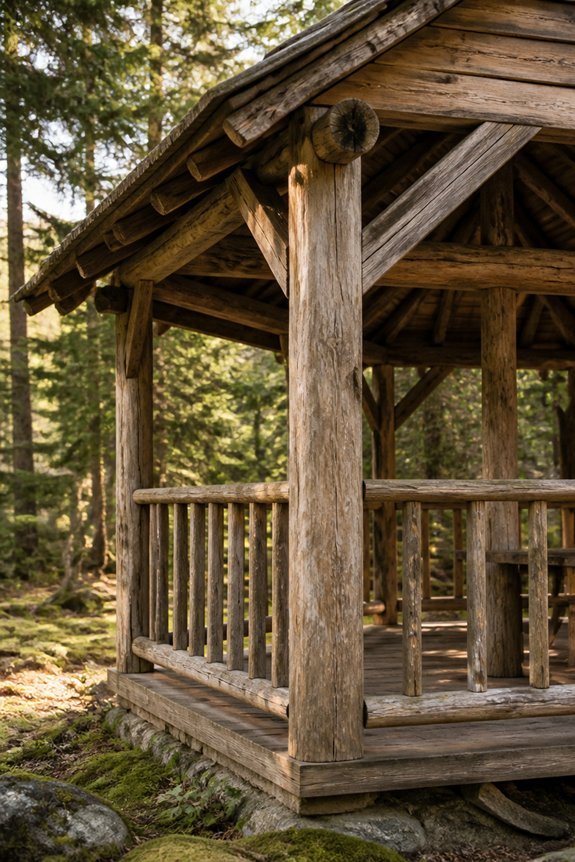
Why Log Gazebos Fit Woodland Settings
Woodland settings call for structures that blend with nature. Log gazebos answer this need beautifully. They use stacked or notched logs as their main framing. This creates an authentic rustic look that feels at home among the trees.
Builders often source logs locally. This keeps costs down and reduces transportation. It also helps the structure match the surrounding forest.
Building Basics
Construction starts with horizontal logs. These connect at corners using notches or metal brackets. A roof structure caps the frame above. Cedar and pine hold up well outdoors. They resist decay and weather nicely.
Roofing options include metal or shingles. Either choice sheds rain and debris effectively. Open sides let breezes flow through. They also keep forest views clear and unobstructed.
Common sizes run 12 by 12 feet or 14 by 14 feet. These dimensions suit most gatherings without overwhelming the site.
What You Will Need
This project calls for moderate carpentry skills. Standard tools get the job done. Pay close attention to log seasoning. Check stability at each step of assembly. Rushing either point leads to problems later.
Modern Minimalist Gazebo With Clean Lines
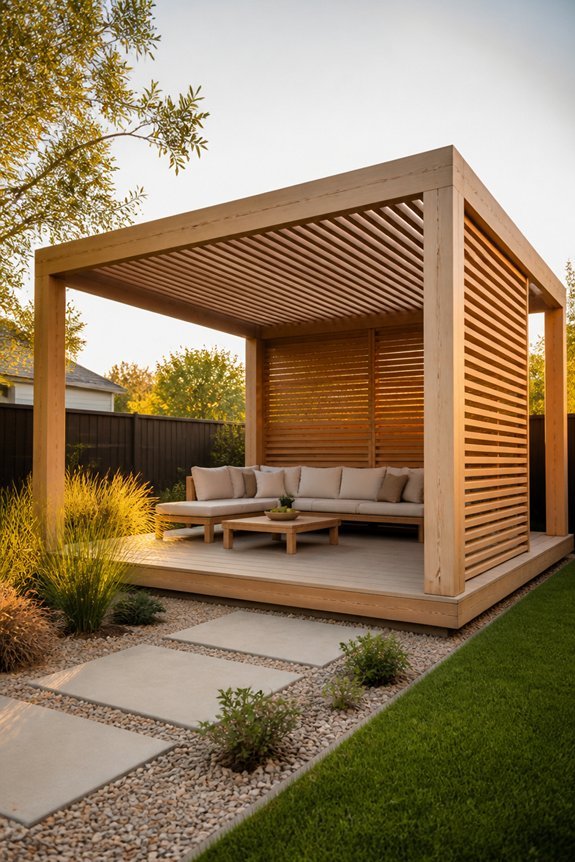
A Fresh Alternative
Rustic log designs have their charm. But sometimes you need something different. The modern minimalist gazebo offers that contrast. It relies on straight lines and geometric shapes. Steel, aluminum, and composite decking create open frameworks. The result is streamlined and functional. Visual clutter disappears. Outdoor gatherings still thrive.
Building the Frame
Construction stays simple. Think rectangular or square frames. Flat roofs work well. So do basic pitched designs. Powder-coated metal posts provide support. Horizontal beams complete the look. Clean sightlines matter throughout. Budget builders can use PVC pipes. Treated lumber cut to uniform sizes fits too. Metal connectors hold everything together.
Smart Features
Ornamentation stays minimal. Space gets used efficiently. Weather-resistant finishes protect the structure. Shade cloth installs easily. Polycarbonate panels do too. Neither overwhelms the clean aesthetic. Maintenance stays simple. Reduced surface areas help. Durable materials seal the deal.
Pergola-Style Open Gazebo for Partial Shade
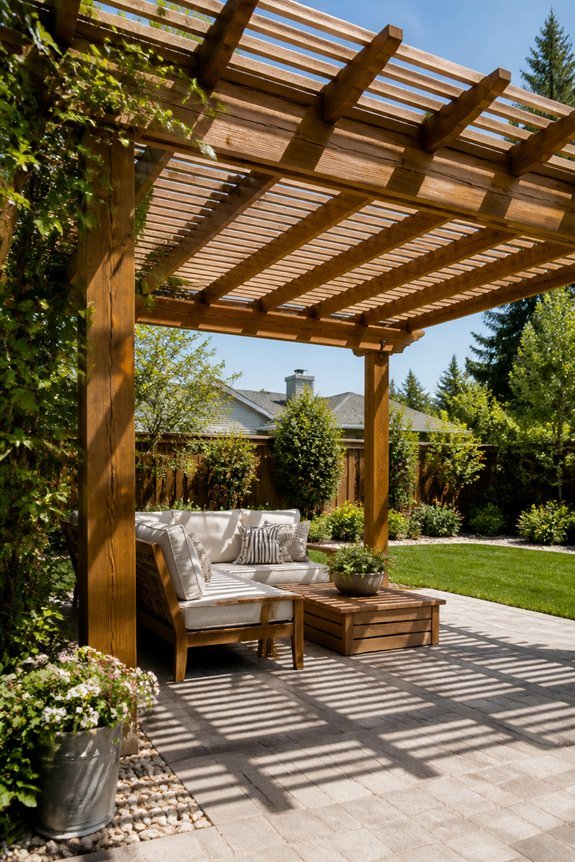
Pergola-style open gazebos bridge the gap between full shade and open air. Their slatted roofs let in sunlight and breeze while cutting direct heat.
Construction starts with vertical posts and horizontal beams. Cross-beams sit on top with even spacing. Wood, vinyl, or aluminum are common choices. Closer slats block more sun. Wider gaps invite more light in.
These structures cost less than enclosed gazebos. Installation is simpler too. Upkeep stays minimal over time.
They suit dining spots, garden nooks, and lounge areas well. You get some UV protection without full shade.
Climbing vines love the framework. Hanging plants and outdoor lights fit naturally here too.
Reclaimed Wood and Metal Hybrid Gazebo
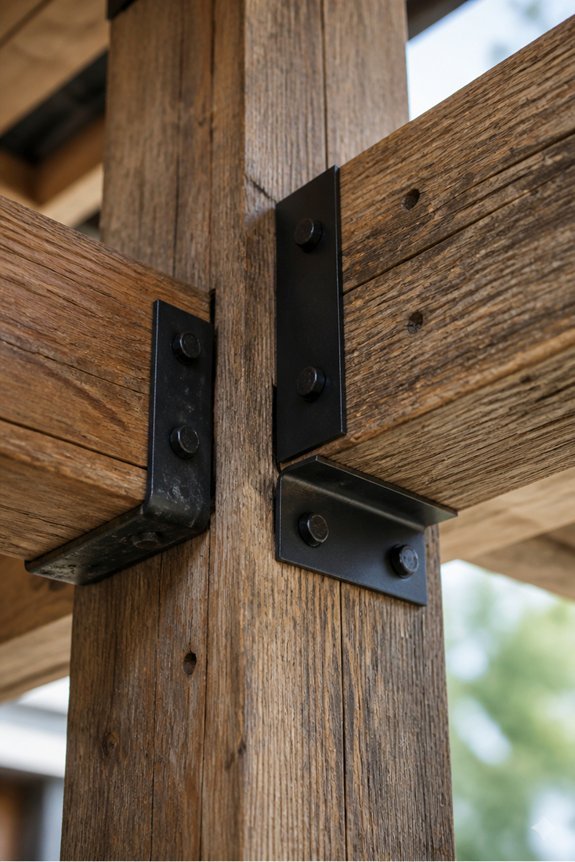
Old materials find new life in these outdoor structures. Barn wood, metal gates, and salvaged steel beams come together in sturdy, eye-catching designs.
The wood lends warmth and character with its rustic texture. Metal framing holds everything together for years of outdoor use. Builders scout demolition sites, antique dealers, and salvage yards for the best pieces.
Fence posts become vertical supports. Vintage railings turn into safety barriers. Old flooring planks resurface as deck boards. Steel pipes and angle iron resist rust through rain and sun.
This approach cuts material costs significantly. Planning takes extra care since wood and metal behave differently. Each requires its own installation method and strength considerations.
Regular upkeep keeps both elements looking their best. A quick inspection and touch-up extends the life of your gazebo.
Fabric Shade Gazebo: Temporary and Easy to Install
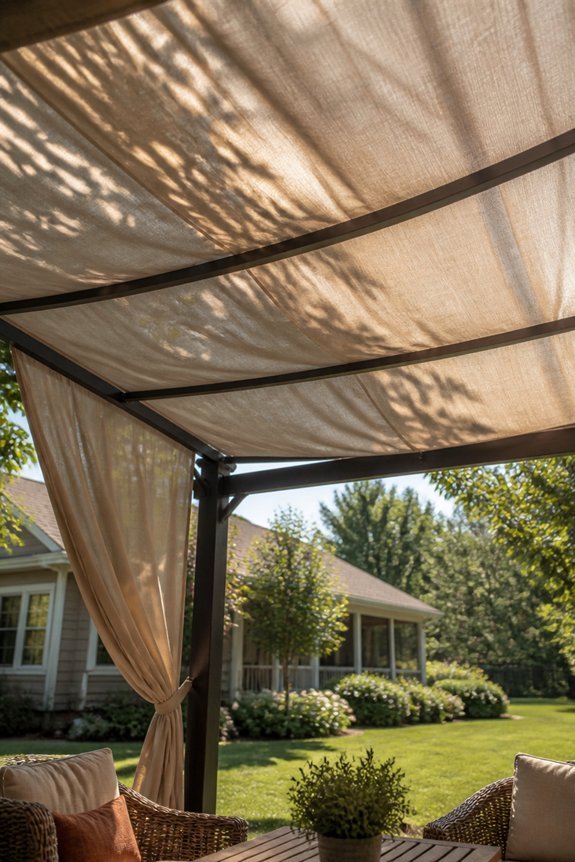
Fabric shade gazebos give you quick shelter without any permanent building work. They use canvas or polyester panels stretched over metal frames. You will not need to dig, pour concrete, or own special tools. Basic assembly equipment is all that is required.
Pop-up versions open in just a few minutes. Frame-based designs take about thirty to sixty minutes to set up. Prices range from one hundred fifty to five hundred dollars. Size and material quality will affect what you pay.
These gazebos block harmful UV rays. They also resist wind up to certain speeds. You can move them easily between different yard areas or events. This makes them ideal for changing needs.
Always anchor your gazebo with stakes or weights. This keeps it from shifting in breezy conditions. They suit patios, camping trips, and temporary outdoor workspaces.
Container Garden Gazebo for Small Spaces
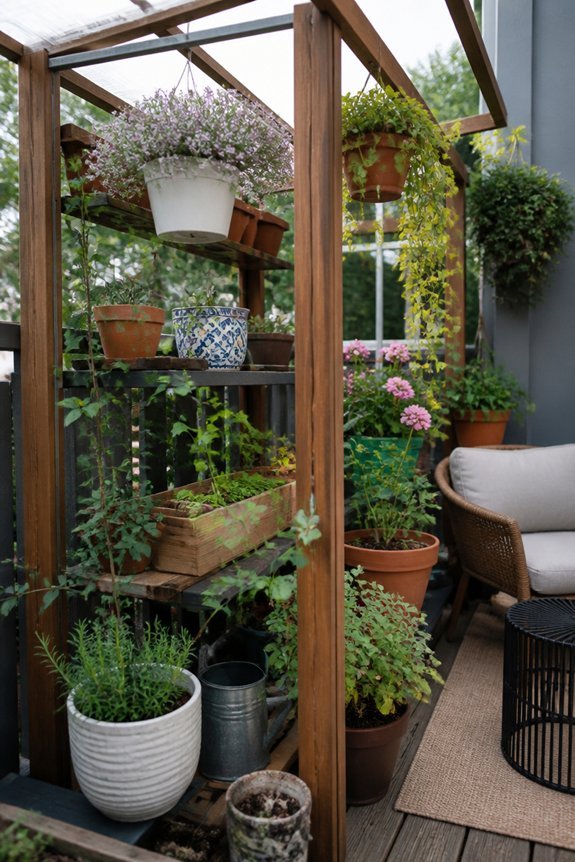
What They Are
Container garden gazebos combine vertical gardening with overhead shade. They fit perfectly where yard space is tight. These structures maximize every square foot.
Frame Construction
Builders typically use wooden frames four to eight feet wide. Lattice panels or pergola-style slats top the structure. The frame doubles as structural support and planting trellis. Climbing vines, herbs, and flowers wind up the sides.
Planting Around the Base
Potted tomatoes, peppers, and basil thrive in containers at ground level. Ornamental plants add visual interest. Hanging baskets attach to the overhead beams. This adds greenery without taking up floor space.
Material Choices
Cedar and pressure-treated lumber resist weathering well. These materials handle plant weight without strain. Your gazebo stays sturdy through seasons of growth.
Where They Work
Balconies transform with these compact structures. Patios gain both shade and garden space. Even the smallest yards accommodate this design.
Building Basics
Installation needs standard carpentry skills. Basic tools get the job done. Most people complete the project over a single weekend.
Why You’ll Love It
Fresh produce grows within arm’s reach. Cool shade welcomes you on hot afternoons. Beauty surrounds you in a space once thought too small for either.
Sunken Garden Gazebo Built Into Your Landscape
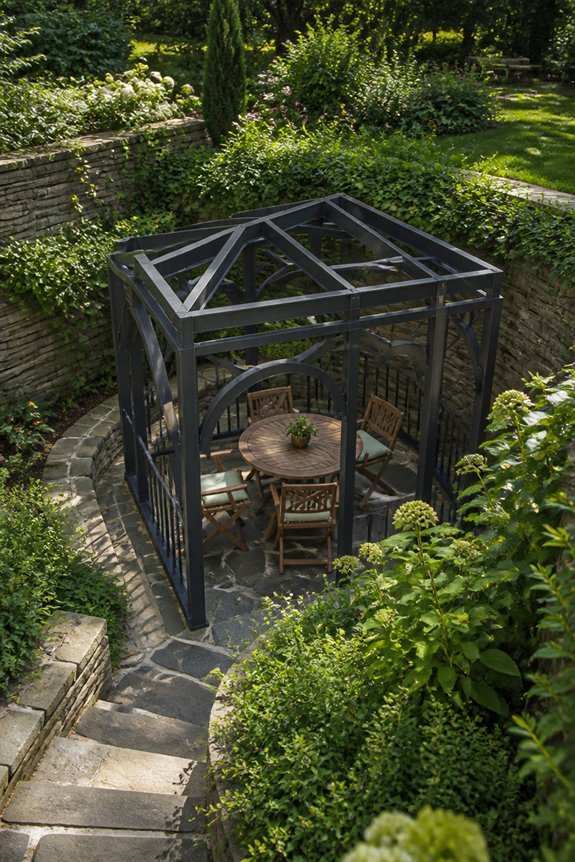
A sunken garden gazebo sits partially below ground level. It creates a sheltered outdoor room that blends naturally into your yard. This design lowers construction costs. The earth provides structural support on several sides, so you need less framing material.
Builders typically excavate 2-3 feet deep. They install retaining walls using stone, timber, or concrete blocks. Proper drainage matters here. Gravel bases and strategically placed pipes prevent water accumulation. The sunken position blocks wind and creates microclimates. Your surrounding plants will benefit.
You can add steps down or a gentle sloped walkway for access. A roof overhead protects you from weather. The integrated look stays intact. This approach suits moderate slopes or yards with existing elevation changes.
Curved Roof Gazebo That Stands Out Visually
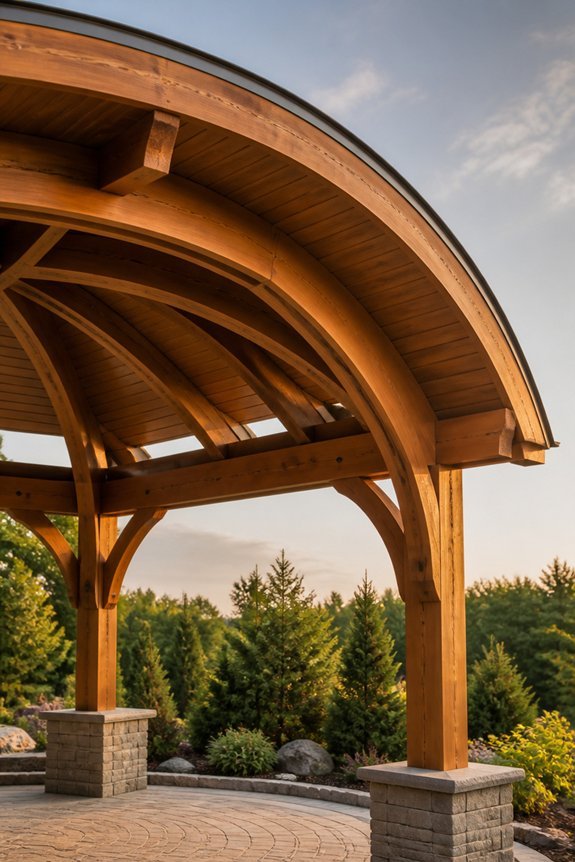
Why Choose a Curved Roof?
Curved rooflines set gazebos apart from boxy designs. They add visual appeal and offer practical benefits too. Water drains off smoothly, and wind flows around the shape more easily.
Materials That Bend Beautifully
Laminated wood beams curve without splitting. They create smooth, organic arches. Metal trusses work well too. They bring a clean, modern look and last for years.
Planning Your Build
Curved designs need careful math. You must figure arch angles, support points, and how weight spreads. An eight-foot gazebo with gentle curves suits intermediate builders nicely. It is ambitious but achievable.
Worth the Extra Cost?
Curved roofs cost more than flat ones. Materials and labor add up. Even so, many homeowners choose them. The standout look and better weather handling make it a smart trade-off for a memorable backyard feature.
Weatherproofing Your Gazebo: Sealing, Staining, and Maintenance
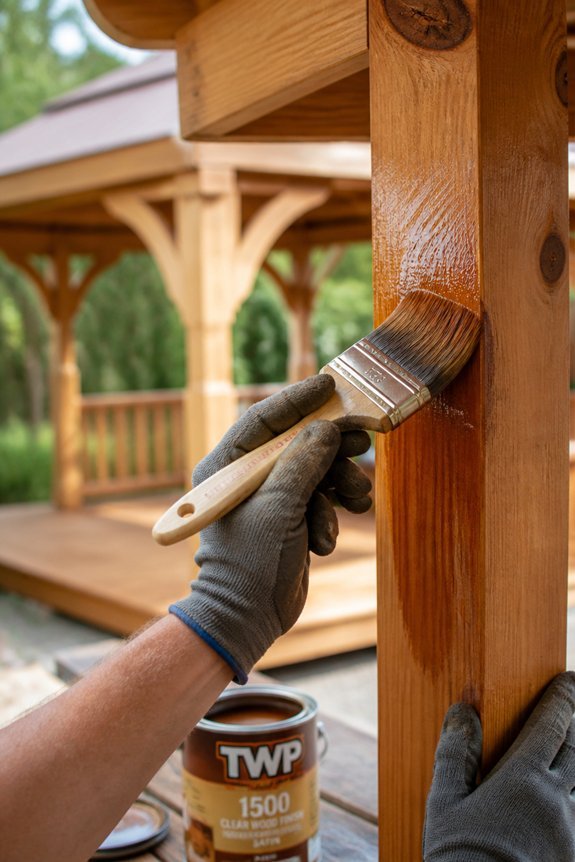
Why Weatherproofing Matters
Wood needs protection to stay strong. Rain and sun can cause rot and damage over time. Taking care of your gazebo now saves money later.
Sealing and Staining
Sealants block water from soaking into the wood. They keep the grain safe from moisture damage. Staining adds beauty plus another layer of defense.
Look for quality outdoor sealers at your local hardware store. Apply them to all exposed surfaces for best results.
Simple Maintenance Tasks
Check your gazebo once a year for cracks or soft spots. Look closely at boards and joints. Small issues are easier to fix early.
Clean leaves and debris off the roof regularly. This stops water from pooling where it shouldn’t.
Tighten any loose screws or nails you find. Rusty fasteners weaken the structure, so replace them when needed.
How Often to Reapply Sealant
Plan to seal your gazebo every two to three years. High sun or heavy rain areas might need more frequent care. Your climate affects the timeline.
The Payoff
Regular care keeps your gazebo standing tall. It stays beautiful through hot summers and rainy seasons. Your outdoor space remains safe and inviting for years to come.
Frequently Asked Questions
How Much Weight Can a DIY Gazebo Safely Support for People and Furniture?
A DIY gazebo’s weight capacity depends on its structural design and materials used. Most properly constructed gazebos safely support 50-100 pounds per square foot. Builders should consult engineering guidelines and use appropriate materials for intended occupancy levels.
What Permits or Zoning Regulations Do I Need Before Building a Gazebo?
Like traversing a maze, permit requirements vary by location. Most jurisdictions require building permits for permanent structures. One must contact local zoning offices to verify setback distances, property line restrictions, and whether the gazebo needs electrical inspections or foundation approvals.
How Do I Protect My Gazebo From Wind, Snow, and Extreme Weather?
One can protect gazebos through reinforced anchoring systems, wind-resistant designs, and sturdy materials. Installing removable panels, applying weatherproof sealants, and adding snow load-bearing roof structures provide additional defense against harsh conditions.
Can I Add Electricity or Lighting to My Budget DIY Gazebo Safely?
Yes, electricity and lighting can be safely added to budget DIY gazebos. One should use outdoor-rated fixtures, weatherproof wiring, install a dedicated circuit with proper breakers, and hire a licensed electrician for permanent installations to guarantee safety compliance.
How Long Does a Typical DIY Gazebo Last Before Needing Major Repairs?
A properly maintained DIY gazebo typically lasts 10-15 years before requiring major repairs. Studies show that structures receiving annual maintenance can extend their lifespan by 40%. Regular inspections, wood treatment, and weatherproofing greatly influence durability outcomes.
Conclusion
Building a DIY gazebo requires matching your project to your budget, skills, and available time. PVC pipes, pallets, and reclaimed wood serve as affordable foundation materials. Proper weatherproofing through sealing, staining, and maintenance transforms a rough structure into a lasting outdoor space. These gazebo options plant seeds of possibility, allowing homeowners to create functional, personalized retreats without excessive spending or professional installation costs.
