


Getting a canopy properly secured to a pergola takes more care than most people expect. The wrong approach leaves sagging fabric, awkward bunching, or a complete mess after the first storm rolls through.
Zip ties tend to work well for lightweight covers, while bungee cords handle tension better on larger setups. Rope offers the most control, though it takes more patience to tension correctly.
Each material has its place depending on canopy weight and local weather conditions.
Measurements matter just as much as the hardware chosen. Planning anchor points ahead of time and building in some adjustability from the start prevents most common problems.
A little foresight now saves hours of frustration once the fabric is actually up.
A Few Things Worth Knowing First
Fabric weight should guide hardware choice more than personal preference. Heavier canvas or polycarbonate panels need sturdier anchoring than lightweight polyester covers.
Weather in the local area matters more than it might seem at first. Homes in windy or storm-prone regions benefit from reinforced tensioning methods from day one, rather than retrofitting later.
Taking time on measurements before any hardware goes up prevents the most common installation headaches, including sagging fabric and uneven attachment points.
What Type of Canopy Works Best for a Pergola?
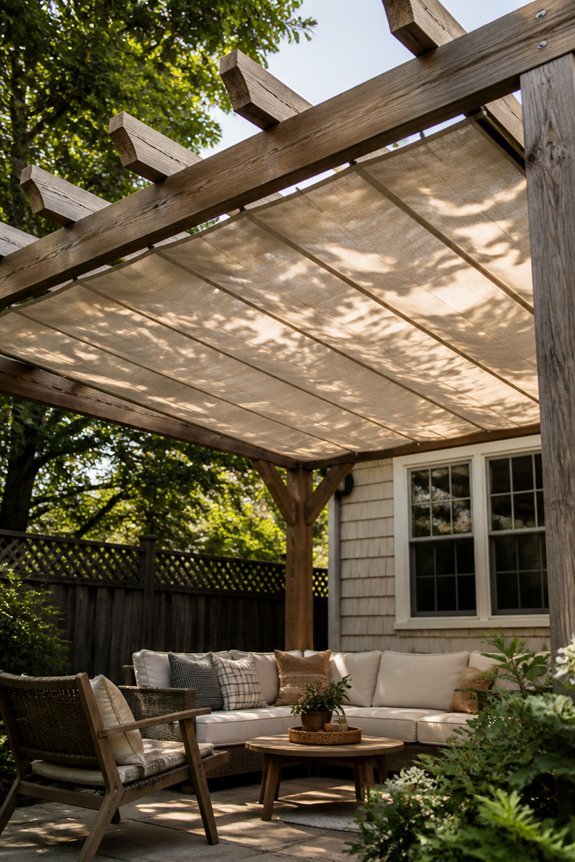
Choosing the right canopy type depends on the pergola’s structure, the local climate, and how the space will be used. Retractable canopies work well for pergolas in areas with variable weather, allowing users to open or close coverage as needed. Shade sail canopies offer a simple, low-cost option for structures with strong anchor points at multiple corners.
Fabric panel canopies, often made from polyester or canvas, attach directly to the rafters and provide consistent overhead coverage. For pergolas in rainy climates, waterproof polycarbonate panels offer more durable protection than fabric. Each canopy type varies in installation complexity, maintenance needs, and cost, so matching the right option to the specific pergola setup improves long-term performance and usability.
What Tools and Materials Do You Need Before You Start?
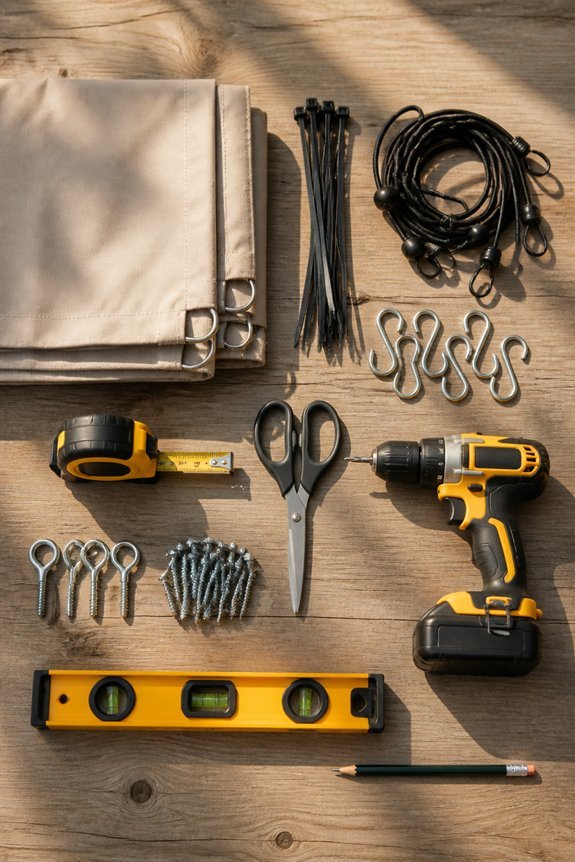
Gathering the right tools and materials before starting saves time and reduces the chance of errors during installation. Most projects require a measuring tape, a drill with assorted bits, a ladder, and zip ties or bungee cords for securing fabric. A level helps confirm even placement across the pergola frame.
Materials depend on the canopy type chosen. Shade sail installations need stainless steel hardware, including eye bolts and turnbuckles. Rod pocket canopies require tension rods or wooden dowels sized to fit the pergola width. Retractable systems may include mounting brackets and screws rated for outdoor use.
Having weather resistant thread and a basic repair kit nearby is also practical. Organizing all items before work begins keeps the process efficient and avoids unnecessary stops mid installation.
Also read: How to Set Up a Canopy for an Outdoor Wedding
How to Measure and Prep Your Pergola Before You Attach Anything
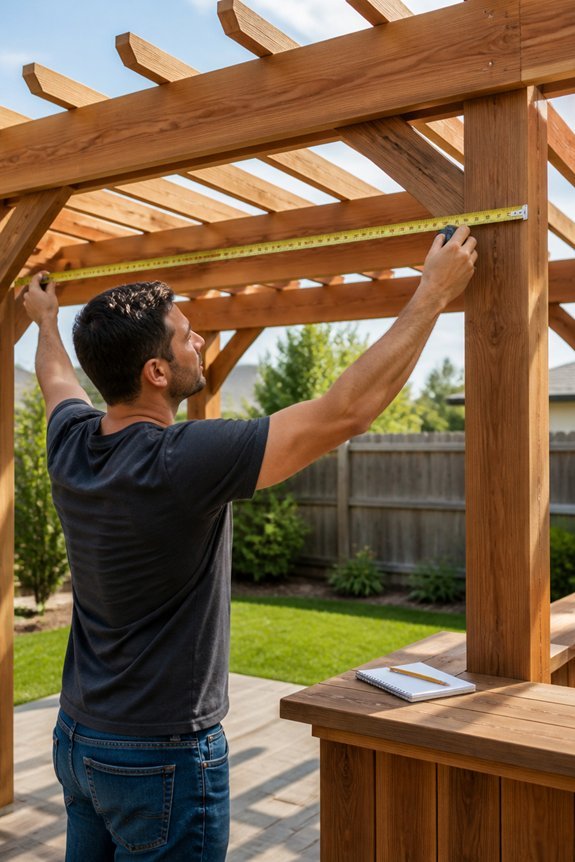
With tools and materials ready, the next step is measuring the pergola and preparing the frame before any canopy goes up. The width and length of the open top section should be recorded in inches, not feet, for accuracy. Existing beams, rafters, and cross rails need inspection for cracks, rot, or loose hardware. Any damaged sections should be repaired before adding weight or tension.
The mounting points along the outer beams must be marked evenly, using a tape measure and chalk line to keep spacing consistent. If the pergola has decorative cutouts or angled ends, those areas may limit where brackets or hooks can sit. Clean surfaces guarantee better grip for hardware, so dirt, debris, and old fasteners should be removed beforehand.
How to Attach a Canopy to a Pergola Step by Step
Once measurements are confirmed and the frame is prepped, attaching the canopy can begin from one end of the pergola and move systematically to the other. Most canopies include loops, grommets, or hook-and-eye connectors that fasten directly to the beams or rafters.
One person should hold the canopy flat while another secures each attachment point, working in a straight line to prevent bunching or misalignment. Zip ties, bungee cords, or rope can reinforce loose sections between fixed attachment points. Tension matters throughout this process, as sagging fabric collects water and debris.
Once the canopy reaches the opposite end, all attachment points should be checked and tightened evenly. Any excess fabric along the edges can be folded neatly and secured with additional fasteners or clips.
How to Secure Your Canopy Against Wind and Bad Weather
Even a well-attached canopy can shift, tear, or collapse when strong winds or heavy rain arrive. Securing it properly requires more than basic attachment. Several methods help protect the canopy during bad weather.
Bungee cords or canopy clips can anchor fabric edges to pergola beams, reducing flapping and stress on seams. Sandbags or weighted bags placed along the base of freestanding pergolas add stability during wind gusts. Guy wires or tension straps connected from pergola posts to ground anchors limit overall movement. Waterproof canopy fabric, such as polyester with PU coating, resists water pooling and tearing better than standard materials.
Homeowners should inspect all attachment points before storm season begins. Loose hardware, frayed straps, or worn grommets should be replaced immediately to prevent larger damage.
How to Tension the Fabric So It Doesn’t Sag
Sagging fabric reduces both the appearance and function of a pergola canopy, and proper tensioning prevents water pooling, tearing, and premature wear. Fabric should be pulled taut across the pergola frame before securing it, distributing tension evenly from all four corners.
Bungee cords, turnbuckles, and ratchet straps are common tools for adjusting tension after installation. Turnbuckles allow fine adjustments without removing attachments entirely, making them useful for seasonal changes in fabric tension. Ratchet straps provide strong, reliable tension across wider spans.
Installers should check fabric tension periodically, especially after rain or wind exposure, since fabric can stretch or shift over time. Ties and clips should be repositioned if uneven pulling or bunching develops along the edges or seams.
How to Maintain Your Pergola Canopy Long-Term
Regular cleaning extends the life of a pergola canopy and prevents buildup of dirt, mold, and debris that can weaken fabric over time. Owners should rinse canopies with a garden hose every few weeks, especially after rain or wind storms. A mild soap solution, such as diluted dish soap, removes stubborn stains without damaging fabric coatings.
Retractable canopies should always be closed during heavy rain or strong winds to reduce stress on seams and attachment points. Seasonal inspections help identify fraying edges, loose grommets, or corroded hardware before small problems worsen.
Applying a fabric protector spray, like Scotchgard, once or twice yearly maintains water resistance. Canopies stored during winter should be cleaned, dried completely, and kept in a breathable storage bag to prevent mildew growth.
Frequently Asked Questions
Can I Attach a Canopy to a Pergola I Didn’t Build Myself?
Yes, attaching a canopy to a pergola someone else built is completely doable, even without knowing the original construction details.
The key steps stay the same regardless of who built the structure. Measuring carefully, selecting a compatible canopy, and using the right hardware for the existing beams gets the job done properly.
A quick inspection of the beams beforehand helps confirm they can handle the added weight and tension before any fabric goes up.
Will a Pergola Canopy Affect My Homeowner’s Association Rules or Restrictions?
It’s worth checking HOA guidelines before installing anything, since many associations do regulate exterior modifications like canopies.
Color, material, and overall appearance are common points of review, so a design that clashes with community standards could require adjustments later.
A quick conversation with the HOA board ahead of time saves the hassle of redoing an installation after the fact.
Do I Need a Permit to Add a Canopy to My Pergola?
Permit requirements vary quite a bit depending on location, so there’s no single answer that applies everywhere.
Contacting the local building authority directly is the most reliable way to find out whether a permit applies to a specific project.
This is especially worth doing before any larger or more permanent canopy installation, since retrofitting for compliance later tends to cost more time and money.
Can a Pergola Canopy Support the Weight of Heavy Snow Accumulation?
Most pergola canopies aren’t built to handle heavy snow loads, so accumulated snow should be removed promptly to avoid structural strain.
Waiting too long between clearings puts unnecessary stress on the fabric and the pergola frame itself, which can lead to sagging or worse.
Anyone in a high-snowfall region should consult a structural engineer before adding a canopy, just to confirm the setup can handle local winter conditions.
Is It Safe to Use Outdoor String Lights Under a Pergola Canopy?
String lights and pergola canopies actually pair together quite well when the right precautions are taken.
Weather-rated lights are the safest choice here, since they’re built to handle outdoor exposure without the risk that standard indoor lighting would carry.
Keeping proper spacing between the lights and the fabric, along with secure and waterproof electrical connections, rounds out a safe and reliable setup.
Conclusion
Attaching a canopy to a pergola takes patience, but the results are worth the extra effort every time.
Careful measurements at the start make the rest of the process go far more smoothly, since even small errors early on tend to compound once the fabric is actually in place.
Secure attachment points matter just as much as the measuring stage. A canopy that looks fine on a calm day can fail quickly once wind or heavy rain puts it to the test.
Regular maintenance rounds out the whole process. Checking tension, fasteners, and fabric condition a few times each season keeps the setup functional and looking sharp for years.
A poorly installed canopy has a way of turning into a disaster right when the weather takes a turn, which makes all this upfront care worth the time it takes.
Have questions about your own pergola setup? Share the details in the comments below.


