Planning a Frozen party can feel overwhelming, but here’s the good news: you don’t need ice powers to make it magical. From snowflake garlands to budget-friendly balloon clusters, there are tons of ways to transform any space into Arendelle without emptying your wallet. The best part? Most decorations take minutes to set up. But wait—there’s a trick to making everything look professionally done, and it’s simpler than you’d think.
Snowflake Garlands and Hanging Decorations
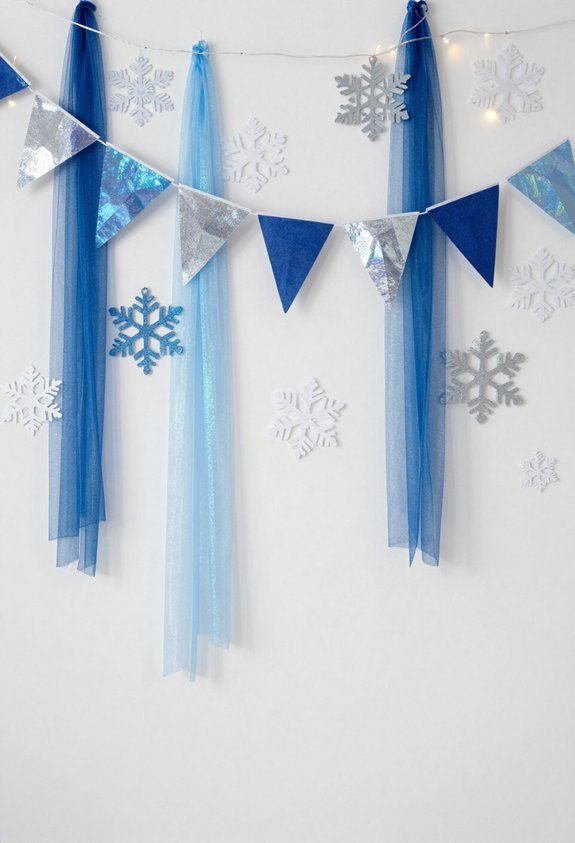
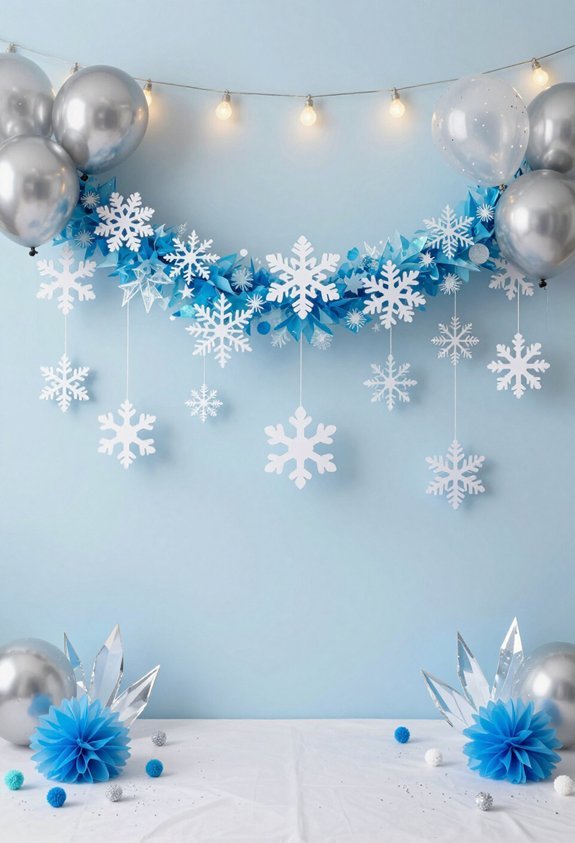
When it comes to turning a room into Elsa’s ice palace without accidentally freezing anyone, snowflake garlands are basically the MVPs of Frozen birthday décor. These sparkly strings of paper or plastic snowflakes hang from ceilings and doorways, creating an instant winter wonderland vibe. You can snag pre-made garlands at party stores or go DIY by cutting snowflakes from white and silver cardstock and stringing them together with fishing line. The best part? They’re lightweight and won’t crash down on your guests’ heads mid-cake. Drape them in swags across walls or let them dangle at varying heights for extra dimension. Mix in some icy blue lights, and your space transforms into Arendelle faster than you can say “Let it go.”
Also read: 18TH BIRTHDAY DECORATIONS: 19 Ideas
Snowflake String Lights and Fairy Lights
Because regular string lights are basically just tiny suns on a wire, snowflake-shaped versions level up the entire frozen aesthetic. These twinkling beauties come in cool white or blue, making any space feel like Elsa’s ice palace. String them around doorways, along tables, or drape them across the ceiling for maximum frostiness. Fairy lights work similarly but offer softer, more delicate vibes. Mix and match different lengths—50 to 100 lights typically do the trick without looking like a power plant exploded. Battery-operated options beat cords tangling everywhere like angry snakes. Position lights low enough to cast magical shadows on walls but high enough nobody accidentally walks into them. The result? A glittering winter wonderland that makes guests forget it’s summer.
Paper Snowflake Wall Backdrops
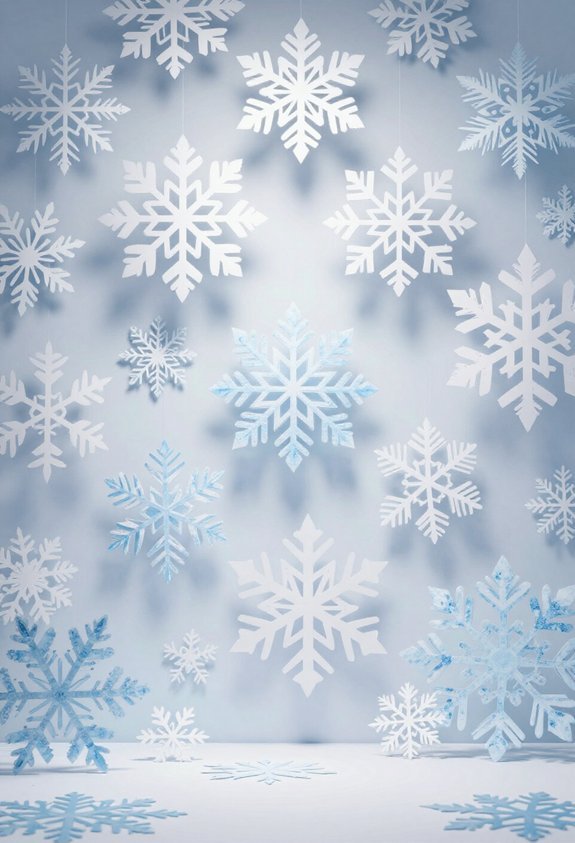
Dozens of paper snowflakes hanging on a wall might sound like a craft project gone wrong, but trust us—it’s actually magical. Cut white or light blue paper into six-inch snowflakes using simple scissors and folding techniques. Tape them directly onto walls or create a backdrop frame using fishing line and a PVC pipe stand. Layer snowflakes at different heights and depths for dimension. Mix various snowflake sizes and styles—some delicate, some chunky and goofy-looking. Position them to frame your cake table or photo booth area. The best part? Guests will lose their minds taking pictures. Plus, cleanup is easier than explaining to your parents why you made that bathroom smell weird. Paper snowflakes transform boring walls into frozen wonderlands instantly.
Frozen Door and Wall Decals
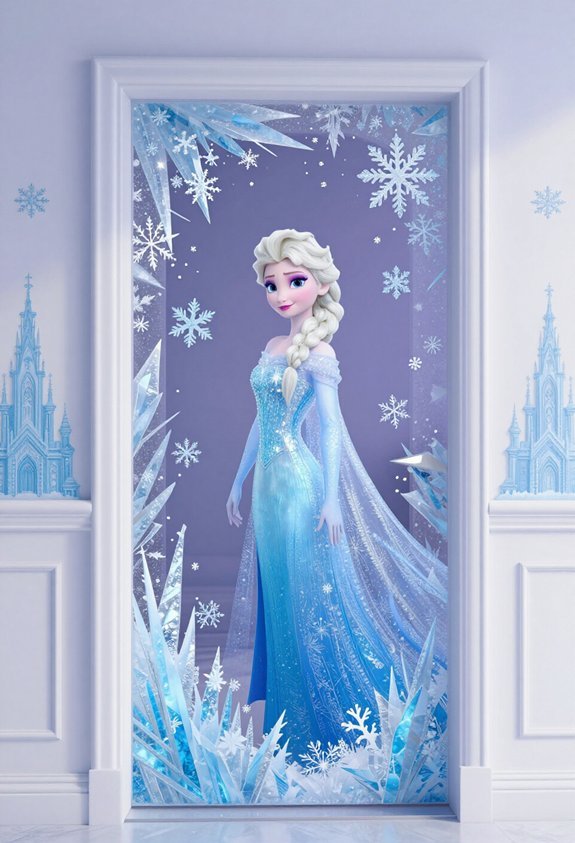
While paper snowflakes are awesome, sometimes people want decorations that stick around without tape marks everywhere. Frozen door and wall decals are basically the superheroes of party decorating. These peel-and-stick masterpieces feature Elsa, Anna, and Olaf in all their icy glory. They come in various sizes, from small 12-inch cutouts to massive 36-inch showstoppers that make guests say “wow.” The best part? No sticky residue nightmares. Simply peel, press, and watch your walls transform into Arendelle. Position Elsa on the main entrance for maximum impact. Mix smaller character decals around doorways and corners for cohesive theming. They peel off cleanly when the party ends, leaving zero damage. Your security deposit stays safe, and your walls stay pristine. Win-win.
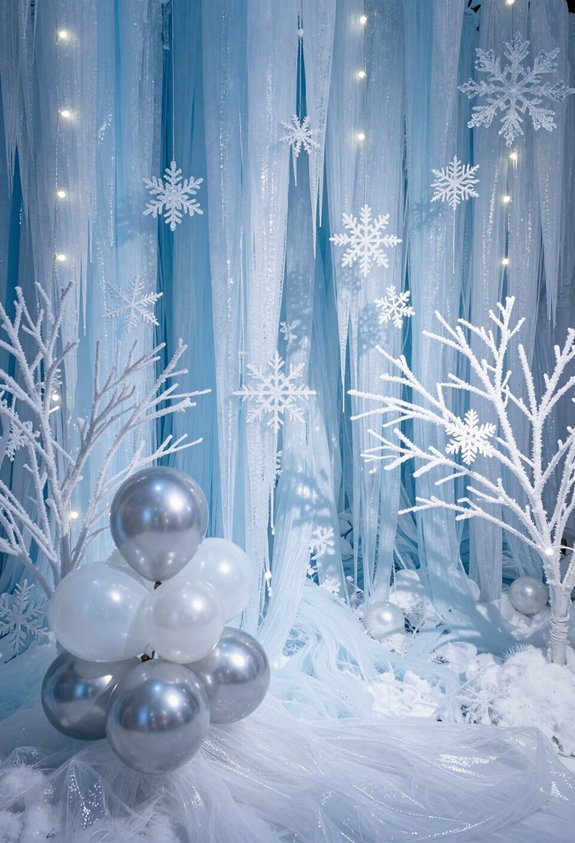
Ice-Blue and White Balloon Installations
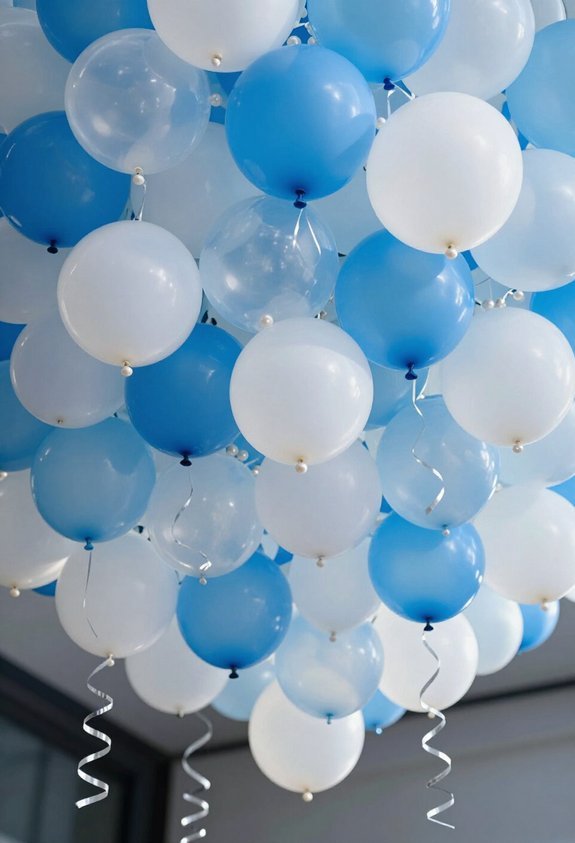
Balloons are the MVPs of any party setup, and ice-blue and white balloon installations take things to the next level. These puffy decorations transform bland spaces into frozen wonderlands without requiring actual ice—or freezing your guests solid. Cluster balloons in groups of five to seven around doorways and corners. Mix various sizes: 5-inch, 11-inch, and 36-inch balloons create visual interest and prevent the monotonous “balloon blob” effect. Anchor larger balloons with fishing line or balloon weights so they don’t float away like they’re auditioning for the sky. White balloons represent snow, while ice-blue ones channel Elsa’s icy magic. String them together using balloon garland tape, then drape across walls or ceilings. The result? A dreamy, Instagram-worthy frozen kingdom that’ll make guests gasp—minus any actual frostbite.
Frozen Character Balloon Bouquets

To make guests’ hearts melt faster than an ice cube in July, character balloon bouquets bring the beloved Frozen crew to life. These showstoppers feature giant Elsa and Anna head balloons—think 3-foot-tall faces—paired with icy blue, silver, and white latex balloons. Olaf’s goofy grin steals the show every time. Arrange bouquets in clear weighted vases or tie them to chair backs where they’ll inevitably bonk guests on the head (comedy gold). Mix in some snowflake cutouts between balloons for extra pizzazz. Layer different balloon sizes for dimension. Position these bad boys near the entrance or cake table as focal points. Kids absolutely lose their minds spotting their favorite characters floating overhead. Pro tip: inflate helium balloons just before the party starts, or they’ll deflate faster than your enthusiasm on Monday morning.
Ice Palace Balloon Columns
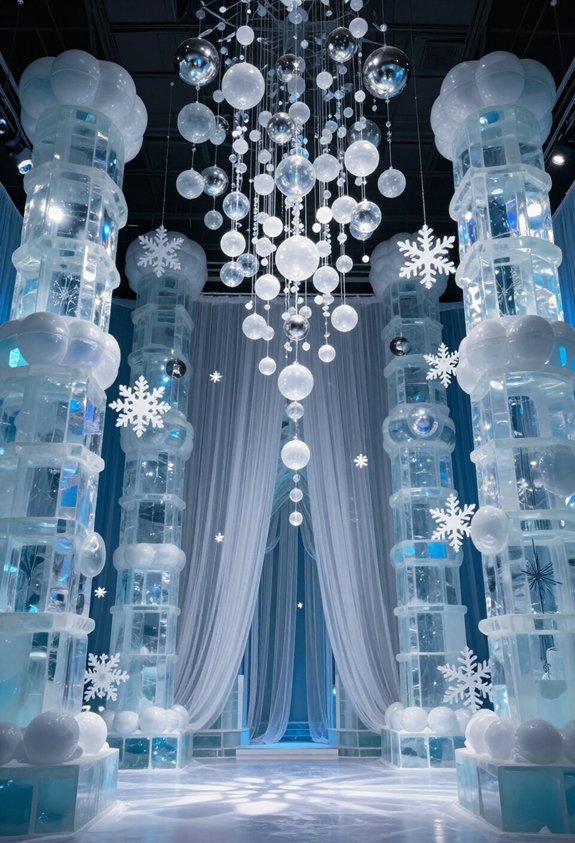
Towering pillars of shimmering balloons transform any party space into an actual ice palace—or at least something that looks cool enough to fool your guests for a solid five minutes. Stack white, silver, and light blue balloons six to eight feet tall using fishing line and PVC pipe frames. Seriously, it’s easier than assembling IKEA furniture. Position these columns at party entrances or corners for maximum ice-queen energy. Add some snowflake cutouts and tinsel garland wrapped around the bases. Your guests will feel like they’ve walked into Elsa’s freezer—the good kind, not the creepy one in your garage. These balloon columns photograph beautifully and make everyone feel fancy without requiring actual construction skills or frozen magic powers.
Blue and Silver Tinsel Garlands
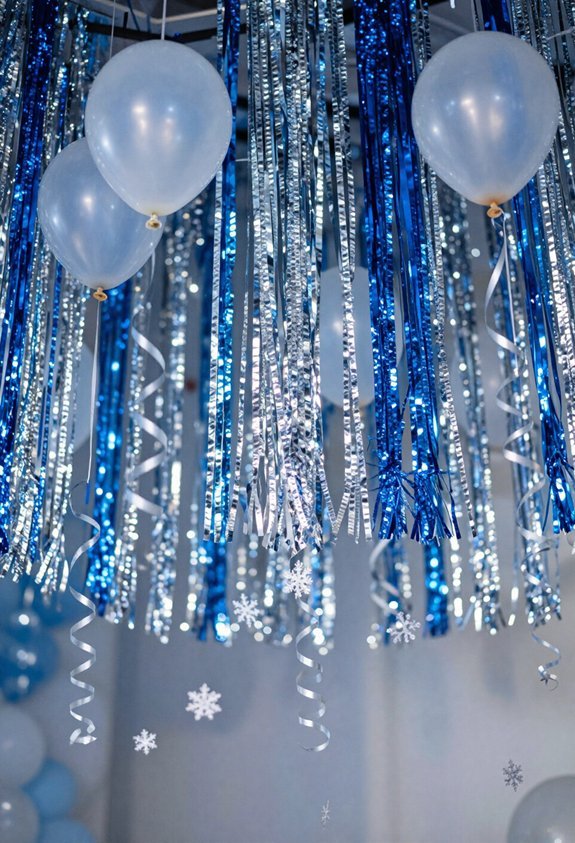
Draping shimmering strands of blue and silver tinsel around the party space is like wrapping your guests in a giant frozen hug—minus the uncomfortable sweating. These garlands are basically magic in string form.
Hang them along doorways, around tables, or across the ceiling for maximum sparkle. The blue and silver combo screams “Elsa approved” without being too try-hard. Drape them loosely for that elegant, ice-castle vibe rather than wrapping them tight like you’re gift-wrapping a present.
Use fishing line to attach tinsel to walls and corners. This keeps everything invisible so the garlands appear to float. Aim for garlands that are 6-8 feet long for good coverage.
Mix different tinsel widths for dimension and interest. Layer thin strands with thicker ones. Your frozen kingdom suddenly feels way more legit. Guests will absolutely lose it.
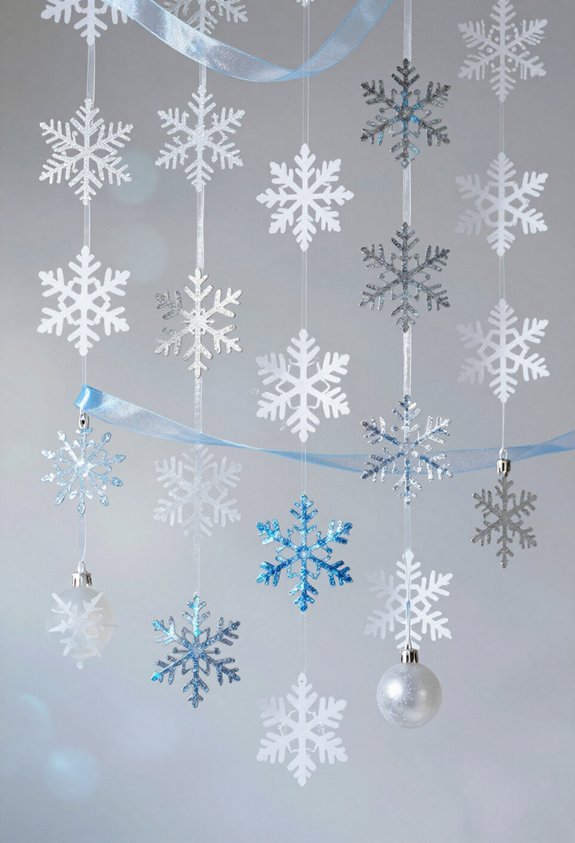
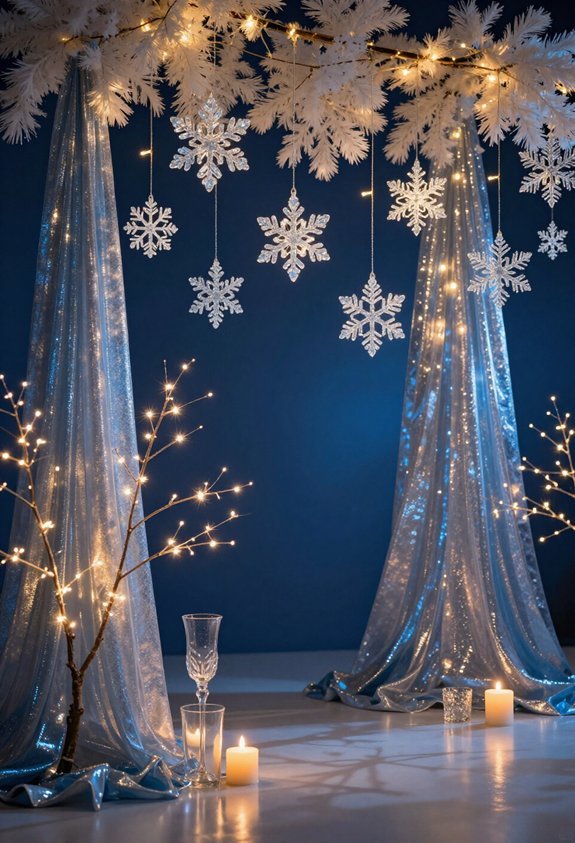
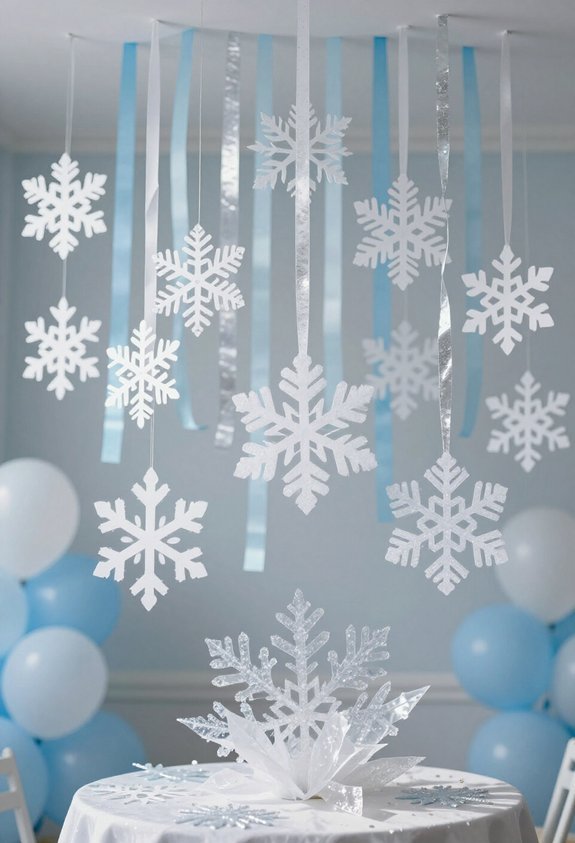
Icicle Hanging Decorations
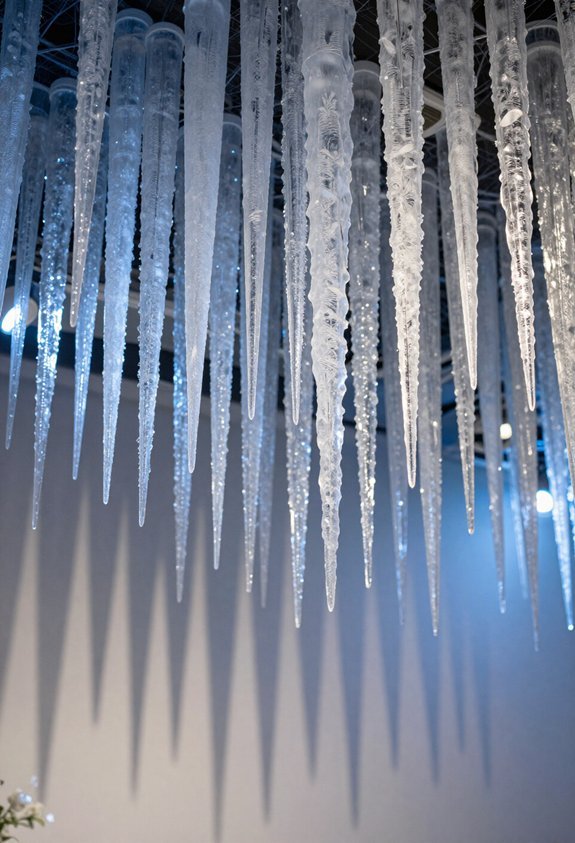
Icicle hanging decorations are basically the cherry on top of any frozen party—except they’re icy and way less messy. These dangly beauties come in long strands, usually 3 to 4 feet long, and they seriously transform a boring ceiling into a winter wonderland. Just string them up around doorways, windows, or across the ceiling and watch guests lose their minds. Blue and white ones look absolutely magical when paired with those silver tinsel garlands mentioned earlier. The best part? They catch light like actual ice crystals, making everything sparkle without anyone needing to shovel snow indoors. Hanging them’s easy too—just grab some clear fishing line or thumbtacks, and you’re golden. They’re affordable, reusable, and way cooler than trying to create real icicles (which would definitely melt all over your cake).
Elsa and Anna Character Cutouts
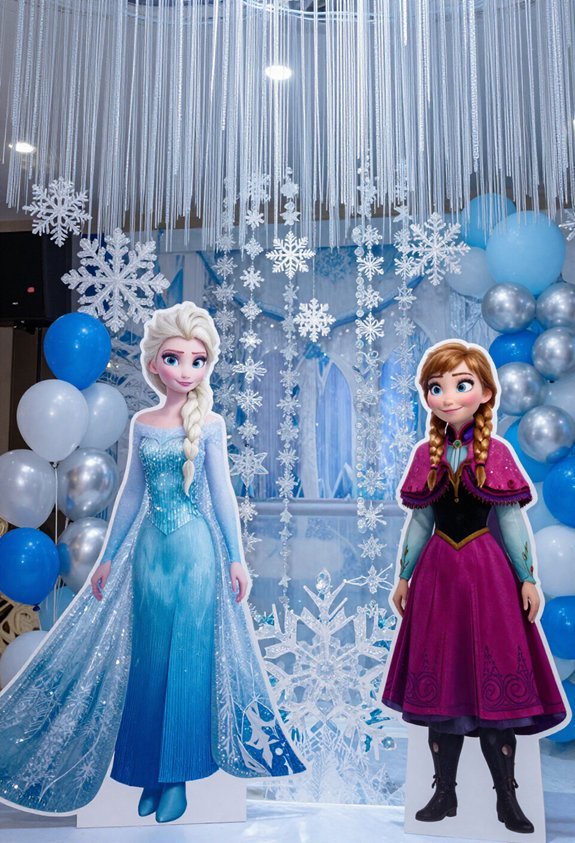
If life-size cardboard versions of Disney royalty sound like your jam, then character cutouts are basically mandatory for any Frozen bash. These six-foot-tall Elsa and Anna standees will make your party space feel like Arendelle itself. Elsa’s icy blue dress practically glows against any backdrop, while Anna’s red hair pops like a neon sign. Position them near the entrance and guests will literally stop in their tracks. Kids love posing next to their favorites for photos, and honestly, adults do too. You can dress them up with real scarves or props for extra hilarity. The cardboard versions won’t judge your party planning skills either, which is invigorating. They’re durable, reusable, and cost way less than hiring actual royalty.
Frozen-Themed Tablecloths and Runners
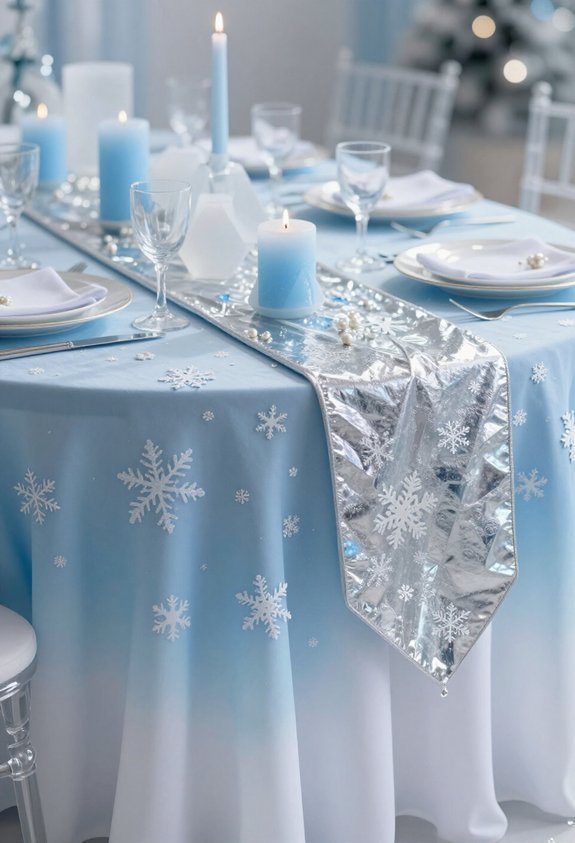
The table itself is basically a blank canvas just waiting for some serious Frozen flair. Tablecloths in icy blues and pristine whites transform any dining surface into Arendelle’s frozen landscape. Layer a shimmering blue cloth underneath with a white runner down the middle for that snowy mountain effect. Add silver snowflake patterns or go full glitter if nobody’s worried about sparkly mess (spoiler: everyone will be). These fabrics aren’t just pretty either—they hide spills from cake-eating chaos and sticky fingers. Position snowflake cutouts along the runner’s edges for extra pizzazz. The best part? These tablecloths cost way less than hiring actual ice sculptors, and they won’t melt during the party. Your table becomes a winter wonderland without the frostbite risk.
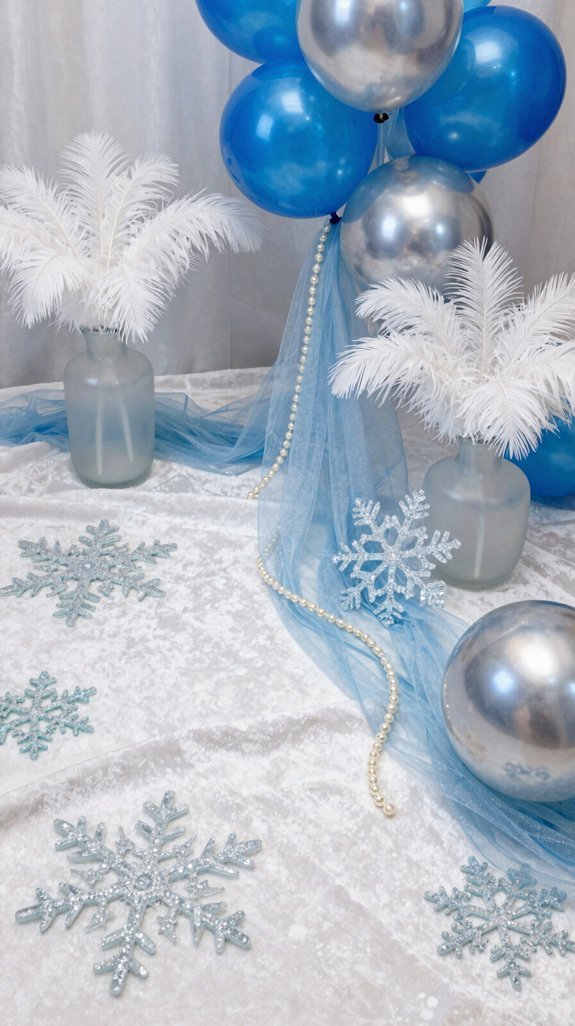
Frozen Winter Wonderland Centerpieces
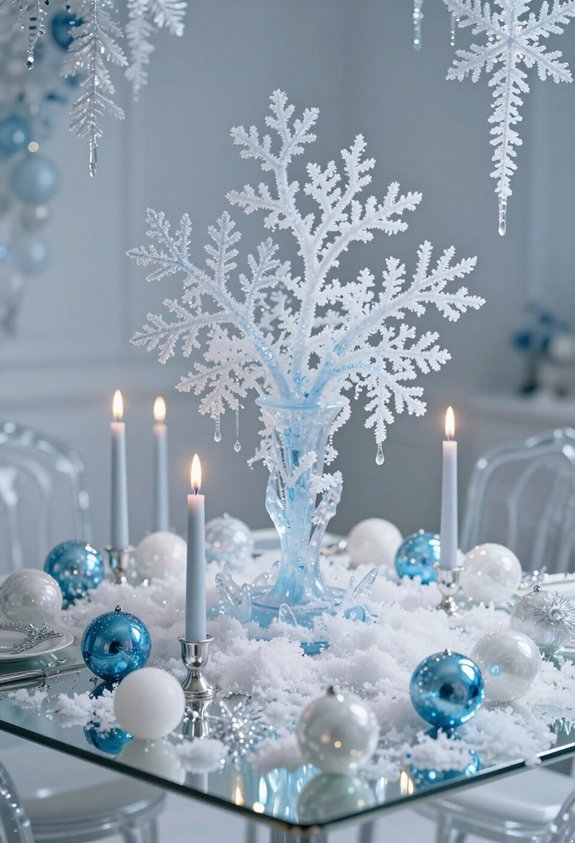
Once the table is dressed up fancy, it’s time to give those centerpieces some serious star power. Think big, sparkly, and totally frozen over. A 12-inch tall vase filled with white and light blue flowers works wonders. Toss in some fake snow and silver branches, and boom—instant Winter Wonderland. Add battery-operated string lights (the ones that won’t melt anything) for extra pizzazz. Scatter some plastic snowflakes and ice-blue candles around the base. Silver and white ornaments create dimension without taking up much space. For a budget-friendly hack, fill clear jars with shredded white tissue paper and frozen-colored ribbons. The magic? These centerpieces look way fancier than they actually are. Your guests will think you hired a professional decorator instead of just raiding craft stores like a sensible person.
Cake Table Backdrop With Crown Centerpieces and Snowflake Scatter
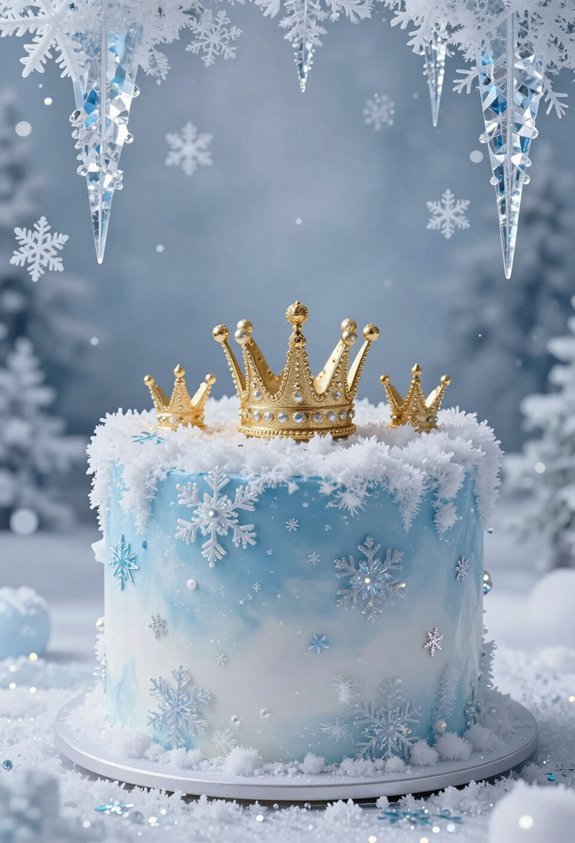
Your cake table deserves its own red-carpet moment, and a killer backdrop is basically the celebrity it needs. Think shimmering blue and white fabric draped behind the cake, creating an icy palace vibe that screams “Elsa approved.” Layer it with oversized snowflake cutouts in silver and white for maximum sparkle. Add crown centerpieces flanking the cake—gold or silver plastic crowns work perfectly and cost less than actual royalty. Scatter smaller snowflakes across the table surface, mixing sizes for visual interest. Position white pillar candles around the base for subtle glow without melting anything (besides hearts). This setup transforms an ordinary dessert table into a frozen throne room where the cake becomes the undisputed queen. Your guests will be absolutely frozen with awe.
Sequined Tablescapes in Blue and Silver
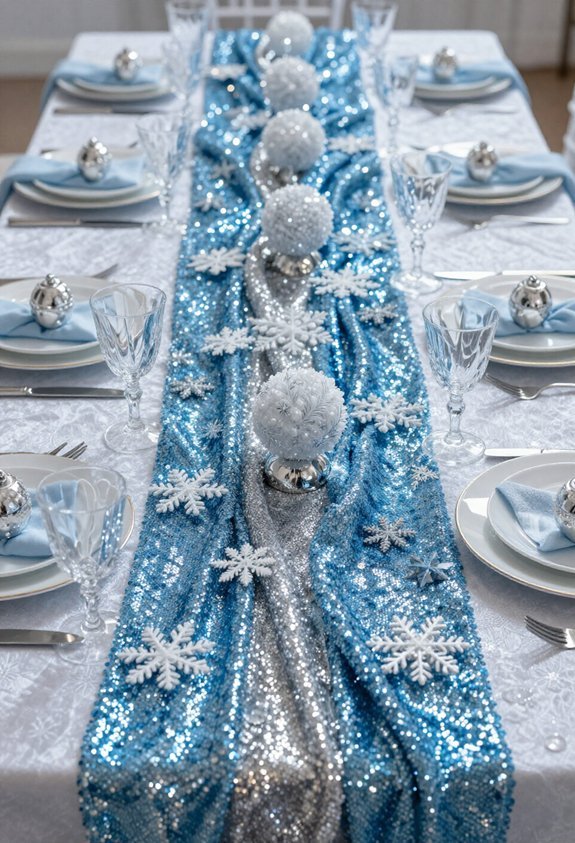
While the cake table steals the spotlight, the dining tables deserve some serious shimmer too. Sequined tablecloths in blue and silver transform ordinary dinner spreads into ice palace magic. Layer a silver sequined base cloth with blue runners down the center for extra pizzazz. Scatter loose sequins across the table like edible glitter that won’t make anyone sneeze. Place white plates and blue napkins on top for contrast that really pops. Add silver chargers underneath to catch the light and make everything sparkle like Elsa just blessed your buffet. Small blue and white candles in silver holders complete the frosty vibe. String fairy lights underneath the table edges so it literally glows. Your guests will feel fancy, and honestly, who doesn’t want to eat dinner while sitting at a shimmering ice rink?
Framed Movie Posters and Scene Stills as Wall Features
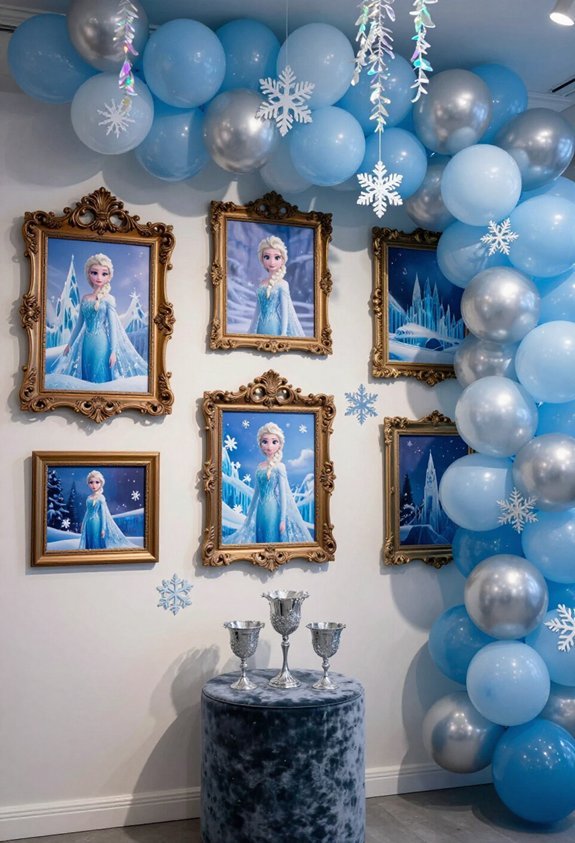
Every Frozen party needs its walls to tell a story, and framed movie posters and scene stills do exactly that. Grab some poster-sized prints (24 by 36 inches work great) featuring Elsa belting out “Let It Go” or Anna’s goofy grin. Frame them in silver or white frames to match that icy theme. Hang them at eye level, spacing them about three feet apart around the room. Mix in smaller scene stills showing Olaf being, well, Olaf—which basically means causing hilarious chaos. The blue and white color palette from your tablescapes will tie everything together perfectly. Your walls transform from boring to totally frozen-tastic. Guests will feel like they’ve stepped right into Arendelle itself, which honestly beats most actual vacations.
Castle-Inspired Entrance Archway
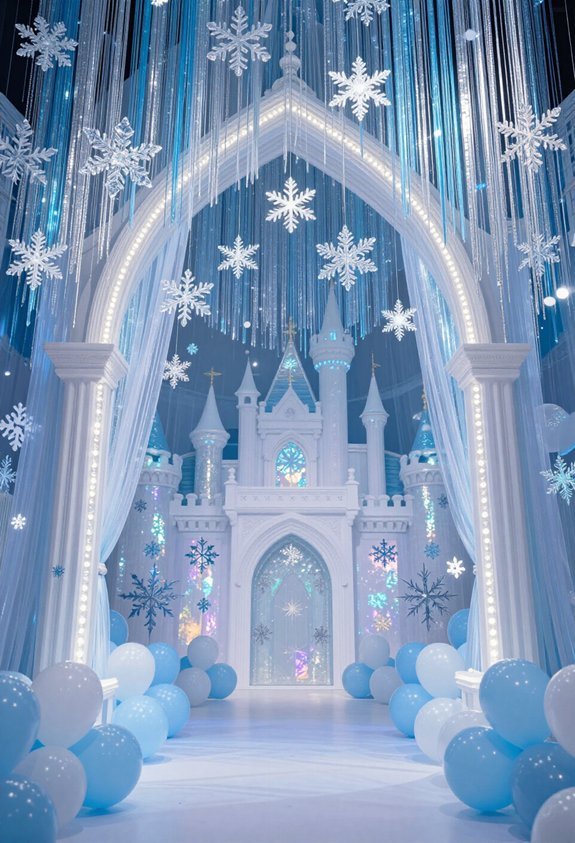
Once those walls are looking seriously magical, it’s time to create an entrance that’ll make guests gasp before they even step foot inside. A castle-inspired archway does exactly that. Think tall and dramatic—aim for at least seven feet high using PVC pipes or foam boards painted icy blue and silver. Drape white tulle and shimmery fabric around the frame for that frozen-palace vibe. Add cardboard turrets on each side, painted with glittery details and crenellations (fancy castle teeth, basically). String cool-white LED lights along the arch’s edges. Position cardboard snowflakes or icicles dangling from the top. Guests won’t know whether to applaud or bow. This entrance basically screams “You’ve entered Arendelle,” and honestly, that’s the whole point.
Winter Scene Backdrop for Photo Ops
No party is complete without a picture-perfect moment, and a winter scene backdrop delivers exactly that. Think white bedsheets, fluffy cotton balls, and glitter galore—basically a snowstorm in cardboard form. Hang it behind a table measuring about 8 feet wide and 6 feet tall, positioned against the main wall. Guests will freeze in place (pun intended) for photos. Add some cardboard snowflakes, icicle garlands, and maybe a stuffed polar bear or two. String blue and white lights around the edges for that authentic frozen vibe. The best part? Kids will actually want their pictures taken instead of running away like they’re allergic to cameras. Your phone’s storage will thank you, and parents will lose their minds over these gems.
Snowflake Confetti and Table Scatter
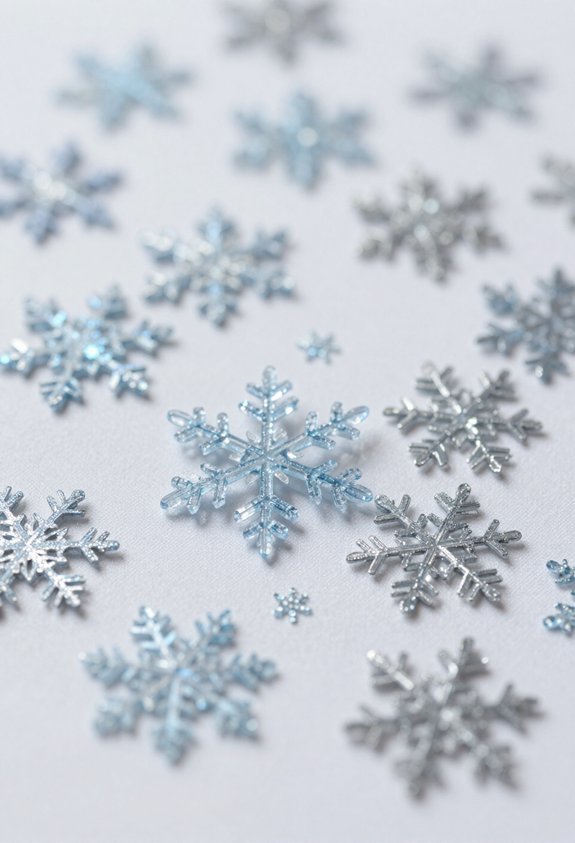
Snowflake confetti transforms any table from boring to magical in about thirty seconds flat. Sprinkle the white and silver sparkly bits across blue tablecloths and watch guests’ eyes light up. Pro tip: scatter them before people sit down, unless you enjoy confetti flying everywhere when someone sneezes.
Mix different snowflake sizes for extra pizzazz. Large cardboard cutouts anchored with tape create dramatic focal points, while tiny metallic flakes catch light beautifully. Place them in deliberate clusters rather than random handfuls for sophisticated flair.
Clear vases filled with snowflakes and fake snow work wonderfully as centerpieces. Freeze fake snowflakes inside clear balloons for floating decorations that won’t blow away mid-party. The result? A winter wonderland that screams “Frozen” without anyone needing to ask.
Table Place Cards With Snowflake Designs
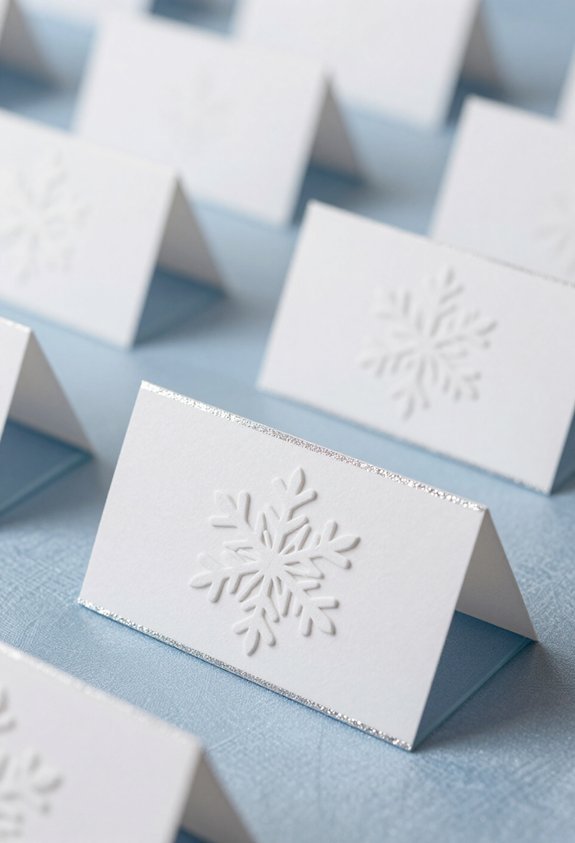
Position them about three inches above each plate for maximum impact. Add a sprinkle of glitter for extra pizzazz and watch kids’ eyes light up like they’ve never seen sparkles before.
You can also fold cardstock into tent shapes and tape snowflakes on front. Pro tip: laminate them so they survive inevitable spilled juice. Your guests will feel like royalty dining at Queen Elsa’s actual table.
Crown Props and Tiara Centerpieces
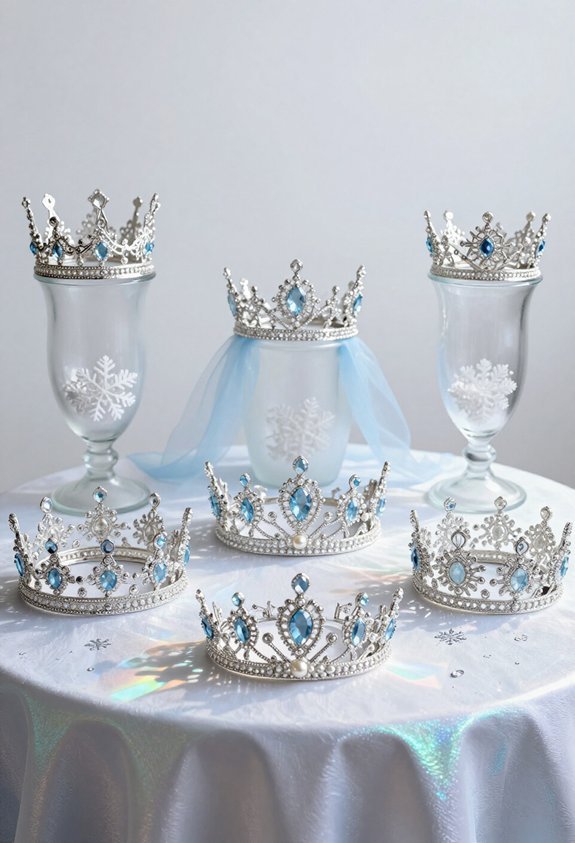
Every Frozen party needs crowns and tiaras because nothing says “ice queen energy” like a plastic headpiece that makes guests feel like actual royalty. The best part? Kids will wear them all day without complaining, which is basically a miracle.
Grab some plastic tiaras from the dollar store and spray-paint them silver or icy blue. They cost about two dollars each and look surprisingly fancy. Position them on the dessert table as centerpieces among white and light blue decorations.
Make DIY paper crowns using construction paper and glitter for a personal touch. Cut triangles, tape them into circles, and let kids decorate. These props work perfectly for photos and make everyone feel like Elsa’s trusted advisors.
Crown prop stations let guests choose their favorite before cake arrives. Nobody’s too cool for a tiara.
Frozen Party Banner and Bunting
Once the crown-wearing festivities are in full swing, it’s time to make the whole room scream “Arendelle” with banners and bunting that actually look like they belong in an ice palace. Hang 12-foot paper banner strips across doorways spelling out “LET IT GO” in bold blue letters. String white and icy-blue bunting along walls and ceilings, creating a snowflake-covered atmosphere without the actual melting disaster. Mix in silver snowflake cutouts dangling at different heights—they’re basically decoration that floats without trying too hard.
Position large cardboard snowflakes (18 inches wide) in corners and above the dessert table. Layer tissue paper bunting in light blue, white, and silver for maximum frozen vibes. The effect transforms ordinary living rooms into something legitimately magical, minus Elsa’s attitude problem.
Cotton Ball Snow Effect Decorations
Cotton balls are basically nature’s gift to lazy decorators everywhere. They’re fluffy, white, and require zero artistic talent to use. Simply grab a bag from the drugstore and start gluing them onto walls, doorways, and tables to create instant snow drifts. The effect? Pure winter magic without the frostbite.
Layer cotton balls at different heights around the party space. Stick them to blue tablecloths for an icy backdrop. String them from the ceiling using clear fishing line so they appear to float like actual snowflakes. Guests will genuinely think it snowed indoors.
The best part? Cotton balls cost about three dollars and look surprisingly fancy. Nobody needs to know decorating took fifteen minutes. Frozen parties suddenly feel fancy and elaborate, but honestly, it’s just fluff doing the heavy lifting here.
Pathway and Aisle Decorations With Icy Accents
While cotton balls handle the overhead snow situation, the ground deserves some icy love too. Line pathways with white string lights twisted around blue tulle fabric. This creates a frozen corridor that screams elegance without screaming your budget into oblivion. Sprinkle iridescent confetti every two feet for extra sparkle. Clear plastic sheeting works amazingly well as a faux-ice walkway. Just warn guests not to slip—nobody wants a birthday party incident report. Place battery-operated LED candles in blue glass holders along the sides. They won’t set anything ablaze and look absolutely magical. String paper snowflakes from the ceiling above the aisle at varying heights. This gives the illusion of falling snow without the wet socks situation. The result? A pathway that looks genuinely frozen and impressively Pinterest-worthy.
Budget-Friendly Paper Chain Snowflakes
Transform plain white paper into magical snowflakes that cost basically nothing. Cut standard 8.5-by-11-inch paper into strips about one inch wide. Link them together with glue or tape, forming loops. Then chain those loops into bigger loops. Keep going until party guests think actual snow fell indoors.
The beauty? Zero skill required. Crooked snowflakes look authentically frozen anyway. Hang these paper chains from the ceiling, drape them across doorways, or string them along tables. White paper chains photograph incredibly well against blue Frozen-themed backdrops.
Want extra pizzazz? Spray-paint some chains silver or light blue before assembling. Mix glitter into the glue for sparkle without breaking the budget. Kids can help create them, which means free entertainment and cheap labor. Everyone wins.
Last-Minute Frozen Decorations Under $50
Sometimes party planning happens at the last second, and that’s totally okay. Frozen decorations don’t require fancy stores or deep pockets. Grab blue and white streamers from the dollar store and twist them into icy columns around doorways. Cut snowflake shapes from white printer paper—yes, regular paper works great. Tape them to windows and walls for instant winter vibes. Fill clear cups with blue food coloring and water, arranging them on tables like magical ice chunks. String white fairy lights in corners because nothing screams “frozen kingdom” like twinkling bulbs. Printable Elsa posters cost nothing online. Drape white bedsheets over furniture for snowy landscapes. Boom—you’ve created an enchanted winter wonderland without spending more than fifty dollars or losing your mind completely.
Frequently Asked Questions
How Do I Create a DIY Frozen Cake Topper Without Buying Expensive Pre-Made Decorations?
One can create a DIY Frozen cake topper by printing character images, laminating them for durability, and attaching them to wooden dowels or popsicle sticks. Alternatively, one might craft fondant figures or use colored cardstock to fashion snowflake designs and character silhouettes for personalized decoration.
What’s the Best Way to Hang Heavy Balloon Columns Safely Without Damaging Walls?
One can secure balloon columns using weighted bases or sandbags rather than wall attachment. Command hooks rated for appropriate weight, fishing line, or ceiling-mounted tracks offer damage-free alternatives. PVC pipe stands provide sturdy freestanding support without requiring wall contact.
How Can I Make Decorations Last Longer in Warm Indoor Party Venues?
One should store decorations in climate-controlled areas until final setup. Using adhesive gel, fishing line, and sturdy anchors prevents wilting. Keeping balloons away from direct heat sources and using air conditioning strategically extends their lifespan greatly throughout the event.
Where Should I Position Decorations for Optimal Visibility From All Party Areas?
Decorations should be placed at elevated heights on walls and ceilings, positioned at room corners, and arranged symmetrically around the main party area. This guarantees guests viewing from any location can appreciate the entire display without obstruction.
How Do I Safely Use Dry Ice or Fog Effects With Frozen Decorations?
One should use dry ice in ventilated containers away from children and decorations. Fog machines require proper spacing from flammable materials. Always follow manufacturer safety guidelines and never allow direct contact with dry ice or hot equipment.
Conclusion
Creating a magical Frozen party doesn’t require emptying your wallet or losing your mind. Mix budget-friendly paper snowflakes with twinkling lights, and suddenly your backyard looks like Elsa’s ice palace (minus the actual freezing). Throw up some blue balloons, hang some garlands, and boom—instant winter wonderland. Your kid’s guests will be so amazed they’ll forget to ask where the bathroom is. That’s the real magic right there.

