Store-bought party decorations are fine, but there is something genuinely satisfying about walking into a room you decorated yourself and watching people ask where you got everything.
DIY birthday decorations are not just about saving money, although that is a real bonus. They are about making the celebration feel like it was made specifically for that person rather than pulled off a shelf.
I have spent more Saturday afternoons than I can count hot gluing things together at my kitchen table the night before a party. Some projects were disasters, but most turned out better than anything I could have bought.
Start Here Before You Start Crafting
Before you commit to a project, think honestly about how much time you actually have.
Some of these ideas take 20 minutes. Others need a full afternoon plus drying time overnight.
Pick two or three projects that fit your timeline comfortably rather than attempting everything and finishing nothing. A couple of well-executed DIY pieces always look better than a room full of half-finished ones.
30 DIY Birthday Party Decoration Ideas
DIY decorations work best when you lean into what makes them special, which is the personal touch that no store-bought version can replicate.
Every idea below uses materials that are easy to find, budget friendly, and adaptable to almost any birthday theme or color scheme.
Start with the ones that excite you most and go from there.
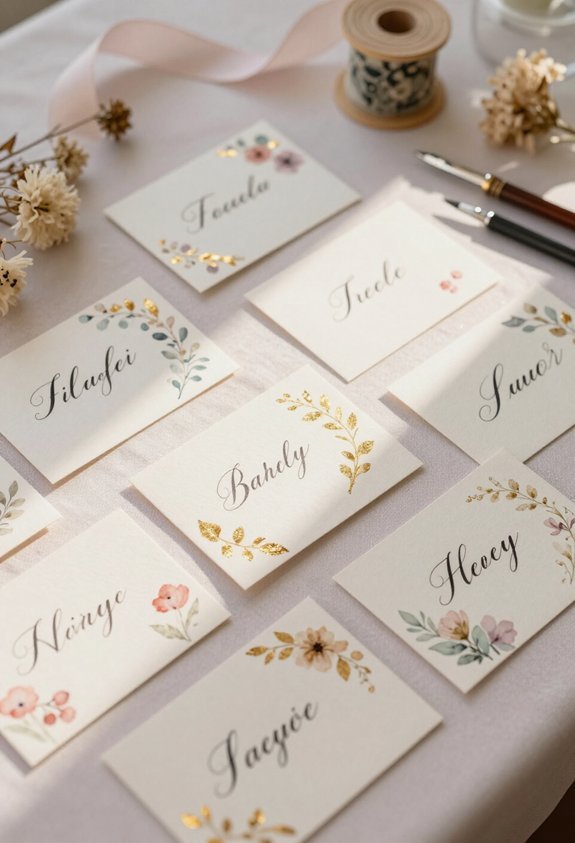
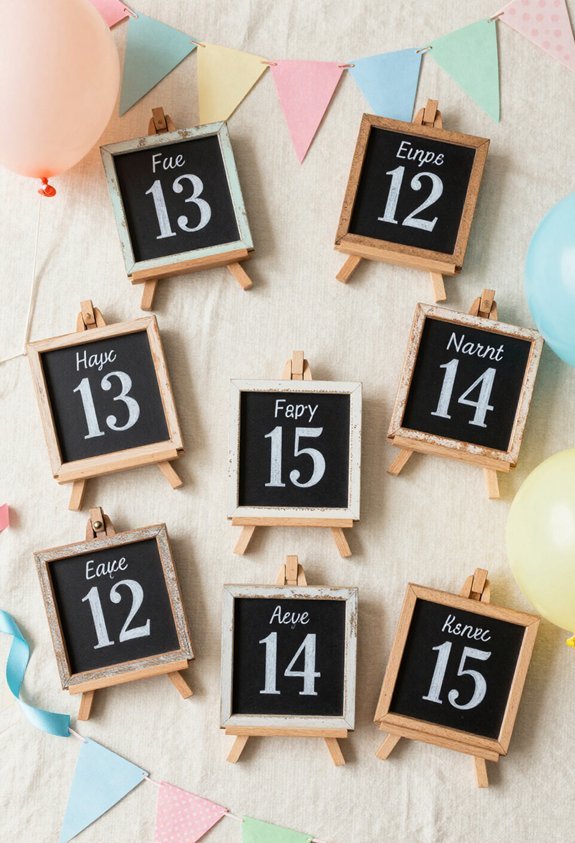
Design Personalized Seating Cards
Now that the banner is hanging in all its hand-lettered glory, it’s time to make sure guests actually sit in the right spots. Nobody wants awkward shuffling or Uncle Bob claiming the best seat.
Cut cardstock into 3-by-4-inch rectangles and write each guest’s name with colorful markers. Add silly doodles—cupcakes, confetti, tiny faces. Prop them against water glasses or tuck them into napkin folds.
Want fancier cards? Fold cardstock in half for a tent shape. Decorate both sides and position them where people can’t miss their names. Use metallic pens, stickers, or watercolor washes.
The real magic happens when guests see their personalized cards. They’ll feel special, not randomly assigned. Plus, assigned seating prevents food feuds and bathroom-break chaos. Everyone wins.
Also read: 21 First Birthday Themes for Baby Boys
Create Custom Drink Labels
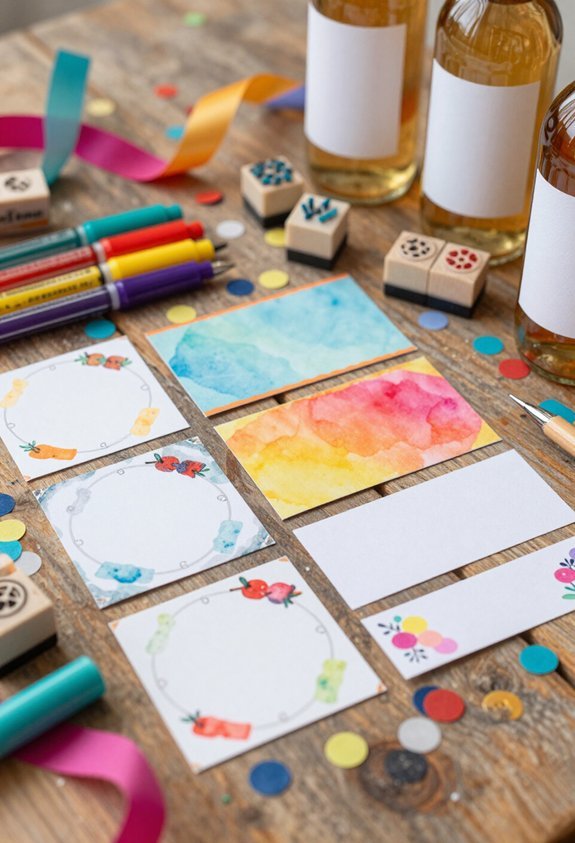
Custom drink labels transform boring cups into funny, themed masterpieces that make guests laugh and actually remember which drink is theirs. Creating these silly tags takes just cardstock, markers, and tape. Cut rectangles roughly 2 by 3 inches and decorate them with hilarious names like “Unicorn Juice” or “Suspicious Punch.”
Add stick-figure drawings, emoji doodles, or pun-based humor. Wrap each label around cups with clear tape and watch guests giggle every time they grab a drink.
The best part? They’re cheap and super easy. Even terrible artists succeed here—stick figures are encouraged. These labels prevent the awkward “whose cup is this?” moment while adding personality to the whole party. Your friends will absolutely love the goofy creativity.
Build a Custom “30” Number Backdrop
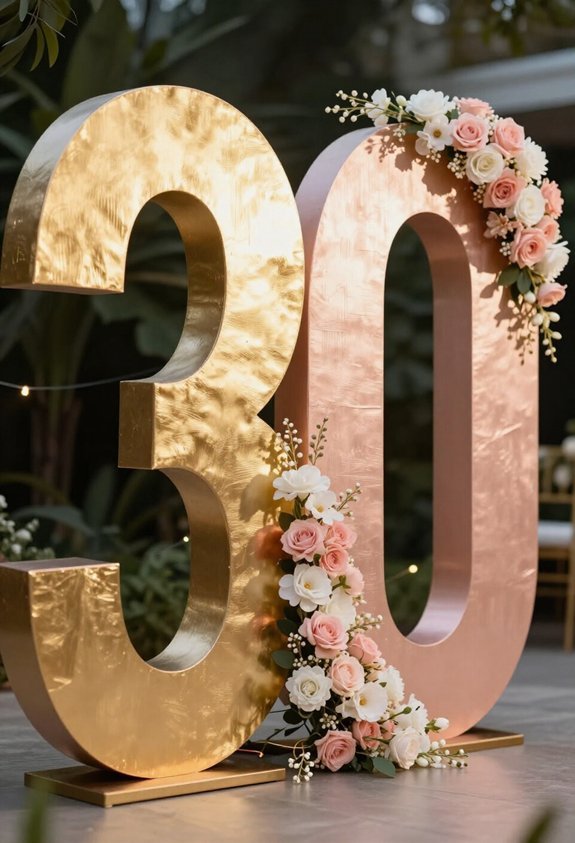
Prop the numbers against a wall using wooden supports behind them. Add string lights around the edges for extra pizzazz. Guests will absolutely love taking photos in front of this ridiculous masterpiece.
Want more flair? Glue on metallic confetti or stick colorful streamers between the numbers. Fill the space with balloons in coordinating colors. The result? An Instagram-worthy backdrop that celebrates getting older without actually reminding anyone about their creaky joints and early bedtimes.
Create a Photo Timeline Wall
Why settle for just one fabulous backdrop when guests can take a trip down memory lane instead? A photo timeline wall transforms any party space into a hilarious journey through the birthday person’s life. Simply string a clothesline across 8-10 feet of wall space and clip photos chronologically from baby pics to present day.
Include embarrassing childhood photos—the kind with questionable haircuts and missing teeth—because nothing says “happy birthday” like public humiliation.
Add colorful paper labels below each photo with funny captions or birth year dates. Guests love laughing at those awkward phases everyone experienced. The wall becomes an instant conversation starter and memory-filled masterpiece. Plus, it beats staring at blank walls while pretending cake tastes amazing.
Hang a Polaroid Photo String
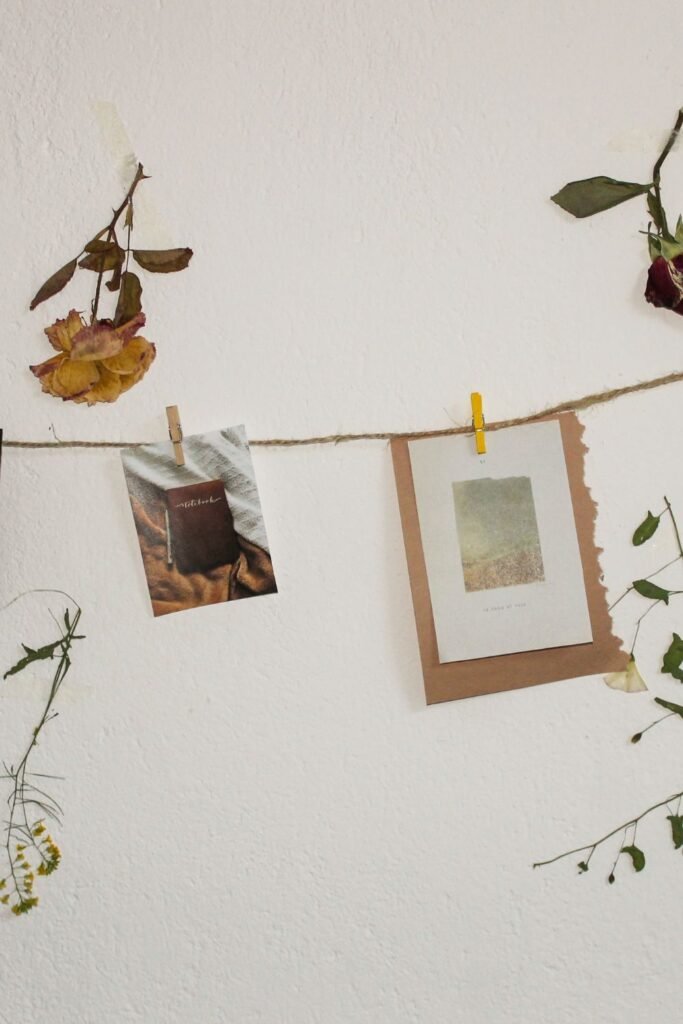
If a photo timeline wall feels too permanent and serious, a Polaroid photo string offers instant charm with zero commitment. Grab some twine, fishing line, or colorful ribbon and stretch it across a wall or corner. Clip Polaroid-style photos using tiny clothespins, tape, or adhesive putty.
The beauty? Photos can be rearranged endlessly without guilt or nail holes. Mix actual Polaroids with printed Instagram photos for a nostalgic vibe. Arrange them chronologically or randomly—there’s no wrong way. Add small decorations like dried flowers, confetti, or mini balloons between photos.
The string creates movement and personality, making guests smile while admiring memories. It’s casual, flexible, and way less intimidating than a permanent wall installation. Plus, nobody judges your photo choices when they’re dangling casually overhead.
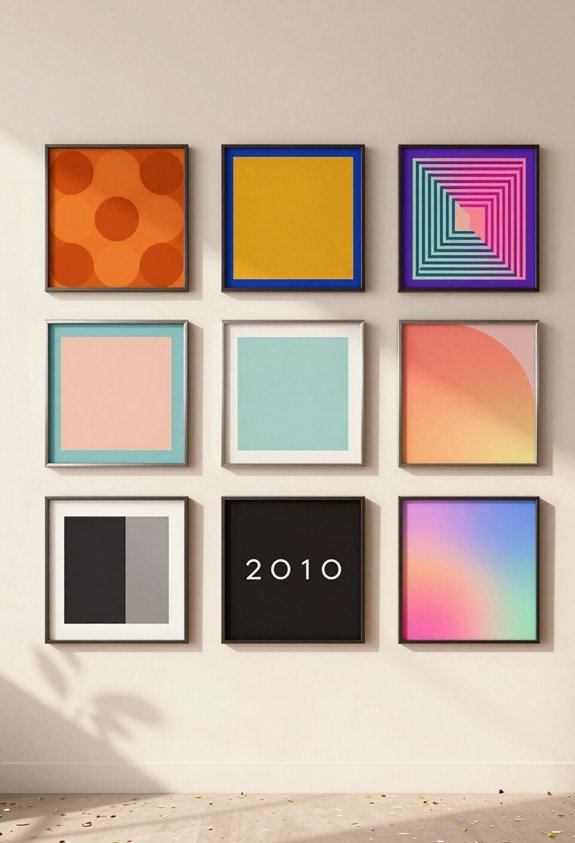
Build a Gallery Wall With Vintage Frames
A gallery wall with vintage frames takes the casual vibe of a photo string and cranks it up to eleven. This approach screams “I have my life together,” even if you don’t.
Hunt thrift stores for mismatched frames in gold, silver, and wood tones. Mix sizes—think 5x7s with 8x10s—for visual interest. Arrange them on the wall first using painter’s tape to avoid holes everywhere (your security deposit will thank you).
Fill frames with photos, funny quotes, or colorful paper. Leave some frames empty for mysterious, artsy vibes. Space them about 2-3 inches apart for balance.
The beauty? Gallery walls look intentional and impressive while actually being forgiving. Off by an inch? Nobody notices. Your guests will just think you’re fancy.
Install a Paper Flower Wall

Paper flowers transform a plain wall into an Instagram-worthy masterpiece without requiring a green thumb or actual gardening skills. Guests will think someone actually spent hours gardening instead of crafting in pajamas. Create flowers by layering colored tissue paper or coffee filters in circles. Stack them, crumple slightly for texture, and secure with hot glue—no green thumb needed, just hot glue fingers.
Mix sizes from tiny two-inch blooms to dramatic twelve-inch statement flowers. Arrange them across the wall in organic clusters or structured patterns. Blend pinks, purples, creams, and greens for visual impact. Position the biggest flowers at eye level for maximum wow factor. The best part? Paper flowers won’t wilt or require watering. Just pure, immortal, zero-maintenance beauty that makes everyone look like a creative genius.
Build a Crepe Paper Backdrop
Transform a blank backdrop into an eye-catching photo booth sensation with crepe paper streamers. Grab rolls in bold colors like hot pink, turquoise, and sunshine yellow.
Tape them horizontally across a wall or cardboard frame, overlapping slightly for that fancy look. Stretch each streamer about eight feet wide for maximum drama. Layer different colors together and crinkle them slightly—nobody said it had to be perfect!
Add some twisted streamers diagonally for pizzazz. Prop a small table in front holding funny signs or props. The whole thing takes thirty minutes, costs under twenty bucks, and makes guests feel like celebrities. Photos against this backdrop turn hilariously gorgeous. It’s basically magic with glitter and tape.
Arrange Flowers Around Milestone Numbers
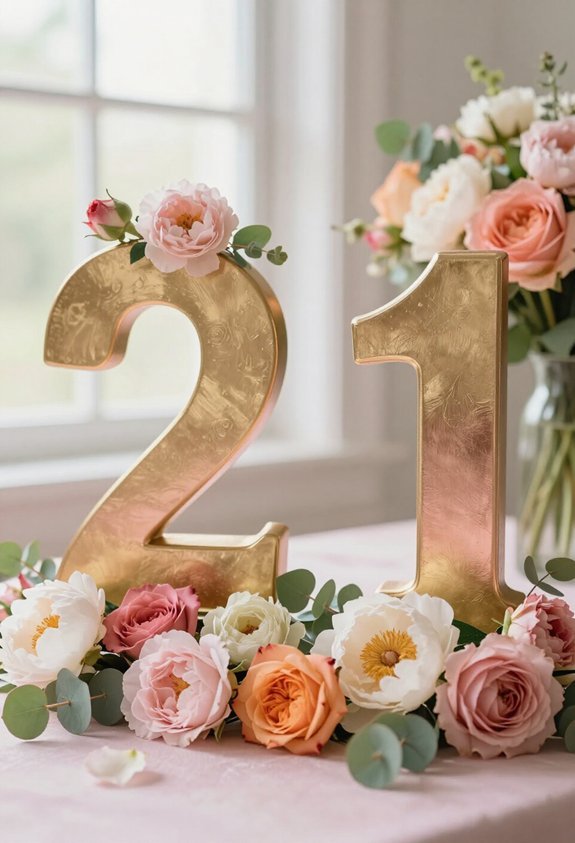
When someone turns twenty-one or hits their golden birthday, numbers deserve the spotlight too. Giant cardboard digits work brilliantly for this trick. Grab a 2-foot-tall “3” and “0” for milestone birthdays, then go flower-crazy around them.
Arrange blooms in clusters of three to five flowers per number. Pink roses, purple tulips, and white daisies create stunning contrast against plain numbers. Tuck flowers into floral foam, secured with tape to prevent embarrassing topples mid-party.
Position these beauties as a photo booth backdrop or centerpiece. The birthday person will feel like royalty when surrounded by gorgeous flowers and their special age. Plus, guests can’t resist snapping pictures with oversized numbers decorated like botanical masterpieces. It’s surprisingly simple but looks absolutely professional.
Dip Glassware in Metallic Paint
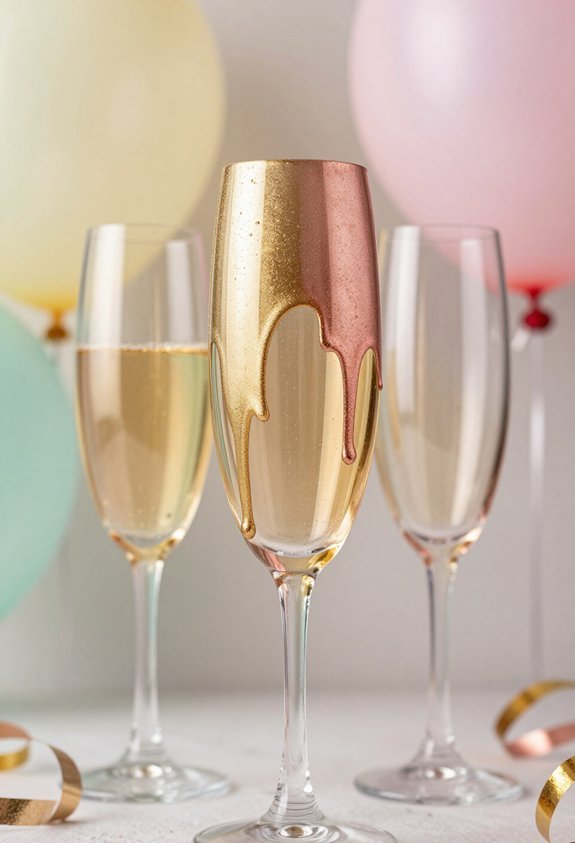
Flowers and numbers steal the spotlight, but glassware deserves some pizzazz too. Dipping cups and glasses in metallic paint transforms boring drinkware into fancy-pants party magic. Grab some gold, silver, or rose gold acrylic paint and pour it into a shallow bowl.
Hold each glass by the rim and dunk the bottom half into the shimmering goodness. Let gravity do the heavy lifting while the paint coats evenly.
Rotate gently for complete coverage, then place them upside-down on parchment paper to dry. The metallic sheen catches light beautifully and makes guests feel like royalty. Plus, nobody will accidentally mistake your cousin’s drink for theirs anymore. These sparkly vessels elevate any birthday bash from “meh” to “magnificent” without breaking the bank.
Repurpose Wine Bottles as Candle Holders
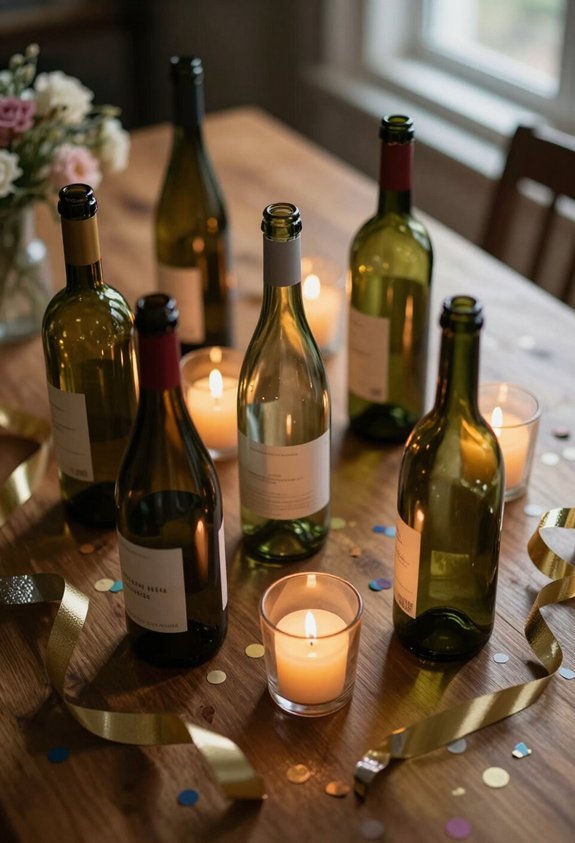
Empty wine bottles are basically fancy vases just waiting for a second act. Grab some empties and let them shine as candle holders. First, clean those bottles thoroughly—no mysterious residue allowed. Drop a pillar candle inside, and boom: instant elegance. The glass glows beautifully when lit, casting warm amber light everywhere. For extra pizzazz, wrap twine or ribbon around the neck in gold or silver.
These holders cost basically nothing but look expensive. Group three bottles together at varying heights for maximum drama. The flickering light dances through the glass, creating moody vibes that scream “I’m fancy.” Wine bottles transform from trash to treasure in seconds flat. Your guests will assume you spent actual money here.
Set Up a Confetti Bar Centerpiece
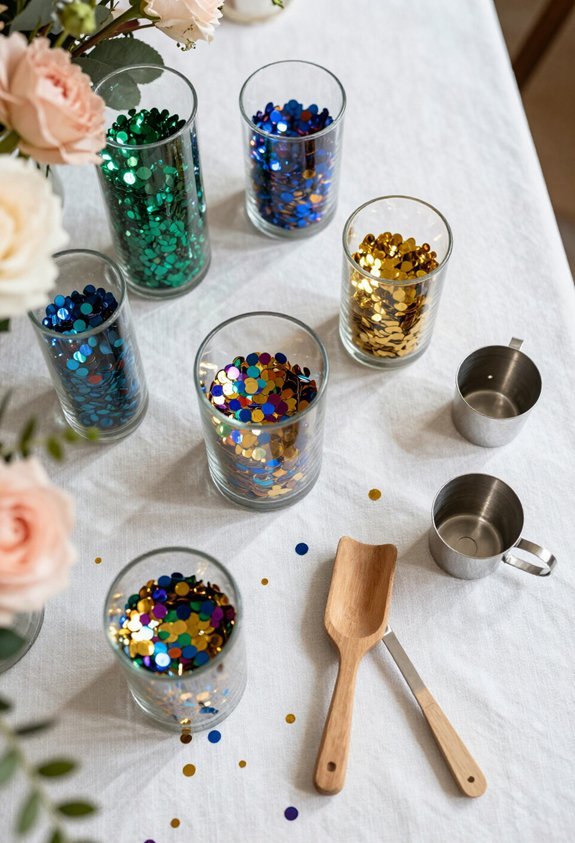
While glowing wine bottles handle the mood lighting, a confetti bar centerpiece brings the actual party energy to the table. Grab a clear glass vase or mason jar and fill it halfway with colorful confetti in bold shades like hot pink, gold, and electric blue. Add some ribbons and tissue paper for extra pizzazz.
Set small bowls around the base filled with additional confetti packets so guests can grab handfuls and toss them whenever the moment feels right—basically giving everyone permission to make a beautiful mess.
Position the centerpiece in the middle of the table where it catches light and demands attention. It’s basically bottled happiness that won’t blow away mid-sneeze. Your guests will love the interactive element and Instagram-worthy setup.
Display Vinyl Records as Tabletop Art
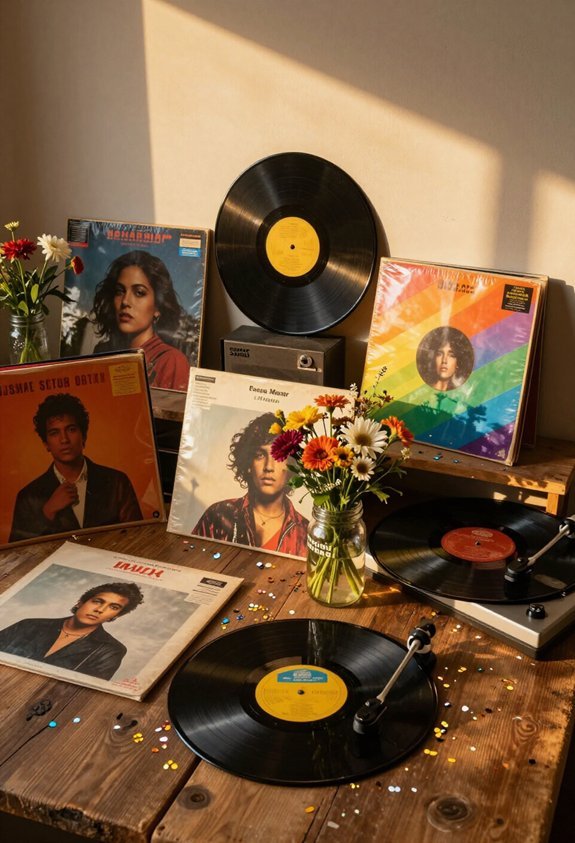
Vinyl records aren’t just for spinning on a turntable anymore—they’re basically colorful art discs that make tables look infinitely cooler. Grab some old records from thrift stores and lean them against the center of each table.
The album covers pop with wild colors and groovy designs that seriously catch people’s eyes. Stack three to five records together for maximum visual impact, and honestly, nobody’s going to accidentally sit on them because they’re pretty hard to miss.
Mix different sized records around a small potted plant or candle for extra pizzazz. Your guests will think you’re some kind of decoration genius, even though you basically just found some forgotten music and stood it up. That’s the beauty of this hack—it’s effortless and looks absolutely fantastic.
Hang a String Light Canopy
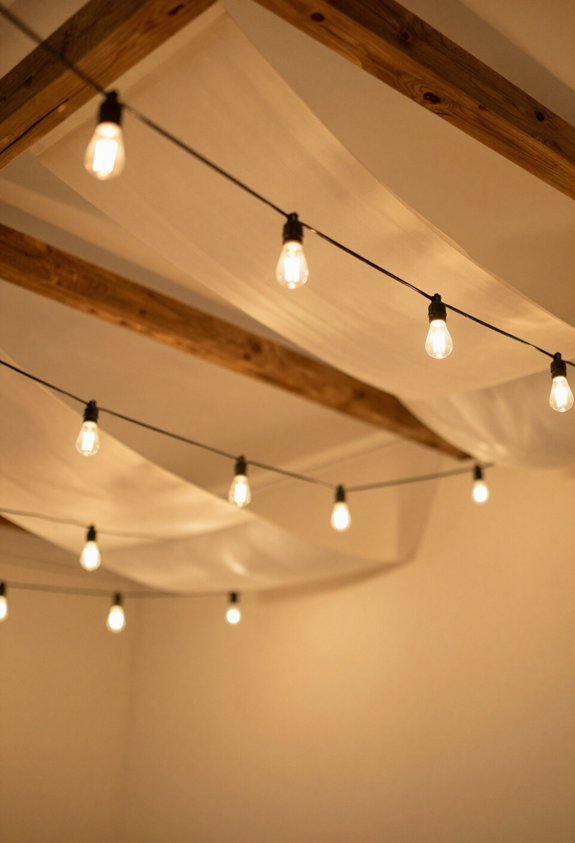
String lights are basically magic wires that turn any party space into an enchanted forest—except way less buggy and infinitely more fun. Draping them overhead creates a dreamy canopy that makes everyone feel like they’re celebrating inside a glowing cloud.
Start by mapping out a grid pattern across the ceiling or outdoor space, spacing bulbs about 12 inches apart. Attach them to hooks, nails, or tape—whatever doesn’t get you in trouble with the landlord. Warm white lights feel cozy and romantic, while colorful ones scream “party animal!”
Mix in some paper lanterns or fabric swags between strings for extra pizzazz. The result? A space so stunning, guests won’t even notice the mysterious stain on the carpet. Pure magic, zero regrets.
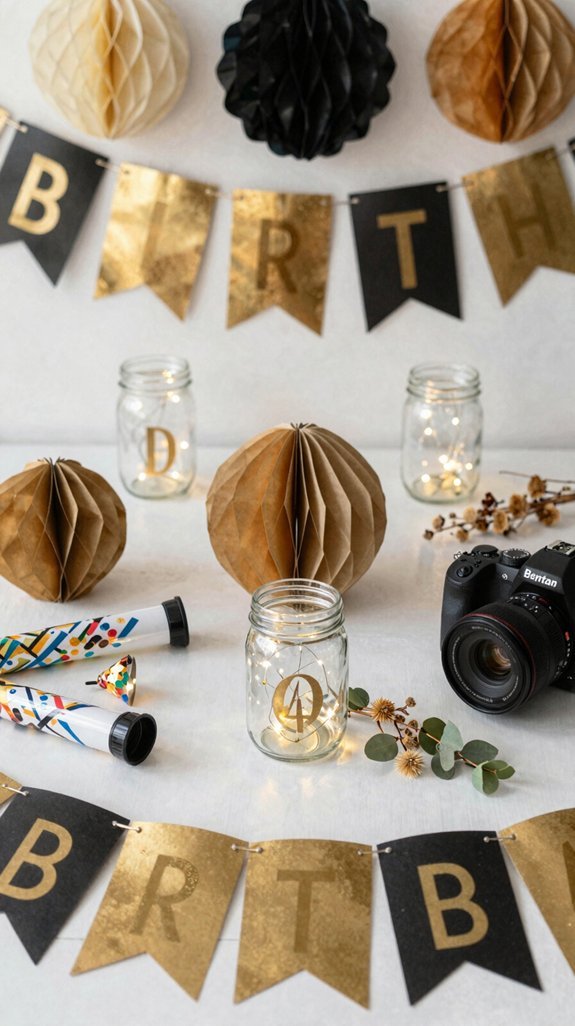
Use Mason Jars as Milestone Lights
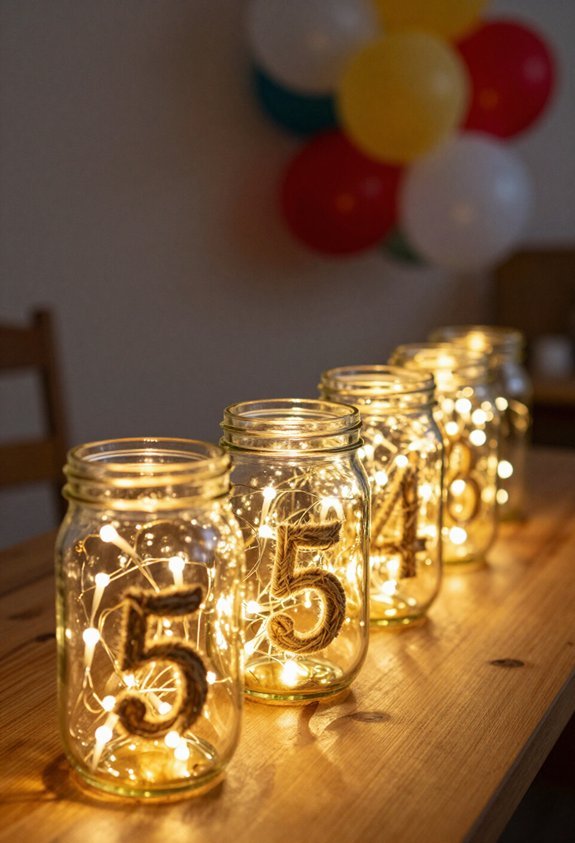
Transform ordinary mason jars into glowing milestones that mark the birthday person’s journey through life. Fill clear quart-sized jars with battery-operated fairy lights and label each one with a memorable year or age.
A five-year-old gets a jar. A ten-year-old gets another. Line them up on tables or shelves, creating a glowing timeline that’s basically a edible-free birthday cake alternative. The warm white lights make everything look fancy without requiring actual cooking skills. Add tissue paper inside for extra color—think pastels or metallics.
These jars won’t melt or attract bugs like real candles do. Guests love reading the funny labels describing ridiculous moments from the birthday person’s past. It’s decoration and storytelling combined. Plus, the jars are reusable, so this craft keeps giving.
Fill Glass Hurricane Holders With Candles

Glass hurricane holders bring the candlelit elegance game to the next level, and they’re way easier than the mason jar route. These tall, cylindrical glass containers are basically fancy candle bodyguards, protecting flames from getting knocked over by rambunctious party guests.
Fill them with pillar candles in cream, soft pink, or warm gold—basically colors that scream “I have my life together.” Arrange several holders down the center of tables or cluster them on shelves for maximum glow-up energy. The beauty? They’re cheap, reusable, and won’t make you question your craft skills.
Pro tip: add some faux flowers or colorful tissue paper around the base for extra pizzazz. These bad boys transform any corner into an instant fancy-pants zone, proving that sometimes elegance doesn’t require actual elbow grease.
Create Milestone Moment Lights
Marking special ages deserves more than just a cake and awkward singing, so why not light up the moment—literally? Milestone moment lights transform any birthday into something memorable and Instagram-worthy.
Grab string lights and spell out the birthday person’s age using wire or cardboard numbers. Position them as a glowing centerpiece on the dessert table. Add battery-operated fairy lights inside clear glass vases for a magical glow.
These lights won’t make anyone sweat—unlike that embarrassing dance circle. Mix warm white bulbs with soft pastels for cozy vibes. Drape lights around doorways or hang them above the gift table. The result? A celebration that literally shines brighter than the birthday person’s hopefully-not-gray hair. Everyone wins when you add light, ambiance, and zero smoke detectors going haywire.
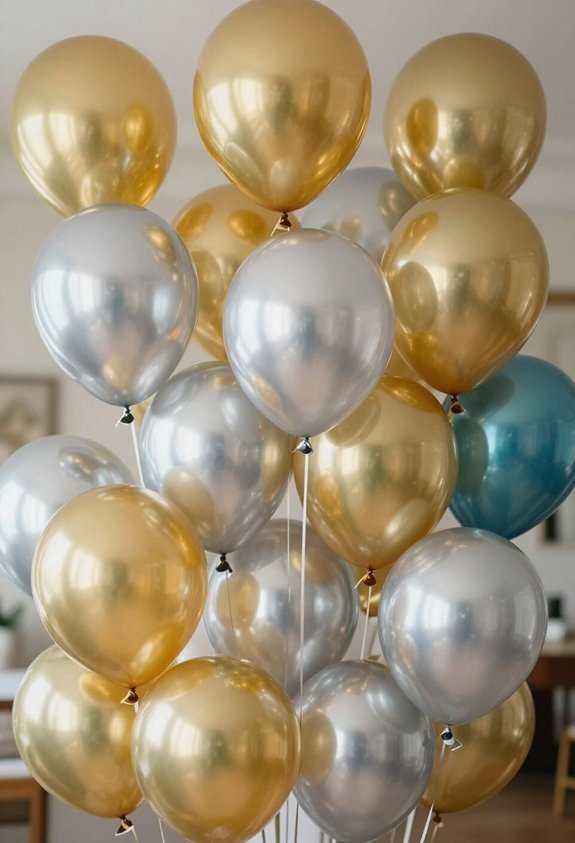
Build a DIY Balloon Garland in Metallics
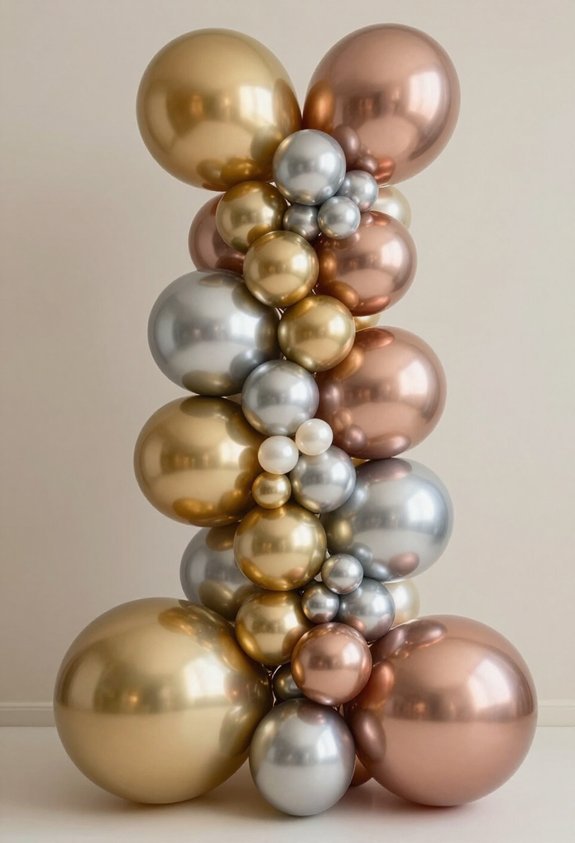
Balloon garlands in shiny metallics are the fancy cousin of basic party decorations—and they’re way easier to make than they look. Start by grabbing gold, silver, and rose gold balloons in different sizes.
Blow them up until your face turns funny colors, then arrange them on a string or fishing line. Mix in some metallic streamers for extra pizzazz. The secret? Cluster small and large balloons together so nothing looks lonely.
Tape the whole thing to a wall, doorway, or table edge. Suddenly your party looks like a fancy magazine photo. No fancy skills needed. Just balloons, string, and zero judgment about those weird squeaky sounds you’ll make while inflating everything.
Cluster Metallic Balloons by Zone
Rather than just throwing balloons everywhere like confetti cannons exploded, organizing them into zones makes the whole garland look intentional and fancy. Think of the party space as pizza slices. Each section gets its own balloon cluster. Gold balloons hang together in one zone, silver in another, and rose gold gets the spotlight elsewhere.
Space zones about 12-18 inches apart so they don’t look like one giant balloon sneezed everywhere. Mix balloon sizes within zones—big ones anchor the look, small ones fill gaps.
Add some greenery or streamers between zones for breathing room. This strategy transforms a random balloon mess into something that screams “I actually planned this.” Guests won’t realize how simple it was. Winner, winner, balloon dinner!
Hang DIY String Bunting
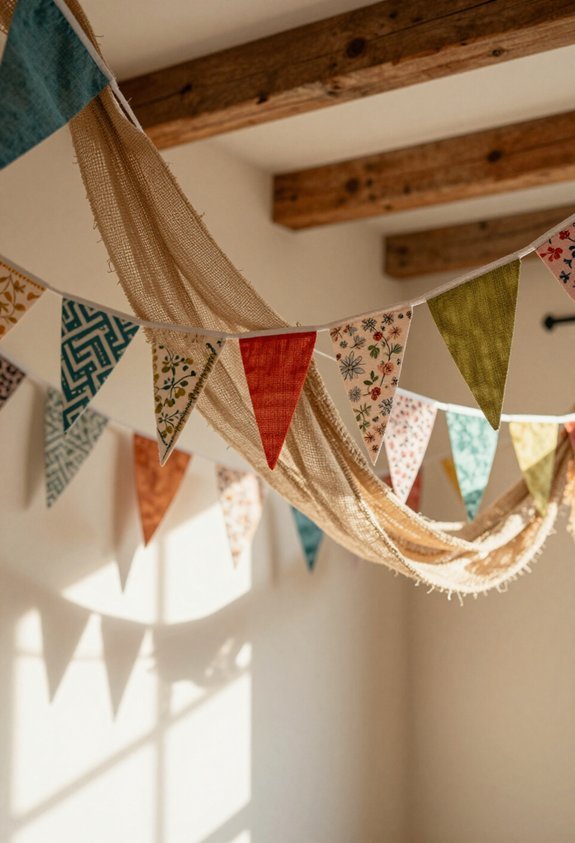
String bunting transforms any party space from “meh” to “yes!” with barely any effort. This stuff is basically colorful paper triangles on a string, and it’s genuinely magical.
Head to the craft store and grab some cardstock in birthday-appropriate colors—think hot pink, electric blue, or sunshine yellow. Cut triangles about 4 inches tall and string them together with twine or ribbon. Don’t stress about perfection; wonky triangles have personality.
Drape the bunting diagonally across walls, doorways, or above the snack table for maximum impact. Eight to ten feet of coverage works perfectly for most spaces. Tape the ends securely or they’ll flop down faster than someone after eating cake.
Homemade bunting screams “I actually tried,” and guests will absolutely notice. Plus, it costs like five bucks. That’s basically free in party math.
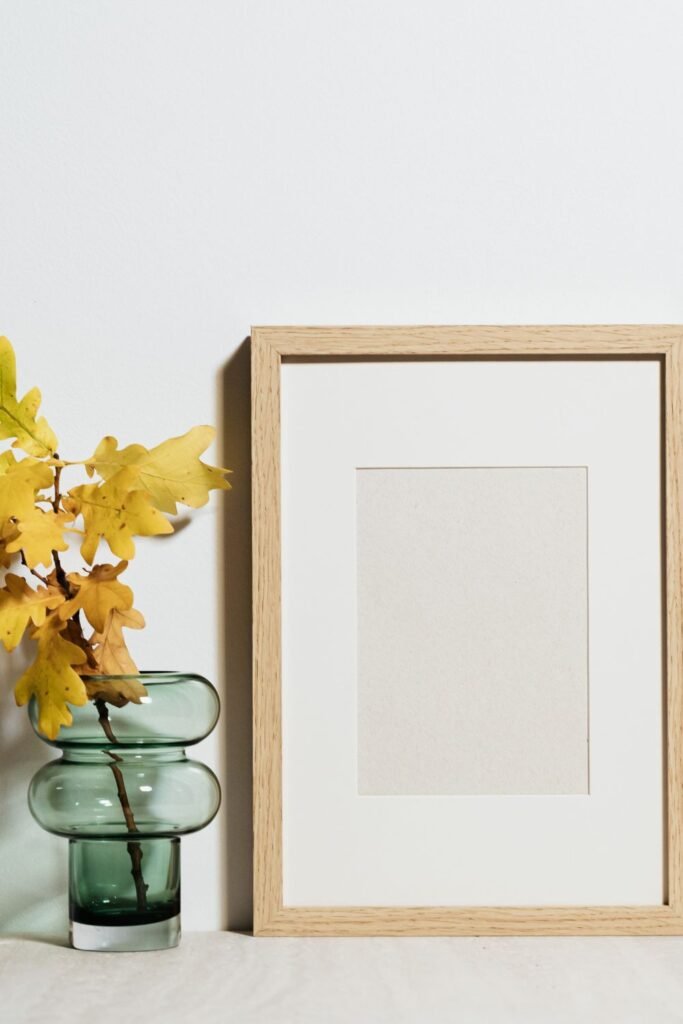
Frame Your Favorite Memories
While bunting gets the walls looking snazzy, nothing tugs at heartstrings quite like photos of the birthday person actually existing and having fun. Grab frames—any size works, really—and stuff them with hilarious pictures from years past.
That embarrassing haircut phase? Perfect. The time someone’s face got covered in cake? Gold. Arrange frames in clusters around the party space, on tables, or hanging from string.
Mix frame colors like gold, silver, and white for visual pop. Black-and-white photos look classy next to colorful ones. Pro tip: include a photo of the birthday kid looking absolutely ridiculous. Everyone laughs. Everyone wins. These memory frames beat expensive decorations any day because they celebrate the actual human being celebrated, wrinkles and all.
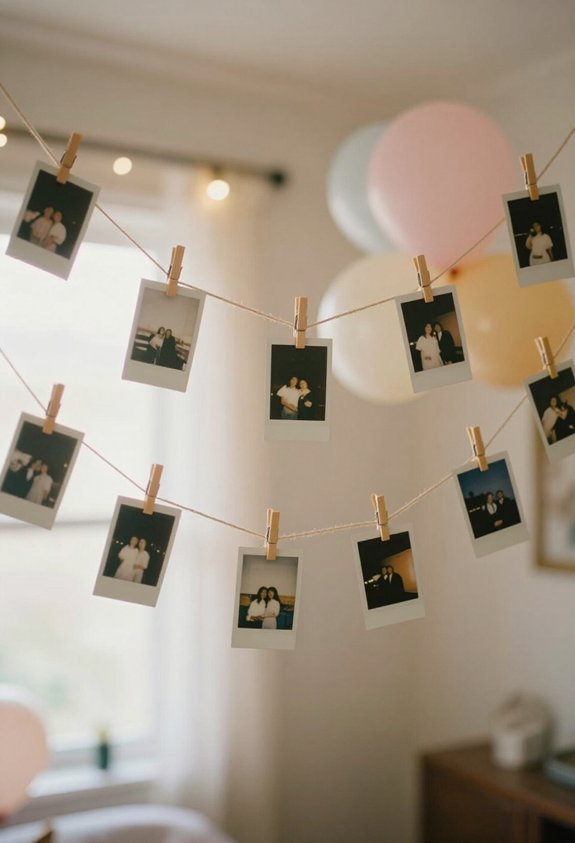
Create a Photo Banner With Decade Progression
Take photos from each decade of the birthday person’s life and string them together into one glorious timeline banner. Dig through old albums and find pictures showing the birthday person’s glow-up journey. Baby photos work great, awkward middle school shots are comedy gold, and those questionable haircut years? Perfect material.
Print photos in 4×6 inch squares and arrange them chronologically on a string or ribbon. Attach them with clothespins or tape, spacing them about six inches apart. The progression tells a hilarious story of transformation and terrible fashion choices.
Hang the banner at eye level where guests can laugh and point at the birthday person’s evolution. Everyone loves spotting when their favorite hairstyle emerged or disappeared. This decoration doubles as entertainment and memory lane rolled into one.
Add Glamorous Gold Leaf Touches
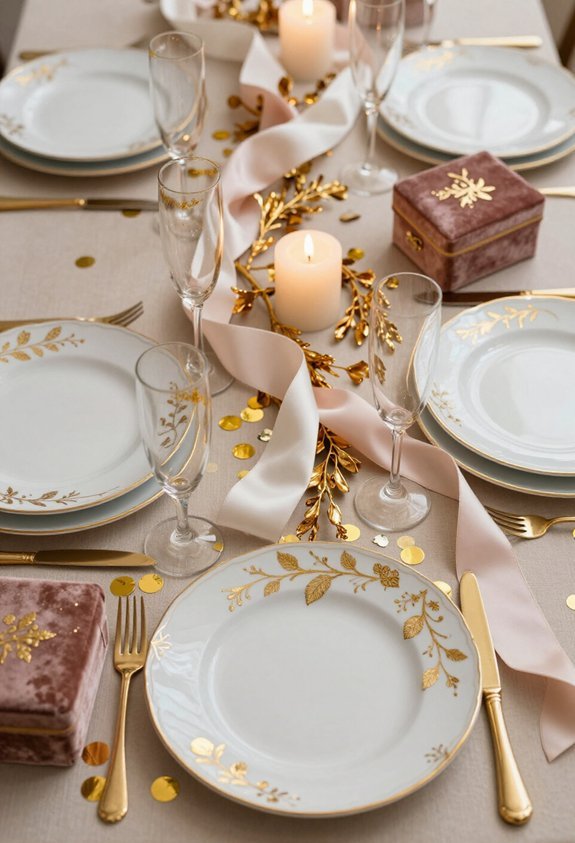
Because nothing says “fancy party” like shiny stuff that costs basically nothing, gold leaf is the decoration hero nobody expected. Gold leaf sheets stick to basically anything—balloons, picture frames, mason jars, even cake boxes. Grab a cheap bottle of adhesive spray and go wild.
The best part? Gold leaf makes a party look like it cost actual money. Stick 2-3 inch pieces around doorways and table edges. Watch guests gasp like the party just got a promotion. Layer gold leaf with black, white, or blush decorations for maximum pizzazz. It’s basically the glitter of fancy people, except way less chaotic. Your party will look absolutely glamorous. And nobody needs to know it came from the dollar store.
Create a Guest Memory Jar Station
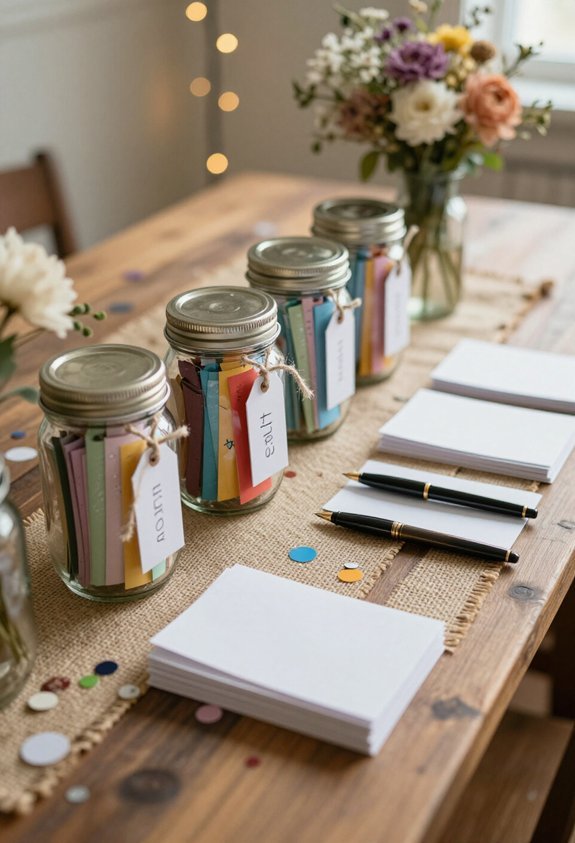
After all that glamorous gold leaf decorating, it’s time to think about something way more meaningful than shiny stuff. A guest memory jar station lets people write down funny moments from the party.
Just grab a clear glass jar (any size works, but 8-10 inches tall looks great) and fill it with colorful cardstock cut into strips. Set out markers in different colors and stick the jar in a visible spot near the dessert table.
Guests write their favorite memories or jokes from the celebration, and the birthday person reads them later. Spoiler alert: someone will definitely write something about cake being everywhere. It’s basically free entertainment that actually matters, which beats watching people awkwardly stand around doing nothing.
Make DIY Confetti Poppers
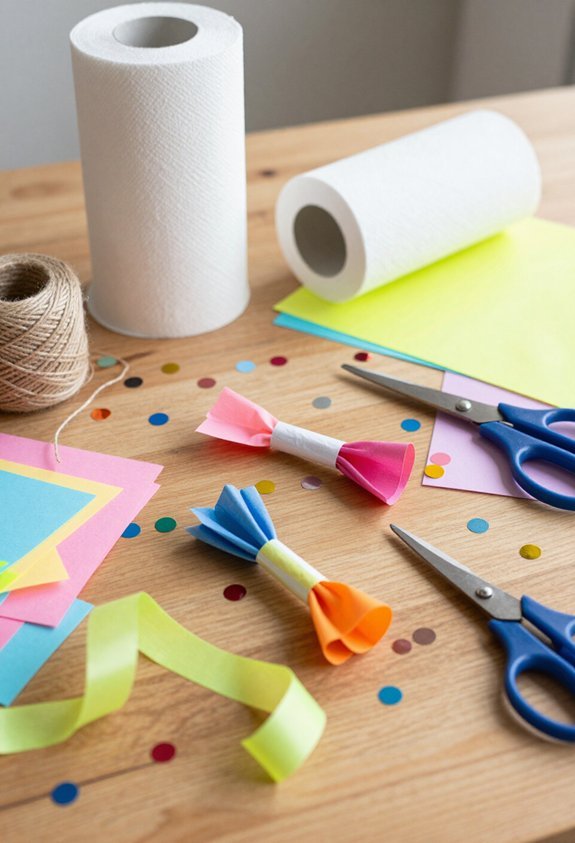
Launching confetti into the air without spending a fortune? DIY confetti poppers are the answer. Grab a toilet paper tube and stuff it with colorful confetti pieces.
Fold the bottom closed, then seal it with tissue paper secured by a rubber band. When party time arrives, hold the popper upside down and pull the tissue paper tab hard. Boom! Confetti explodes everywhere like a tiny, harmless firework. Kids absolutely lose their minds over these things.
Adults pretend they’re too cool, then secretly love them too. The best part? They cost practically nothing. Each popper uses less than a dollar in materials. guests can even make their own poppers beforehand, turning the activity into pre-party entertainment. Talk about a confetti-tastrophe in the best way possible.
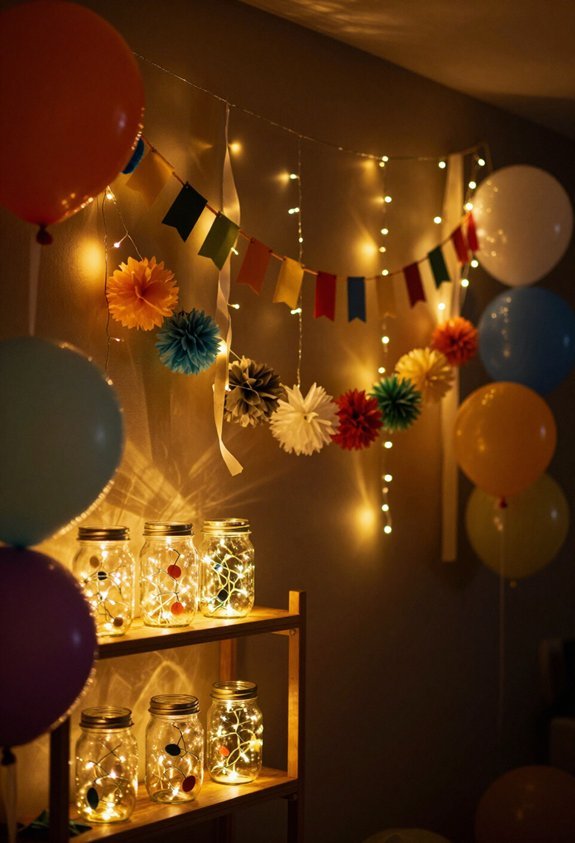
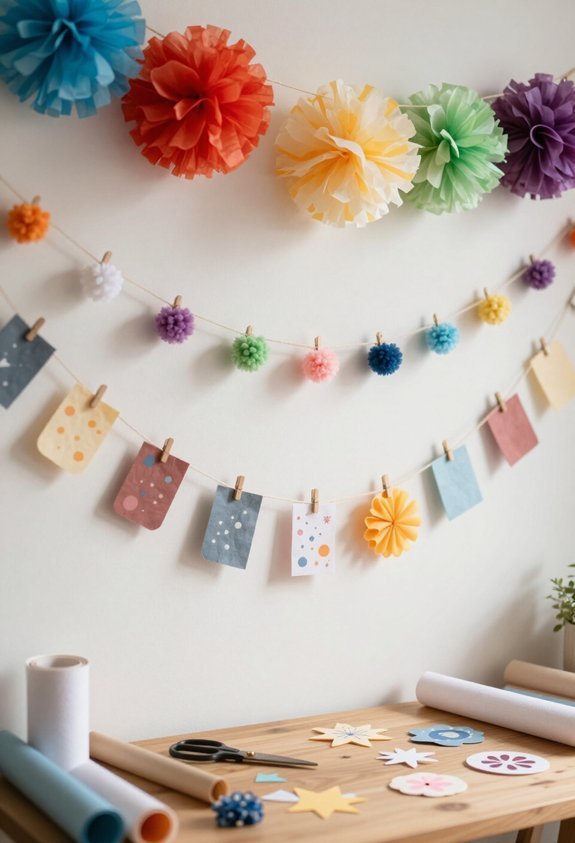
Make Tissue Paper Pom-Poms in Party Colors

Tissue paper pom-poms are basically clouds of color that make any party space look instantly fancy. Making them is easier than tying your shoes, and way more fun. Stack eight tissue paper sheets and fold them accordion-style in half-inch pleats. Tie the middle tightly with string or floral wire.
Now comes the satisfying part: fluff out each layer until it looks like a colorful explosion happened. Seriously, it’s oddly therapeutic. Use hot pink, mint green, or whatever screams “party” to you.
Hang them from the ceiling with fishing line so they seem to float. These pom-poms instantly transform boring blank spaces into celebration zones. They’re cheap, cheerful, and nobody will guess you made them in ten minutes flat.
Use Milestone Quotes on Chalkboard Signs
Chalkboard signs are like the wise older sibling of party decorations—they look classy but tell funny jokes. They’re perfect for marking milestone moments without breaking the bank.
Pick a sign measuring 18 by 24 inches for maximum impact. Write bold quotes celebrating the birthday person’s age. Try “Officially [Age]: Please Excuse Any Weird Behavior” or “Another Year Older, Still Not an Adult.” Guests absolutely love the humor.
Use colorful chalk markers in pink, gold, or bright blue to make words pop. Position signs near the cake table or entrance so everyone spots them immediately.
The best part? Making these takes ten minutes tops. Customize messages for the specific person. Their friends will laugh, take photos, and remember your effort forever.
Hand-Letter a Milestone Banner
Grab a marker and prepare for some serious artistic glory—because hand-lettering a milestone banner is basically like becoming a fancy calligrapher, except you’re allowed to mess up and nobody has to know. Start with a long strip of cardstock, maybe two feet wide. Sketch the birthday age lightly in pencil first. Then grab your favorite markers and go over those letters boldly and confidently. Bold, thick strokes look way cooler than tiny, shaky ones. Add some colorful swirls and decorative doodles around the numbers. Hang the finished banner above the cake table or across the wall behind presents. Your guests will think you’re basically a professional artist. Spoiler alert: you’re not, but they don’t need to know that.
Paint Wine Bottles as Candle Holders
Three empty wine bottles just begging for a second life sit gathering dust in the recycling bin. Paint them with acrylic craft paint in bold colors like deep purple, forest green, or sparkly gold. Let each bottle dry completely—patience is key, unlike your last relationship. Add a tea light candle inside the neck opening, and boom! You’ve got instant elegance without breaking the bank. Arrange three bottles down your table’s center, spacing them about eight inches apart. They’ll glow warmly and make your party look fancier than a penguin in a tuxedo. Pro tip: use non-flammable paint so your decorations don’t become a fire hazard. Your guests will assume you spent hours on these treasures. Their jaws will drop when you reveal your paint-splattered secret.
Hang a Welcome Sign
A cardboard sign hung by the front door sets the party mood before guests even step inside. This welcome sign doesn’t need to be fancy or museum-quality. A piece of poster board and some markers work great. The host can write “Happy Birthday” in big, colorful letters. Adding glitter, stickers, or streamers makes it pop even more.
Positioning the sign at eye level guarantees guests spot it immediately. Hanging it with tape or string takes just seconds. The sign tells visitors they’re in the right place and something fun is happening. It’s basically a cheerful announcement that says “get ready to party” without actually shouting. This simple decoration sets expectations high and gets everyone excited before they even see the cake.
Frequently Asked Questions
How far in advance should I start making DIY birthday decorations?
Give yourself at least one to two weeks for anything that involves painting, drying, or multiple steps.
Simple projects like hand-lettered banners or folded paper decorations can be done two to three days before the party without any problem.
The biggest mistake most people make is underestimating how long things take when you factor in drying time, mistakes that need redoing, and supply runs for things you forgot.
What basic supplies do I need to get started with DIY birthday decorations?
A good starting list includes cardstock in your party colors, a hot glue gun, scissors, adhesive tape, markers in various thicknesses, and twine or ribbon for hanging things.
Acrylic craft paint is useful for a wide range of projects and comes in large packs at craft stores for very little money.
Beyond that, collect any items you already have at home before buying anything new. Empty bottles, old frames, mason jars, and leftover wrapping paper are all useful starting materials for several of the ideas in this article.
How do I make DIY decorations look professional rather than homemade?
Consistency is the single biggest factor. Stick to two or three colors throughout all your decorations and everything will look cohesive even if individual pieces are imperfect.
Clean cuts, straight lines, and even spacing also make a huge difference. Take your time with the finishing details rather than rushing through them.
Using a ruler and pencil to sketch things out before committing with a marker or scissors saves a lot of redoing and makes the end result look far more polished.
What are the easiest DIY birthday decorations for someone with no craft experience?
Balloon garlands are one of the most impressive looking decorations you can make and they genuinely require no skill at all, just time and patience.
Photo garlands using printed photos clipped to string with clothespins are another beginner-friendly option that always gets a great reaction.
Paper tassel garlands, tissue paper pom poms, and painted wine bottle centerpieces are all equally simple and look great in photos.
How do I store DIY decorations after the party to reuse them?
Flat items like banners, garlands, and cardstock decorations store well in a large flat box or folder to prevent creasing.
Fabric items and ribbon can be rolled rather than folded to avoid permanent crease lines.
Label everything clearly with what it is and what color scheme it belongs to so you can find it easily next time. A clear plastic storage bin works better than a cardboard box because you can see what is inside without opening it.
Conclusion
DIY birthday decorations are one of those things that feel intimidating before you start and surprisingly enjoyable once you actually get going.
The projects that I have been most proud of over the years were never the most complicated ones. They were the ones where I found a simple idea, committed to it fully, and took the time to finish the details properly.
You do not need to be crafty or creative in any traditional sense. You just need a plan, a few basic supplies, and enough time to let things dry before the party starts.
Pick two or three ideas from this list, gather your supplies this week, and give yourself a proper afternoon to work through them without rushing.
The results will be worth it and so will the look on the birthday person’s face when they see what you made.
If you try any of these projects, leave a comment below and let me know which ones you went with. I genuinely love seeing how these come together in real homes!

