


Party canopies can go from plain to magical in minutes once the right lighting goes up, though figuring out how to hang lights on party canopy frames trips up plenty of first-time hosts.
Frame material shapes the whole approach. Metal poles work well with clips or hooks, while fabric tops need lighter, tension-based methods that won’t tear or sag the material.
Spacing matters more than most people realize going in. Lights placed too far apart leave dark gaps, while bunching them too close wastes strands without adding much visual impact.
Power source is worth settling before the first light goes up, since cords running across a guest walkway create an obvious tripping hazard.
Battery-powered or solar string lights sidestep that problem entirely, making them a popular choice for anyone learning how to hang lights on party canopy setups for the first time.
Before You Start Shopping
Confirm the canopy’s weight limits before attaching anything. LED string lights place far less stress on the structure than heavier incandescent options, making them the safer choice for most setups.
Sketch out the lighting layout before purchasing supplies. Knowing whether the design will run along the perimeter, in a criss-cross pattern, or in parallel rows helps estimate the correct number of strands and fasteners needed.
Decide on a power source early in the planning process. Outdoor-rated extension cords work well near an outlet, while solar or battery-powered lights suit canopies located farther from power access.
What You Need Before You Start Hanging Lights
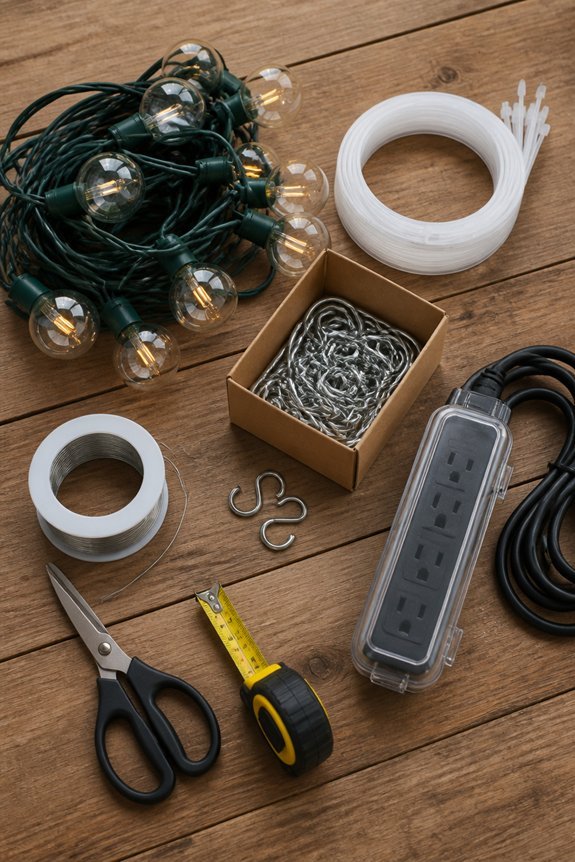
Before hanging lights on an outdoor canopy, gathering the right materials saves time and prevents interruptions mid-project. The basic supplies include outdoor-rated string lights, zip ties or S-hooks, and a sturdy ladder. Extension cords rated for exterior use are also necessary, especially if power outlets are far from the canopy.
Additional tools make the job easier and safer. A measuring tape helps determine how many lights are needed. Clips, adhesive hooks, or cable staples secure the lights along canopy poles or fabric edges. A GFCI outlet or surge protector adds electrical safety outdoors.
Checking the canopy’s weight limits before attaching anything is important. Lightweight LED string lights put less stress on the structure than heavier incandescent options, making them a practical choice.
Also read: How to Install a Front Door Awning Step by Step
Choose the Right Lights for an Outdoor Canopy
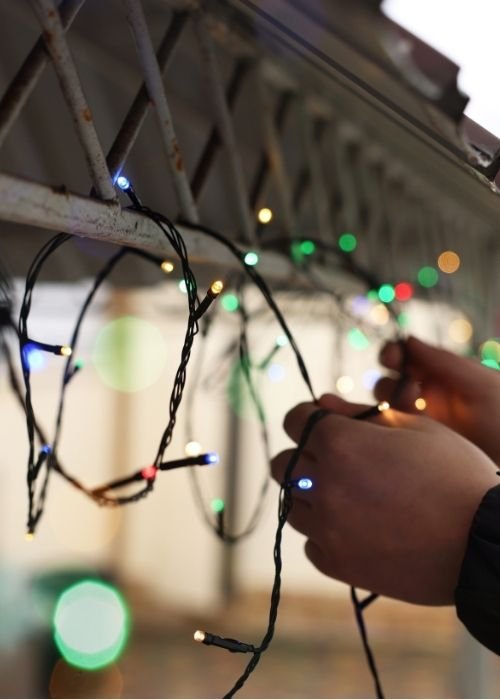
Selecting the right lights for an outdoor canopy affects both safety and appearance. Lights must be rated for outdoor use, meaning they carry a UL or ETL listing for wet or damp locations.
String lights with G40 or C7 bulbs work well for canopies, offering warm, visible light across open spaces. LED options consume less energy and produce less heat than incandescent bulbs, making them a safer choice near fabric or netting. Solar-powered string lights suit canopies without nearby outlets, though they require consistent sunlight to perform reliably.
Bulb spacing matters, with 6-inch to 12-inch intervals providing even coverage. Cord length should match the canopy dimensions without requiring multiple extension cords, which can create tripping hazards and overloaded circuits.
How Many Lights You Actually Need for Full Coverage
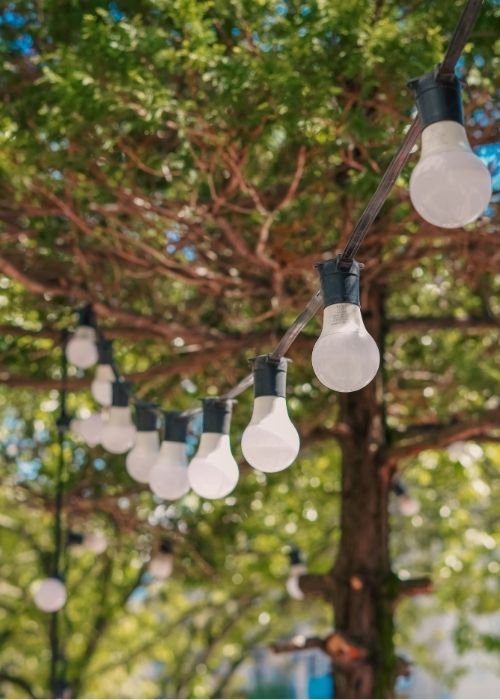
Most canopy owners underestimate how many lights are needed to achieve even, full coverage across the entire structure. A standard 10×10 canopy typically requires between 150 and 200 string light bulbs to avoid dark gaps along the edges and center.
Larger canopies, such as 10×20 or 12×12 models, may need 300 bulbs or more, depending on spacing preferences. Lights spaced six inches apart create denser, brighter coverage, while twelve-inch spacing produces a softer, more spread-out effect.
Key factors affecting total light count include canopy size and shape, bulb spacing along each strand, and number of strands run in parallel versus diagonal patterns.
Measuring the canopy frame before purchasing strands prevents shortages and guarantees consistent coverage across all sections.
Map Out Your Canopy Lighting Layout
Planning the layout ahead of time saves effort and helps avoid uneven spacing or tangled strands during installation. A simple sketch of the canopy frame, including its poles, crossbars, and edges, gives a clear reference point before any lights are unboxed.
Common layout patterns include perimeter runs along the outer frame, diagonal criss-cross lines between corner poles, and straight parallel rows from one side to the other. Each pattern produces a different visual effect and requires a different strand count.
Marking attachment points on the sketch, such as every pole, every two feet along a crossbar, or each canopy corner, helps estimate clip and hook quantities. Reviewing the sketch before purchasing supplies reduces the chance of running short mid-installation.
Attach the Lights to Your Outdoor Canopy Frame
With a layout sketch in hand, the actual work of attaching lights to the canopy frame can begin. Zip ties, S-hooks, and outdoor-rated clips are common fasteners that secure light strands to metal or fabric frames. Zip ties work well on tubular steel frames, while adhesive clips suit fabric canopy edges.
Starting from the power source, workers should run the first strand along the nearest frame rail, securing it every 12 to 18 inches. Corners and joints need extra fasteners to prevent sagging or shifting. For draped designs, strands loop between anchor points on opposing frame rails.
Excess cord should be tucked behind frame rails or bundled neatly to reduce tripping hazards. This maintains a clean, finished appearance across the entire canopy structure.
Run the Wiring Safely and Out of Sight
Concealing wiring keeps an outdoor canopy looking neat and reduces safety risks from exposed cords. Cords can run along the canopy frame, secured with cable clips, zip ties, or hook-and-loop fasteners to keep them flush against metal or fabric surfaces. Running wires along tent poles or edge supports helps minimize visibility from inside and outside the canopy.
Extension cords should be rated for outdoor use, such as those marked with a W suffix, and kept off the ground where foot traffic occurs. Cord covers or rubber ramps can protect cords that must cross walkways. All connections should stay away from water sources, pooled rain, or low-hanging areas that collect moisture, reducing the risk of electrical hazards during outdoor events.
Power Your Outdoor Canopy Lights Without an Eyesore
Choosing the right power source helps keep outdoor canopy lighting functional and visually clean. A standard outdoor extension cord, rated for exterior use, can connect string lights to a nearby outlet without drawing much attention.
Cord covers, available in brown or black, blend into decking, grass, or gravel surfaces effectively. Solar-powered string lights eliminate cord clutter entirely, relying on a small panel placed in direct sunlight. Battery-operated lights offer similar freedom, requiring no outlet access at all.
For permanent setups, a weatherproof outlet box mounted to a nearby post or wall keeps connections organized and protected. GFCI outlets are recommended for any exterior power source to prevent electrical hazards. Keeping power sources low, hidden, or color-matched to surroundings reduces visual disruption considerably.
Troubleshoot Flickering, Sagging, and Burned-Out Bulbs
Even well-installed canopy lights develop problems over time, and identifying the cause quickly prevents further damage. Flickering lights often signal a loose socket connection, a failing bulb, or an overloaded extension cord. Checking each connection point individually helps isolate the source.
Sagging strands typically result from inadequate support, so adding zip ties or guide wire at midpoints redistributes the weight evenly. Burned-out bulbs in LED strings sometimes affect neighboring bulbs, depending on how the circuit is wired. Replacing the failed bulb first resolves this in many cases.
Corrosion on metal sockets, caused by moisture exposure, increases resistance and leads to inconsistent power delivery. Cleaning corroded contacts with a dry cloth or replacing damaged sockets restores stable performance without requiring full strand replacement.
Frequently Asked Questions
Can Outdoor Canopy Lights Be Left up During Winter Months?
Leaving lights up through winter is possible, though it isn’t generally recommended.
Snow, ice, and freezing temperatures can crack wiring and corrode connections over time. Removing the lights before winter sets in helps preserve their lifespan considerably.
Are Canopy Lights Safe to Use During Light Rain or Humidity?
Lights rated specifically for outdoor use are generally safe in light rain or humid conditions.
Checking for an IP44 rating or higher confirms adequate protection against moisture and splashing water. This rating matters more than most people realize when shopping for outdoor fixtures.
What Permits Might Be Required for Permanent Outdoor Canopy Lighting Installations?
Permit requirements vary considerably depending on location.
Electrical permits, zoning approvals, and HOA clearances are commonly required for permanent installations. Checking with the local building department beforehand confirms exactly what’s needed for a given property.
How Do Canopy Lights Affect Nearby Wildlife or Insects at Night?
Canopy lights do attract insects, disrupting their natural navigation and feeding patterns to some degree.
Nearby wildlife, including bats and birds, may adjust their behavior in response to artificial lighting as well. Choosing warmer-toned LED bulbs over cool white options significantly reduces these ecological effects.
Can Renters Install Temporary Canopy Lights Without Damaging Rental Properties?
Yes, several non-invasive methods make this possible for renters.
Clip-on hooks, tension rods, and removable adhesive strips all avoid permanent damage to the property. Reviewing the lease agreement and getting landlord approval beforehand is still worth doing to avoid any disputes later.
Conclusion
Hanging lights on an outdoor party canopy transforms the space considerably when the process is planned out properly from the start.
Choosing outdoor-rated lights suited to the frame type sets the foundation for a safe and long-lasting installation.
Planning the layout in advance and securing cords out of sight keeps the finished result looking clean and intentional.
Addressing issues like sagging or flickering early prevents small problems from becoming bigger ones over time.
With the right materials and a clear plan in place, the finished lighting setup serves both function and appearance well.
Share your thoughts in the comments below on how your own canopy lighting project turned out.


