


Draping a wedding canopy is one of those details guests remember without quite knowing why.
Fabric choice plays a significant role in the final effect, with chiffon creating a soft, floating quality, organza catching light distinctly, and satin offering a heavier, more formal drape.
Frame material shapes the process considerably, since metal and wood each call for different attachment techniques.
Testing fabric samples against the venue’s actual lighting before committing helps avoid surprises on the day itself.
Securing anchor points early in the process prevents the fabric from shifting once the more detailed layering work begins.
Before You Start Shopping
Match the fabric weight to the frame type before purchasing anything. A delicate frame pairs best with lightweight fabrics like chiffon or voile, while a sturdy metal or wooden frame can support heavier materials without bending.
Test fabric samples under the venue’s actual lighting conditions rather than relying on how they look in a showroom. Sheer fabrics in particular can look very different once natural or evening light passes through them.
Plan for an extra set of hands during installation. Draping fabric alone makes it difficult to keep tension even, especially when working with heavier materials or higher frame sections.
Choosing the Right Fabric for Your Wedding Canopy
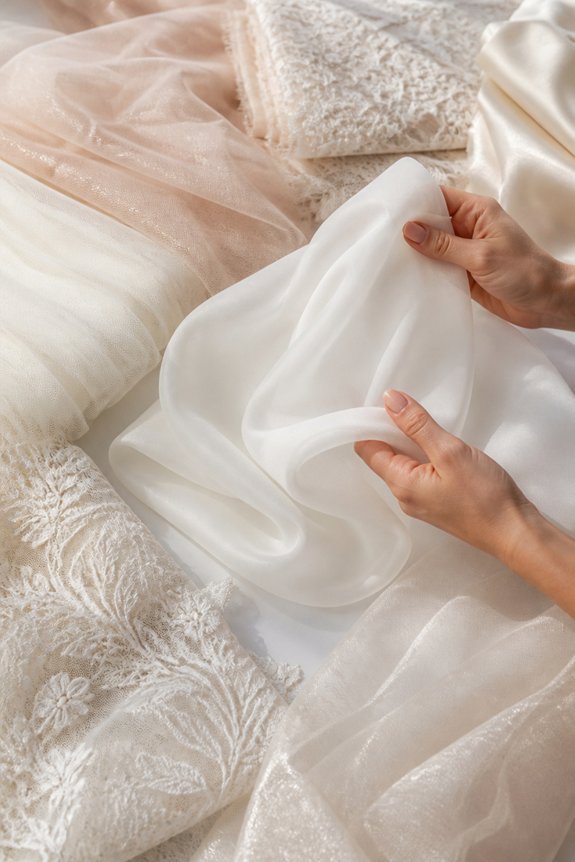
When choosing fabric for a wedding canopy, couples should consider weight, texture, and how the material drapes. Lightweight fabrics like chiffon, organza, and voile flow smoothly and create soft, billowing effects. Heavier materials, such as velvet or satin, hang with more structure and offer a formal, dramatic look.
Fabric color matters as well. White, ivory, and blush tones are common choices, but deeper shades can match a specific wedding theme. Sheer fabrics work well in outdoor settings because they allow light to pass through, creating a soft, glowing atmosphere.
Couples should also consider the canopy frame. A delicate frame pairs better with lightweight fabrics, while a sturdy metal or wooden frame can support heavier draping materials without bending or shifting during the event.
Also read: How to Install a Front Door Awning Step by Step
What You Need Before You Start Draping
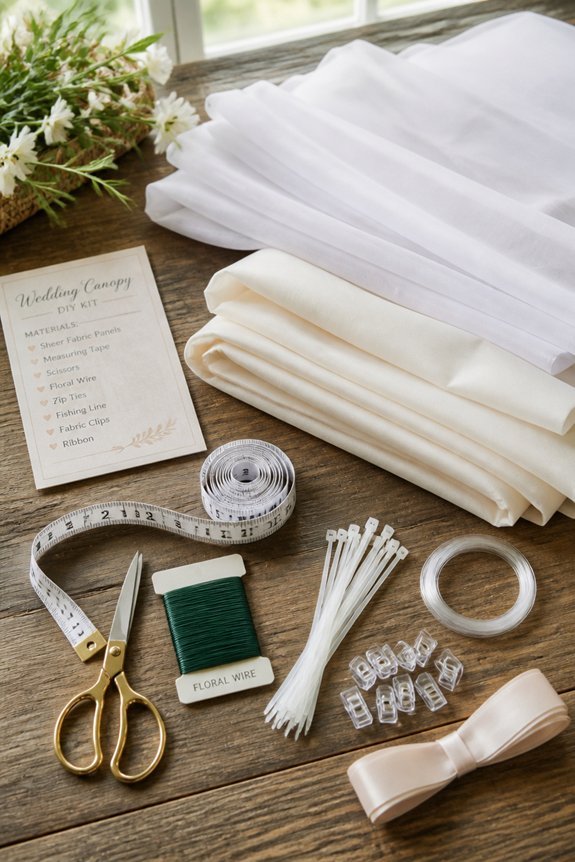
Before draping begins, gatherers should collect several key supplies to guarantee the process goes smoothly. Having everything on hand reduces delays and prevents fabric damage during installation.
Key supplies include:
Fabric, the chosen material, pre-measured and ironed, should be ready before touching the canopy frame.
A sturdy step ladder allows safe access to upper frame sections.
Zip ties, floral wire, fabric clips, or hook-and-loop tape secure fabric to frame posts and crossbars.
Scissors and measuring tape handle last-minute adjustments and accurate placement.
One additional person steadies fabric while the other secures it.
A steamer or iron ensures wrinkle-free fabric photographs and drapes better overall.
Organizing these items beforehand keeps the draping process efficient, controlled, and precise.
How to Secure Fabric to Your Wedding Canopy Frame
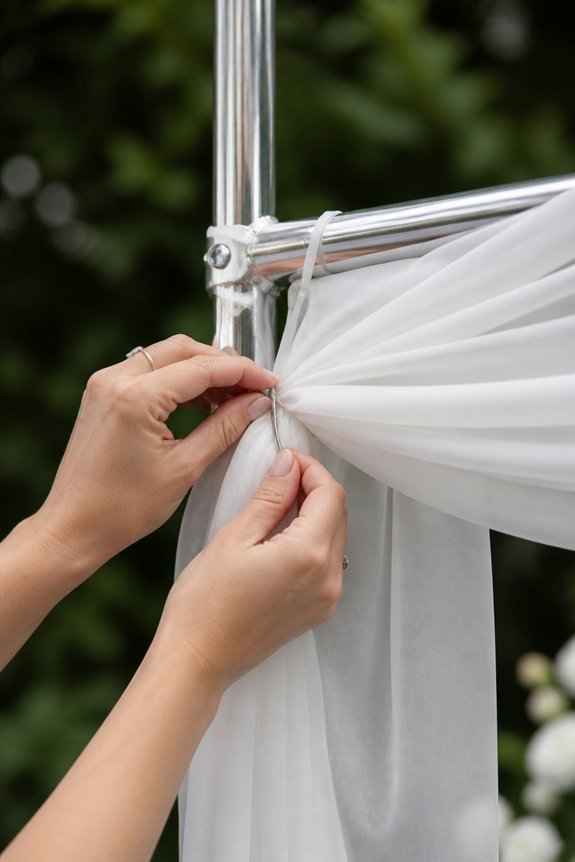
Securing fabric to a wedding canopy frame requires the right attachment method for the frame type and fabric weight. Different frames call for different tools, and choosing correctly prevents slipping or sagging during the event.
Common attachment methods include:
Zip ties work well on metal pipe frames, holding fabric tightly without shifting. Bungee cords allow slight tension adjustment, making them useful for heavier fabrics like velvet or satin. Fabric clips and S-hooks suit wooden or bamboo frames, gripping material without leaving marks. Hot glue offers a semi-permanent bond for lightweight chiffon on decorative frames.
For draped swags, gathering fabric at corner posts first creates an even starting point. Spacing attachment points every 12 to 18 inches prevents uneven bunching along the frame.
How to Drape the Top Panel of Your Wedding Canopy
With the fabric secured to the frame, attention turns to the top panel, which forms the canopy’s most visible surface. The top panel should be centered carefully, with equal fabric hanging over each side of the frame.
Sheer fabrics like chiffon or organza work well here, as they catch light and create soft, flowing lines across the canopy’s ceiling. The fabric can be pulled taut for a clean, structured look, or left slightly loose for a gathered, romantic effect.
Clips, pins, or zip ties hold the panel in place along the frame’s crossbars. Any excess fabric at the edges can be folded neatly underneath the frame, keeping the surface smooth, even, and free of visible bunching or wrinkles.
Adding Flowing Side Panels to Your Canopy
Side panels hang from the canopy’s outer frame rails, adding depth, softness, and a sense of enclosure to the structure. Sheer chiffon, organza, or lightweight satin work well for this application.
Panels are typically attached using zip ties, ribbon ties, or clip rings secured to the rail. Each panel should be cut longer than the frame height, allowing excess fabric to pool slightly on the ground. This creates a soft, finished look.
Panels can hang straight for a clean, formal style, or be gathered and tied back with satin ribbon for an open, airy effect. Spacing panels evenly along each rail keeps the overall appearance balanced. Four to six panels per side is a common starting point for standard canopy frames.
Layering Fabrics for a Fuller, More Dimensional Look
Layering two or more fabric types adds visual depth and fullness to a wedding canopy without requiring a larger frame. A sheer organza layer placed over a heavier base fabric, such as satin or linen, creates contrast in texture and light. Tulle works well as a middle layer, adding softness between structured and flowing materials.
Designers often secure the base fabric first, then drape lighter layers on top, allowing each layer to fall at slightly different lengths. Varying those lengths prevents the arrangement from looking flat or uniform. Mixing ivory, blush, and white within the same layered structure adds subtle color dimension.
Gathering or bunching the top layer at the canopy corners adds volume without covering the base layer entirely.
Florals, Lighting, and Final Details That Complete the Look
Once the fabric layers are set, florals and lighting bring the canopy to its finished state. Greenery such as eucalyptus, ferns, or ivy can be tucked into fabric gathers, draping naturally along the frame. Flower clusters of roses, peonies, or ranunculus add color and weight at corners or central tie points.
Lighting works alongside fabric to shape the overall atmosphere. String lights woven through sheer layers create soft, diffused glow. Pendant bulbs or lanterns hung from the center beam add definition and depth.
Final details include securing all loose fabric ends with hidden clips or floral wire, checking that no seams face outward, and confirming the overall structure is stable. A final walk-around inspection guarantees every element reads cleanly from all guest sightlines.
Frequently Asked Questions
How Far in Advance Should I Drape My Wedding Canopy?
Most planners recommend draping the canopy one to two days before the ceremony.
That window leaves enough time to adjust fabric and address any issues that come up. It also means everything looks polished and settled by the time guests arrive.
Can I Reuse Wedding Canopy Fabric for Other Events Afterward?
Yes, the fabric can absolutely be reused for future occasions.
Parties, photoshoots, and other celebrations are all reasonable next uses for the same material. As long as the fabric stays clean and undamaged after the wedding, there’s no reason it can’t serve a second purpose.
How Do I Keep Fabric From Blowing Away Outdoors?
Zip ties, bungee cords, and fabric clips attached directly to the frame provide the first layer of security.
Sandbags or weights anchoring the base help prevent lifting in stronger wind. Double-sided tape and careful knotting add further stability where fabric is most exposed.
What Is the Average Cost of Wedding Canopy Fabric?
Costs typically fall between $50 and $300, depending on the material and quantity needed.
Sheer chiffon tends to run on the more affordable end. Luxurious silk sits at the higher end of that range for couples wanting a more elevated look.
Do I Need a Permit to Install a Wedding Canopy Outside?
Permit requirements vary depending on location, so checking ahead of time matters.
Local municipal offices or venue management can confirm what’s required for a given size and setup. Temporary structures often need permits depending on duration and local zoning rules, so it’s worth asking early rather than assuming.
Conclusion
A well-draped wedding canopy shapes the entire feel of a ceremony, often more than couples expect going in.
Careful fabric selection and proper frame attachment lay the groundwork for everything that follows, from the top panel to the flowing side drapes.
Layering different fabric weights adds depth without requiring a larger frame, and florals or lighting bring the whole structure to its finished state.
The last panel rarely behaves exactly as planned, and that small imperfection often ends up being part of what makes the finished canopy feel genuine rather than overly staged.
Following these steps in order, regardless of fabric choice or frame type, tends to produce a result the couple and their guests will remember fondly.
Share your thoughts in the comments below on how your own canopy draping turned out.


