Create a welcoming hob area that feels like the heart of your home and kitchen. Warm materials, soft lighting, and accessible design make cooking an enjoyable, comfortable experience daily. Your inviting hob area becomes where delicious meals and cherished memories naturally happen together.
Warm hob designs incorporate wood tones, cream-colored backsplashes, and ambient lighting beautifully. Open shelving displays favorite cookbooks and decorative pieces, pendant lights cast gentle glows overhead. These thoughtful touches transform your cooking zone into an inviting space encouraging culinary creativity and family gathering naturally.
Your warm hob area radiates comfort, functionality, and genuine hospitality through intentional design choices. Layer textures, incorporate soft lighting, and create an accessible workspace for everyday cooking. This cozy kitchen zone becomes your favorite place, where cooking feels less like a chore and more like a cherished daily ritual.
Install a Statement Backsplash Behind Your Hob
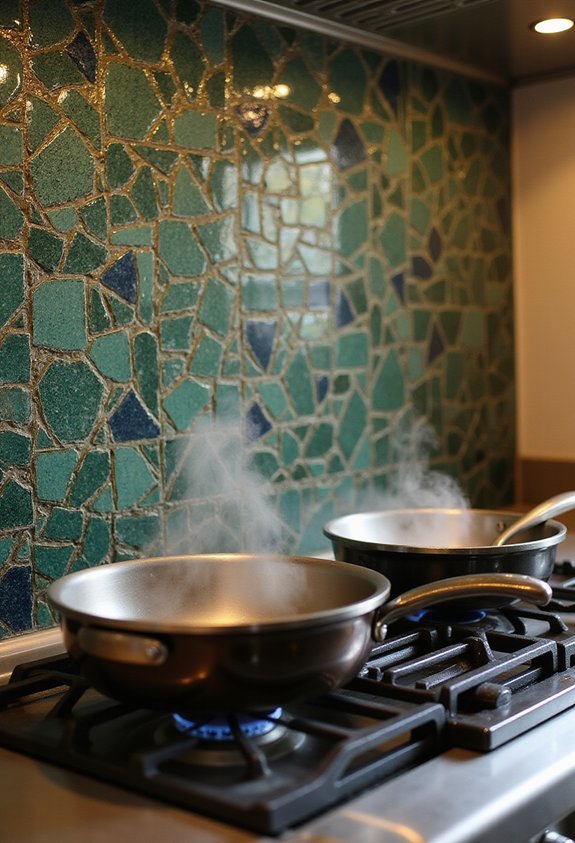
While your hob’s functionality matters most, the area behind it shouldn’t be overlooked—it’s prime real estate for making a visual impact. You can transform this space with a striking backsplash that reflects your style and protects your walls from splatters and stains.
Consider bold tile patterns, vibrant colors, or luxurious materials like marble or glass. Geometric designs add contemporary flair, while subway tiles offer timeless appeal. You might opt for metallic accents that complement your kitchen’s existing hardware.
A statement backsplash draws the eye and anchors your hob as a focal point. It’s also incredibly practical—you’ll appreciate the easy cleanup when cooking intensely. Choose durable materials that’ll withstand heat and moisture. Your backsplash becomes both functional art and a conversation starter in your kitchen.
Also read: 11 Kitchen Divider Ideas for Open Layouts
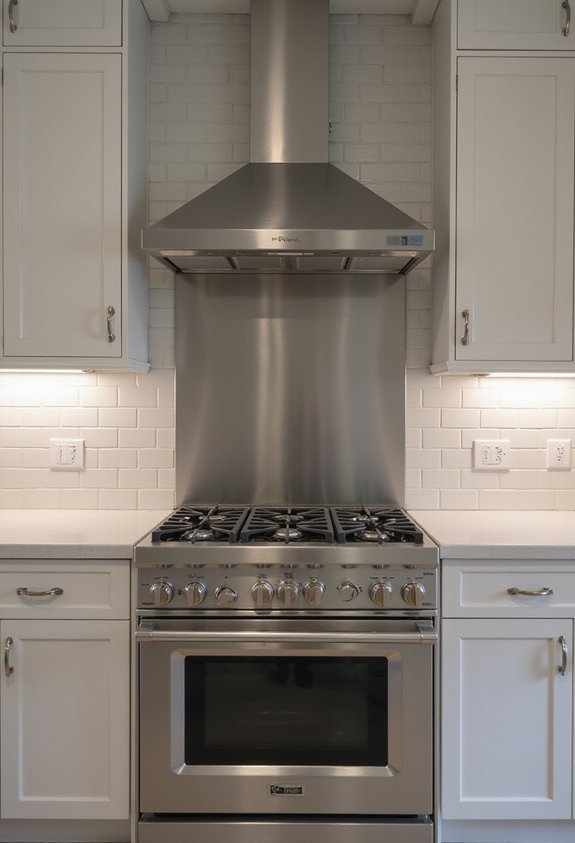
Make Your Range Hood a Design Focal Point
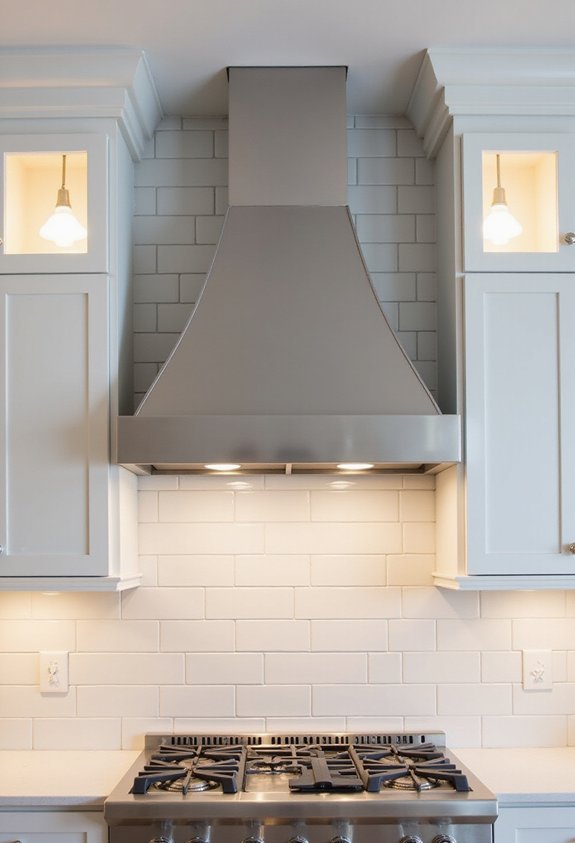
Beyond the backsplash, your range hood deserves equal attention as a design element. You can transform this functional necessity into a striking focal point by selecting a bold finish or unique style that complements your kitchen’s aesthetic. Consider stainless steel for a modern look, copper for warmth, or matte black for sophistication. You might opt for a custom hood with decorative details or architectural features that draw the eye upward and enhance your space’s visual interest. Don’t overlook lighting either—integrate ambient or task lighting around your hood to add dimension and functionality. When you invest in a statement range hood, you’re elevating your entire kitchen’s design while maintaining the practical ventilation your cooking space requires.
Layer Task and Ambient Lighting Above Your Hob
Proper lighting transforms your hob area from purely functional to genuinely usable and inviting. You’ll want to layer different light sources to achieve ideal visibility and ambiance.
Install task lighting directly above your cooktop—pendant lights or recessed fixtures work well—to illuminate your cooking surface without creating shadows. Combine this with ambient lighting from your kitchen’s general overhead fixtures to prevent harsh contrasts.
Consider dimmable options so you can adjust brightness based on your needs. During meal prep, you’ll want brighter task lighting; for entertaining, softer ambient lighting creates a welcoming atmosphere.
You might also add under-cabinet lighting to reduce glare on your cooking surface. Warm-toned bulbs complement most kitchen styles while enhancing food appearance.
This layered approach guarantees you’re never cooking in shadow while maintaining flexibility for different moods and occasions.
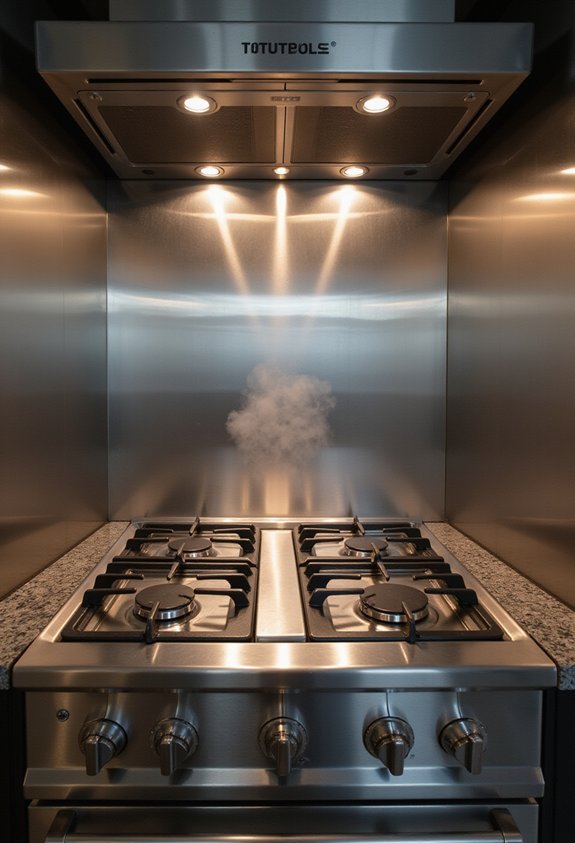
Choose the Right Ventilation System for Your Hob
A good ventilation system’s the backbone of a functional kitchen—it removes cooking odors, steam, and airborne grease before they settle on your walls and cabinets. You’ll find two main options: range hoods that vent outside and recirculating hoods that filter air back into your kitchen. Ducted systems offer superior performance, but they require proper installation and routing. Ductless models work well in apartments or spaces where external venting isn’t feasible.
When selecting your system, consider your hob’s size and your cooking habits. You’ll want adequate CFM (cubic feet per minute) ratings—typically 100 CFM per linear foot of cooktop. Install your hood at the manufacturer’s recommended height, usually 24 to 30 inches above your surface, ensuring ideal smoke and steam capture while maintaining visibility and comfort.
Pick Heat-Resistant Countertops That Won’t Crack or Stain
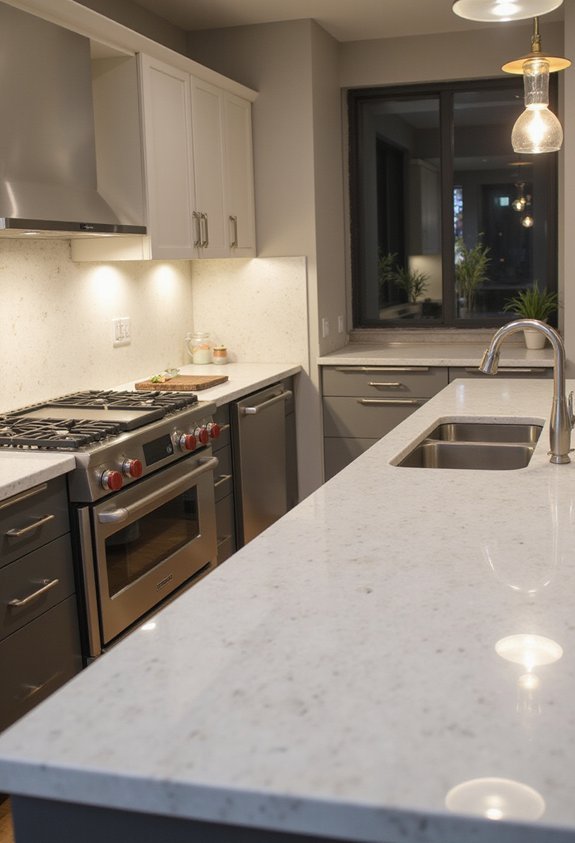
Since your hob generates intense heat and splattering oil, you’ll need countertops that can handle the abuse without warping, discoloring, or cracking. Granite and quartz are your best options—both resist heat damage and staining remarkably well. Granite’s natural stone composition withstands temperatures up to 1,200 degrees Fahrenheit, while engineered quartz offers superior stain resistance with minimal upkeep.
Stainless steel countertops provide an industrial aesthetic and excellent heat tolerance, though they’re prone to fingerprints and scratches. Avoid laminate and wood surfaces near your hob, as they’ll deteriorate quickly from heat exposure.
Install your countertops at least 18 inches from your hob’s edge, and always use trivets or heat-resistant mats for added protection. This strategic placement and material selection guarantees your countertops remain beautiful and functional for years.
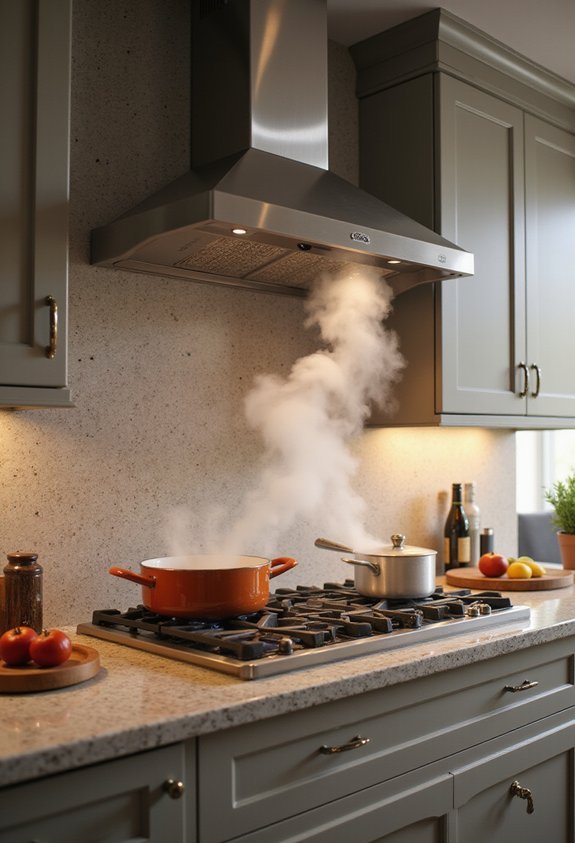
Ensure Safe Clearance and Heat Protection Around Your Hob
Building on your heat-resistant countertop investment, you’ll also need to establish adequate clearance zones that protect your kitchen from fire hazards and heat damage. You should maintain at least 18 inches of clearance above your hob to any combustible materials like cabinets or hood vents. Install a proper range hood that vents externally to eliminate heat and cooking moisture effectively. Keep curtains, towels, and wooden utensils away from the cooking surface. You’ll want to use heat-resistant splashbacks made from stainless steel or tempered glass to shield walls from splatters and radiant heat. Consider adding protective barriers around the hob’s sides if you have open shelving nearby. These precautions guarantee your kitchen remains safe while maximizing functionality in your cooking zone.
Choose Between Open Shelving and Closed Cabinets for Storage
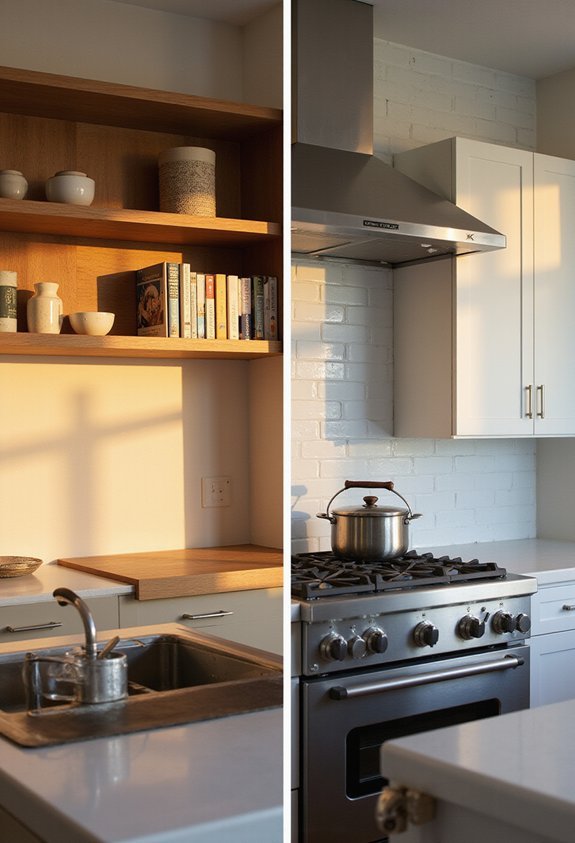
How you organize storage around your hob drastically impacts both your kitchen’s aesthetics and functionality. You’ll need to decide between open shelving and closed cabinets for your cookware and ingredients.
Open shelving displays your collection visually, making items easily accessible while adding character to your space. However, you’ll expose everything to heat, steam, and cooking splatters, requiring frequent cleaning and careful curation of what you display.
Closed cabinets protect your items from heat damage and keep your kitchen looking streamlined. You’ll sacrifice some accessibility, but you’ll gain practical storage that hides clutter and maintains a cohesive design.
Consider combining both approaches: use closed cabinets for everyday essentials and open shelving for frequently used or attractive pieces. This hybrid strategy gives you flexibility while protecting your investment in quality kitchenware.
Set Up a Spice and Seasoning Station Within Arm’s Reach
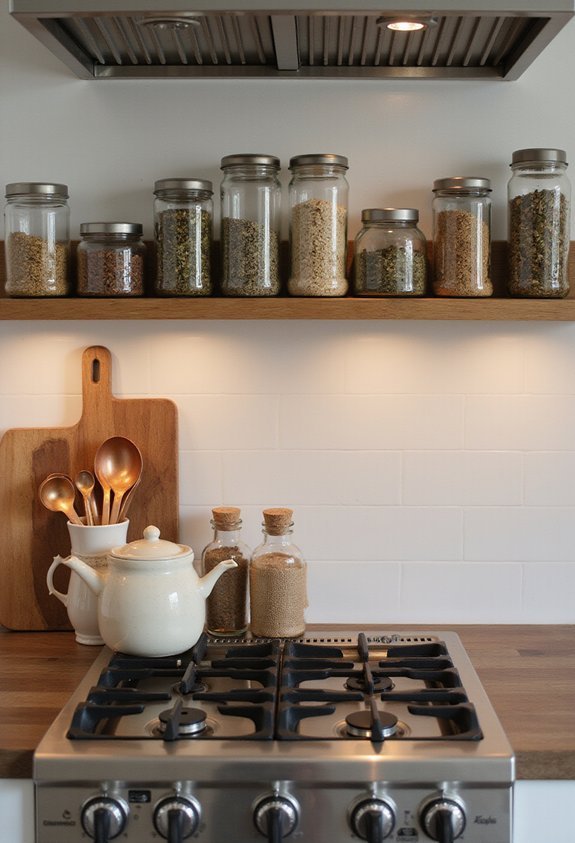
Most home cooks reach for spices multiple times during meal preparation, making proximity to your hob essential. You’ll dramatically improve your cooking workflow by positioning a dedicated spice station directly beside your cooktop.
Consider installing a narrow shelf, magnetic strip, or tiered drawer organizer specifically for your most-used seasonings. Label each container clearly so you’ll quickly identify what you need without fumbling through options. Store spices in uniform, airtight containers that protect them from heat and moisture.
Arrange your station logically—keep everyday seasonings like salt, pepper, and garlic powder at eye level. Position specialty spices like cumin or paprika slightly lower. This strategic setup lets you season dishes without leaving your hob, minimizing interruptions and keeping your focus on cooking.
Plan Counter Space on Both Sides of Your Stove

Adequate counter space flanking your cooktop transforms your cooking efficiency. You’ll want at least 15-18 inches of workspace on each side of your stove to safely handle pots, pans, and ingredients.
This strategic placement keeps frequently used items within arm’s reach while you’re cooking. You can set down hot cookware without fumbling or reaching across burners. The space also prevents you from bumping into cabinets or appliances while maneuvering around the stovetop.
Consider your workflow when planning these zones. Position your prep area on one side and your plating station on the other. Keep countertops clear of small appliances and clutter that’ll steal valuable real estate. This balanced approach maximizes functionality and creates a safer, more organized cooking environment.
Frequently Asked Questions
What Is the Ideal Hob Size for a Standard Kitchen Layout?
You’ll find that a 60-90cm wide hob works best for most standard kitchens. You should choose based on your counter space and cooking needs. A 5-burner configuration gives you flexibility, while 4-burners suits smaller layouts perfectly fine.
How Do I Choose Between Gas, Electric, and Induction Cooktops?
You’ll want to ponder your cooking style, budget, and kitchen setup. Gas gives you precise heat control, electric’s affordable and reliable, while induction heats fast and efficiently. Test each type to see what suits your needs best.
What’s the Best Way to Clean and Maintain My Hob?
You’ll maintain your hob best by wiping spills immediately after cooking. Let it cool, then clean with appropriate products for your hob type. Regular deep cleaning prevents buildup. You should avoid abrasive scrubbers that’ll damage the surface.
How Much Does It Cost to Install a New Kitchen Hob?
You’ll typically spend $200 to $2,000 installing a new kitchen hob, depending on the type you choose. Gas hobs cost less than induction models, and you’ll need to factor in professional installation fees, which usually range from $100 to $500.
Can I Install a Hob Myself or Do I Need a Professional?
You can install a hob yourself if you’re experienced with electrical work, but you’ll likely need a professional for gas connections and safety certification. Most people should hire a qualified installer to verify it’s done properly and safely.
Conclusion
You’ve now got all the tools you need to transform your hob area into a functional and stylish cooking zone. By incorporating these nine design strategies—from statement backsplashes to smart storage solutions—you’ll create a space that’s both visually stunning and incredibly efficient. You’ll enjoy cooking in an area that reflects your personal style while enhancing your kitchen’s overall design and workflow.
