
You’ve returned from an incredible adventure with hundreds of photos on your phone and a collection of ticket stubs stuffed in your carry-on. Now it’s time to transform those scattered memories into something tangible. A travel scrapbook lets you curate your experiences with intention, combining visual storytelling with hands-on creativity. Whether you’re documenting a weekend road trip or a month-long international journey, these twelve techniques will help you craft pages that capture not just where you went, but how it felt to be there.
The One-Page Wonder: Condensing a Trip Into a Single Spread
When you’re working with limited scrapbook space, a single-page layout forces you to curate your absolute best memories. Select three to five photos maximum. Arrange them in a grid pattern or asymmetrical cluster using foam adhesive squares for depth. Try Tombow Mono Adhesive for clean, permanent mounting without bulk.
Designer Kate Williams notes, “The constraint actually breeds creativity—you’ll choose moments that truly matter.”
Include one large focal photo (4×6 inches) alongside smaller accent shots. Add dimension with chipboard embellishments or puffy stickers from American Crafts. Write concise captions using metallic pens, limiting yourself to location names and dates. A single patterned paper background ties everything together. This approach transforms an entire vacation into one impactful, carefully edited visual story you’ll revisit again and again.
Also read: 17 Beautiful Fence and Deck Railing Ideas to Transform Your Outdoor Space
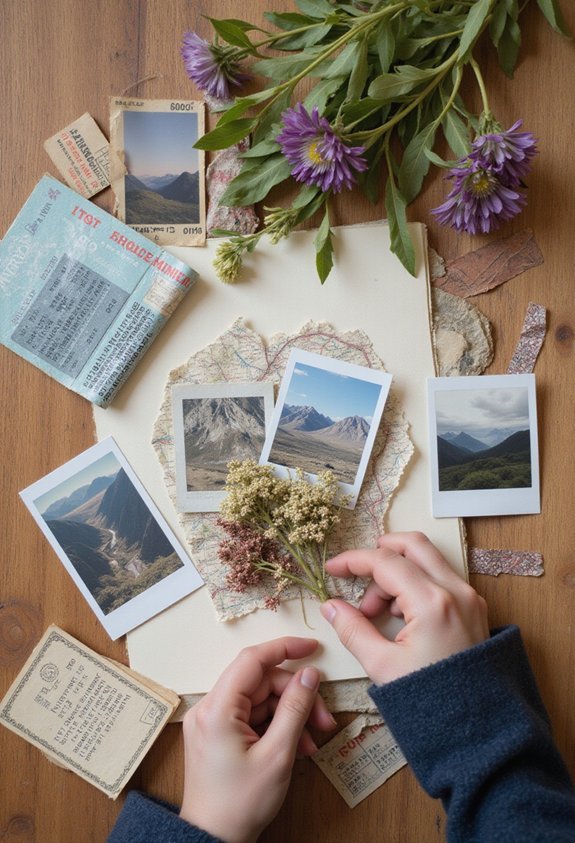
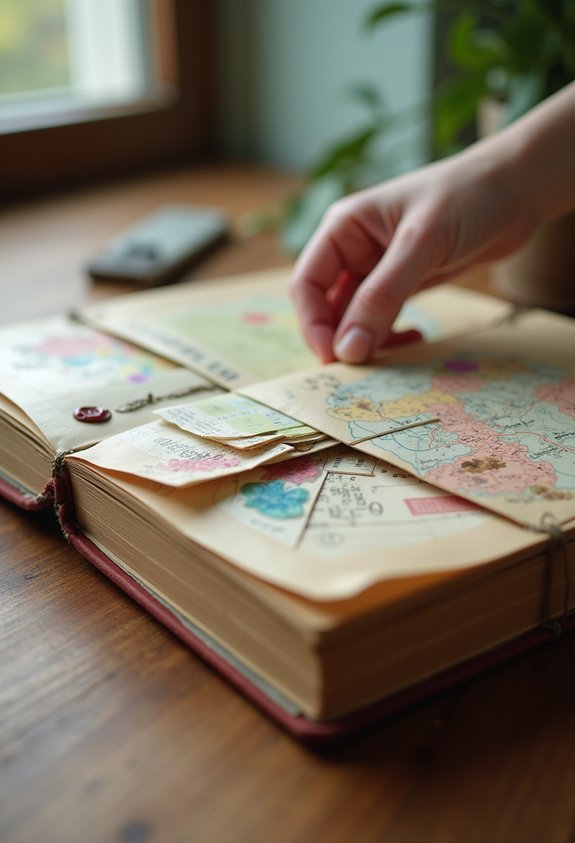
Map-Based Layouts That Chart Your Journey

Because maps inherently tell the story of where you’ve been, they make perfect centerpieces for travel scrapbook layouts. Start with a vintage map as your background, marking your route with washi tape or embroidery thread. You’ll create visual interest while documenting your actual path through cities, countries, or regions you explored during your adventure.
Try layering smaller destination photos directly onto corresponding map locations. This technique connects each memory to its geographic context in a way that’s both beautiful and informative for future reference.
Scrapbooking expert Jennifer McGuire suggests, “Use map punches to create confetti-style embellishments that echo your layout’s theme.” Add dimensional stickers like compasses or tiny pins. These details transform flat pages into tactile keepsakes you’ll treasure for years.
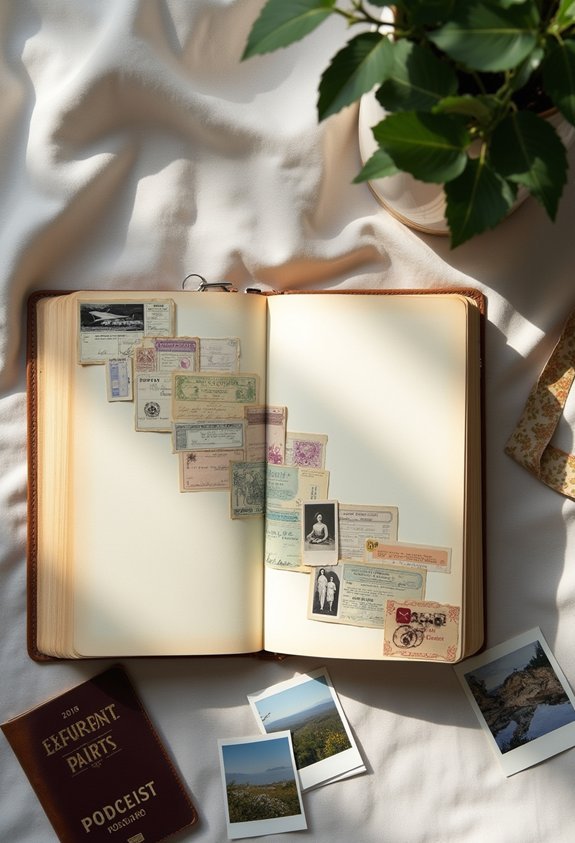
Ticket Stub and Boarding Pass Collages
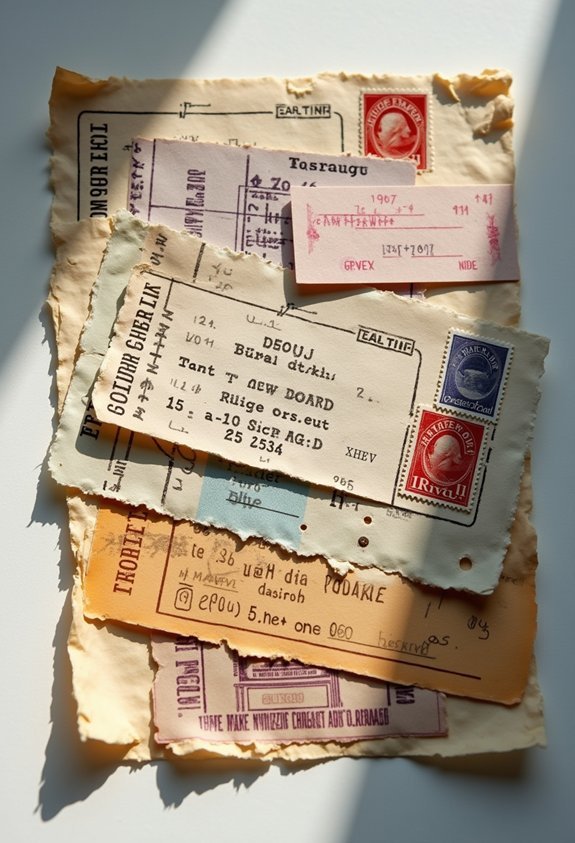
While maps show where you traveled, your collection of ticket stubs and boarding passes proves you actually made the journey. Arrange them chronologically across a 12×12 scrapbook page using acid-free photo corners. You’ll preserve the originals without damaging them with permanent adhesive.
Layer boarding passes at slight angles to create visual depth and movement. Add handwritten notes about flight delays or unexpected upgrades—these details become precious over time. Museum tickets deserve special attention too. Frame them with photos from that same day using washi tape borders.
“Tickets tell micro-stories within your larger travel narrative,” notes scrapbook designer Marina Chen. “They’re tangible proof of experiences money can buy.”
Consider scanning delicate tickets before mounting them. Digital backups protect against fading while you enjoy displaying the authentic artifacts.
Daily Journal Entries With Photo Corners
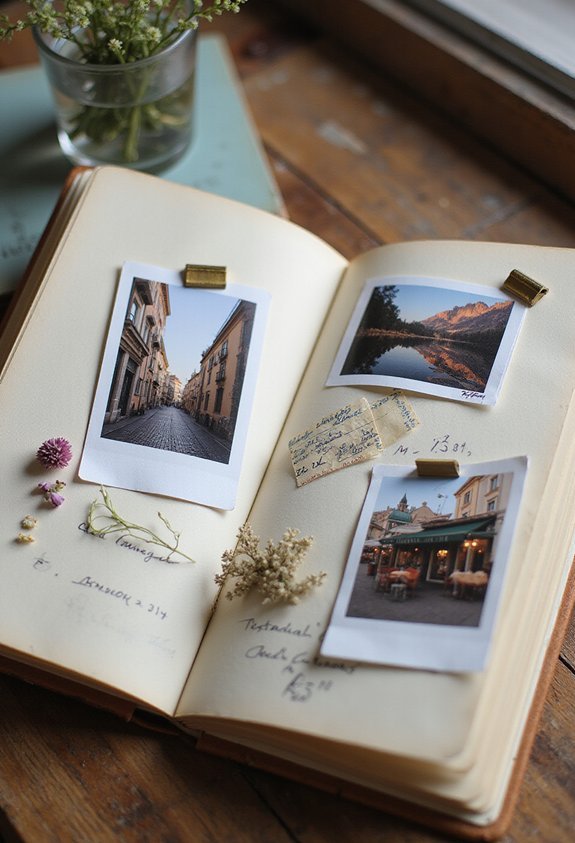
Transform your trip memories into a narrative timeline by pairing handwritten journal entries with carefully positioned photos. You’ll need acid-free photo corners (we love Pioneer’s self-adhesive variety) to mount your 4×6 prints without permanent damage. Position each image adjacent to the corresponding day’s entry for visual flow.
Write your reflections using archival-quality pens like Sakura Pigma Micron in 0.5mm width. Keep entries between 50-100 words per day—enough detail without overwhelming the page layout.
“The photo corner technique allows future repositioning while maintaining a vintage aesthetic,” notes scrapbook designer Maria Chen. “It’s both practical and charming.”
Layer your entries across spreads using washi tape borders to define each day’s section. This creates distinct visual boundaries while maintaining cohesive storytelling throughout your album.
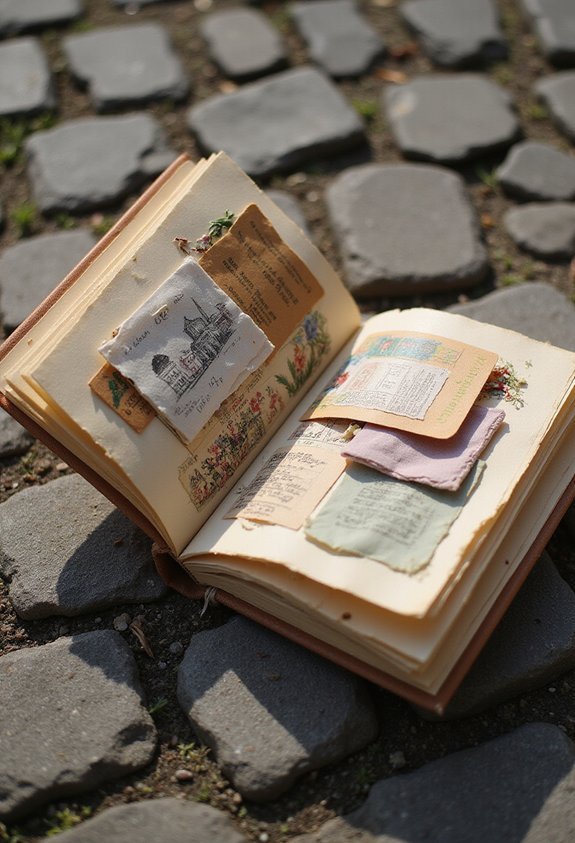
Pocket Pages for Collectible Mementos

Beyond photographs and written words, your travel adventures generate tangible treasures that deserve protection and display. Pocket pages transform ticket stubs, postcards, and museum passes into viewable keepsakes without permanent adhesive commitment.
We Can’t Get Enough’s design editor notes, “Clear vinyl pockets let you showcase both sides of ephemera while keeping items pristine.” Install 4×6-inch pocket sleeves along page margins using double-sided tape. Slip boarding passes behind mesh overlays for dimensional texture.
Create mini envelopes from patterned paper to hold pressed flowers or sand samples. Attach them with corner mounts for easy access. Library pockets work brilliantly for storing maps you’ll actually reference later.
Zippered pouches accommodate bulkier items like foreign coins or fabric swatches. Layer transparent and opaque pockets to build visual interest across your spread.
Restaurant Receipts and Food Memory Pages

Every memorable meal tells a story that faded receipts alone can’t fully capture. Transform those dining experiences into vivid food memory pages that celebrate culinary adventures.
Start with restaurant receipts as your foundation elements. Trim them to 3×4 inches and mount on cardstock. Add photos of signature dishes alongside handwritten notes describing flavors and ambiance. We can’t get enough of pairing receipts with napkins bearing restaurant logos—they add authentic texture to your layouts.
Create dedicated spreads for food markets and street vendors. Preserve business cards, menu snippets, and even toothpick wrappers in clear pockets. According to scrapbook designer Maria Chen, “Food ephemera becomes storytelling gold when you arrange items chronologically.”
Include quick reviews rating each meal’s highlights. Your future self will appreciate these delicious details.
Polaroid-Style Instant Photo Grids
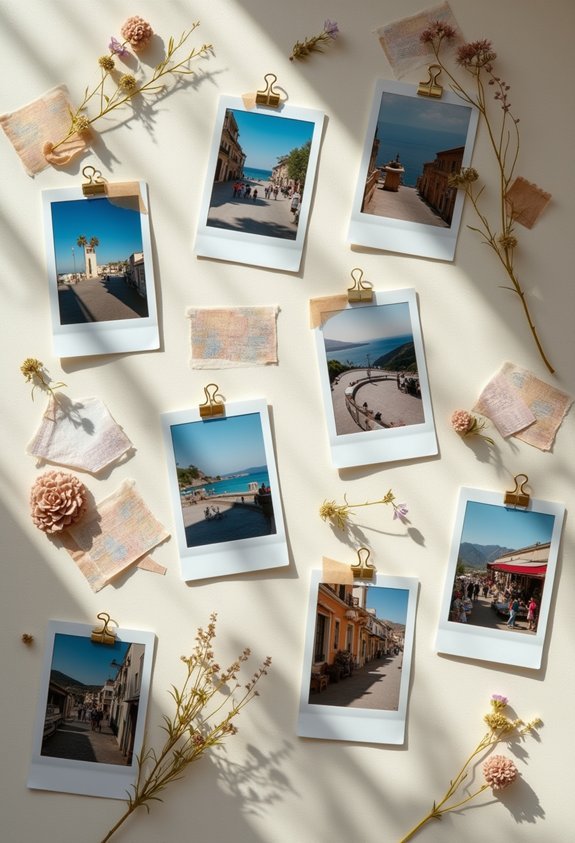
When you arrange instant photos in uniform grids, your travel scrapbook gains that coveted gallery-wall aesthetic without the commitment. Start with a simple three-by-three layout on 12×12 cardstock. Space your Polaroids exactly one inch apart for that clean, museum-quality look.
Mix landscape shots with portraits to create visual rhythm across your page. You’ll want to use photo corners instead of permanent adhesive—they’re removable and add vintage charm. We can’t get enough of the way gold-foiled corners complement warm sunset photos.
“Grid layouts force you to curate thoughtfully,” notes scrapbook designer Maria Chen. “You’re selecting your nine best moments, not fifty mediocre ones.”
Add handwritten captions beneath each photo using a fine-tip archival pen. Keep descriptions brief—just the location and date work perfectly.
Accordion Fold Books for City Walks
Accordion fold books transform your daily wandering through cobblestone streets and bustling markets into a continuous visual narrative. You’ll create a panoramic story that unfolds left to right, mimicking your actual walking route through neighborhoods.
Start with an 8×8-inch accordion base from Strathmore or Canson. Attach ticket stubs, café receipts, and pressed flowers with washi tape. Map out your route with hand-drawn illustrations between photos.
“The accordion format lets travelers see their entire day at once,” notes scrapbook designer Maria Chen. “It’s geography and memory combined.”
Layer lightweight elements only—heavy embellishments cause pages to buckle. We can’t get enough of adding walking distances and timestamps beside each photo. Store your finished book in a fabric sleeve to protect those fold lines during transport.
Color-Themed Pages by Destination

Although destinations differ dramatically in architecture and atmosphere, they often share a signature color palette that defines your visual memories. Santorini’s blue and white deserve dedicated pages with navy cardstock and whitewashed embellishments. Morocco calls for terracotta, saffron, and deep teal accents throughout your spreads.
You’ll want to select patterned papers that echo each location’s dominant hues. We can’t get enough of how Recollections’ 12×12 cardstock collections mirror specific regions perfectly. Thailand pages shine with hot pink and gold foil elements, while Iceland benefits from cool grays and glacier blues.
“Restricting your palette to three signature colors per destination creates visual cohesion without limiting creativity,” notes scrapbook designer Maria Chen. Mount photos using coordinating washi tape in complementary shades for polished results.
Mixed Media With Local Fabrics and Textures
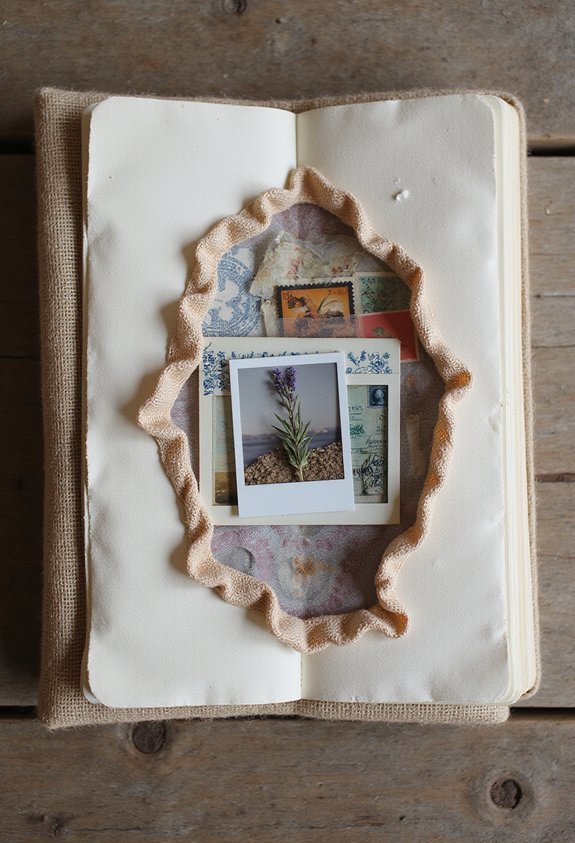
Beyond color coordination, the physical materials you collect during your travels transform flat pages into dimensional storytelling. Fabric scraps from Moroccan markets add authentic texture when layered behind photos. Pressed flowers from Parisian gardens create delicate borders that preserve memories beautifully.
Interior designer Maria Santos recommends, “Small textile pieces—like handwoven ribbons or linen samples—become natural page dividers that ground your visual narrative.”
We can’t get enough of burlap strips paired with beach sand in shadow boxes. Try adhesive dots to secure heavier materials without warping pages. Lace from vintage shops works perfectly as photo corners or matting.
Consider museo board backing for dimensional elements exceeding 1/4-inch thickness. Rice paper overlays soften busy compositions while maintaining visibility. Mix smooth and rough textures strategically—silk against corrugated paper creates compelling contrast.
Timeline Layouts Documenting Your Itinerary
When your journey spans multiple cities or weeks, a chronological layout transforms scattered memories into a cohesive visual story. Create a horizontal timeline across your spread using washi tape or hand-drawn lines. Mark each destination with ticket stubs, boarding passes, or miniature flags. Place photos above the timeline in date order, anchoring them with small captions noting the location and day number.
We can’t get enough of vertical accordion-style timelines that fold out from your page, revealing hidden journeys layer by layer. Use numbered stickers to mark each stop, creating a game-like progression through your trip.
“Timeline layouts work brilliantly when you’ve got a road trip or island-hopping adventure,” notes scrapbooking designer Maria Chen. “They literally map your movement through space and time.”
Interactive Elements With Fold-Out Panels and Hidden Pockets
Transform your scrapbook into a treasure hunt by adding fold-out panels that reveal secret stories and hidden pockets that hold tactile memories. Create fold-out panels using 12×12-inch cardstock scored at strategic intervals, allowing photos and journaling to cascade outward. Attach these panels with washi tape or mini brads for durability.
Tuck boarding passes, pressed flowers, and receipts into glassine envelopes adhered behind photos. We can’t get enough of We R Memory Keepers’ Cinch binding tool for creating custom pockets. Mini manila envelopes work perfectly for museum tickets.
“Interactive elements transform passive viewing into active discovery,” notes scrapbook designer Jennifer McGuire. “Each hidden compartment becomes its own micro-story.”
Layer vellum overlays on maps to create translucent windows. Install magnetic closures on larger fold-outs to protect delicate memorabilia while maintaining accessibility.
Frequently Asked Questions
What Adhesives Work Best for Securing Different Types of Travel Memorabilia?
You’ll want photo-safe tape runners for paper items, glue dots for dimensional objects like coins, and acid-free glue sticks for tickets. Use corner mounts for photos and double-sided tape for fabric pieces to preserve everything safely.
How Can I Protect My Scrapbook From Damage During Future Travels?
Store your scrapbook in a padded, waterproof case when traveling. You’ll want to use page protectors for delicate items and avoid overstuffing pages. Don’t pack it in checked luggage—keep it with you as a carry-on instead.
What Size Scrapbook Album Is Most Practical for Travel Memories?
A 12×12 inch album offers the best balance—you’ll have plenty of space for photos, tickets, and memorabilia without it becoming too bulky. However, if you’re tight on storage, an 8×8 works perfectly fine.
Should I Create My Scrapbook During the Trip or After Returning Home?
Both approaches work well, but you’ll find creating your scrapbook after returning home is easier. You can relax, gather all materials, and thoughtfully arrange everything without rushing. However, jotting quick notes during travel helps preserve memories.
How Do I Prevent Photos From Fading in My Travel Scrapbook?
Use acid-free paper and photo-safe adhesives to protect your pictures. Store your scrapbook away from direct sunlight and humidity. You’ll also want to use archival-quality materials and consider using photo corners instead of glue.
Conclusion
Your travel scrapbook tells the story of your adventures in ways photos alone can’t capture. Each page you create preserves memories through tangible mementos and personal touches. Don’t worry about making everything perfect—authenticity matters more than precision. Start with one layout technique that excites you most. Layer your ticket stubs, arrange your photos, and add those handwritten notes. You’ll build a keepsake that transports you back to every journey.