I built the first headboard because the wall behind my bed felt too bare, and I was tired of looking at emptiness every morning. My husband had basic tools in the garage, and I had stubbornness. We spent a Saturday afternoon creating something simple out of wood planks, nothing fancy, just boards arranged in a pattern that seemed to make sense. When we finished, I lay back on the pillow and looked up at what we’d made, and the room suddenly felt finished in a way it hadn’t before.
Living with it taught me things I hadn’t expected. The headboard changed how sound moved through the room. It absorbed noise instead of letting it bounce off the bare wall. The space felt quieter, more contained. I noticed how shadows fell across the boards at different times of day, creating texture that shifted with the light. A simple structure became something that changed depending on when I looked at it.
The real benefit came from how it changed my relationship with the bed itself. Before, the bed felt like furniture sitting against a wall. After, it felt anchored. The headboard gave the bed purpose and presence. I found myself spending more time there, reading or just sitting, because the space had become defined. The room organized itself around that focal point without me forcing anything.
What surprised me was how personal it became. The wood weathered slightly over months. Small marks appeared from use and living. The headboard wasn’t a perfect installation anymore. It was proof that we’d built something together and lived with it. That matters more than polish ever could. A headboard you make yourself holds the history of making it in a way something bought never can.
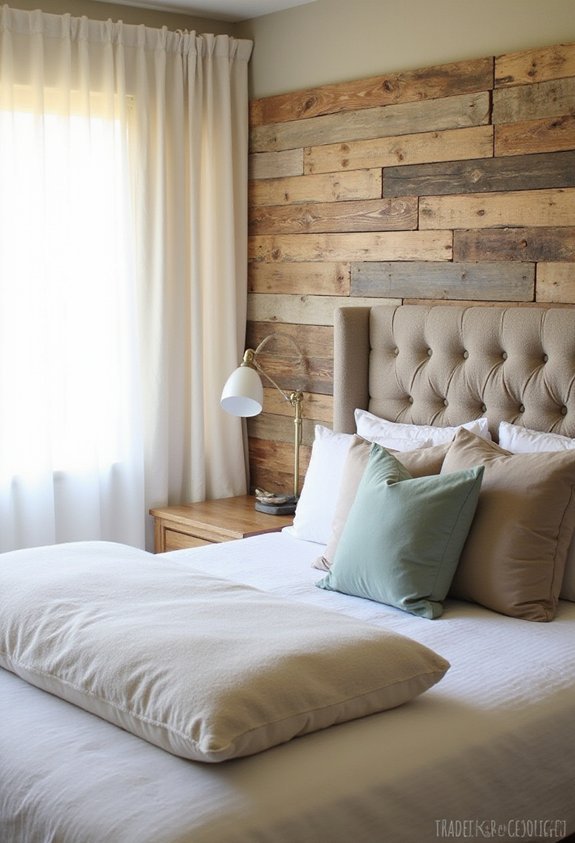
Reclaimed Wood Pallet Headboard
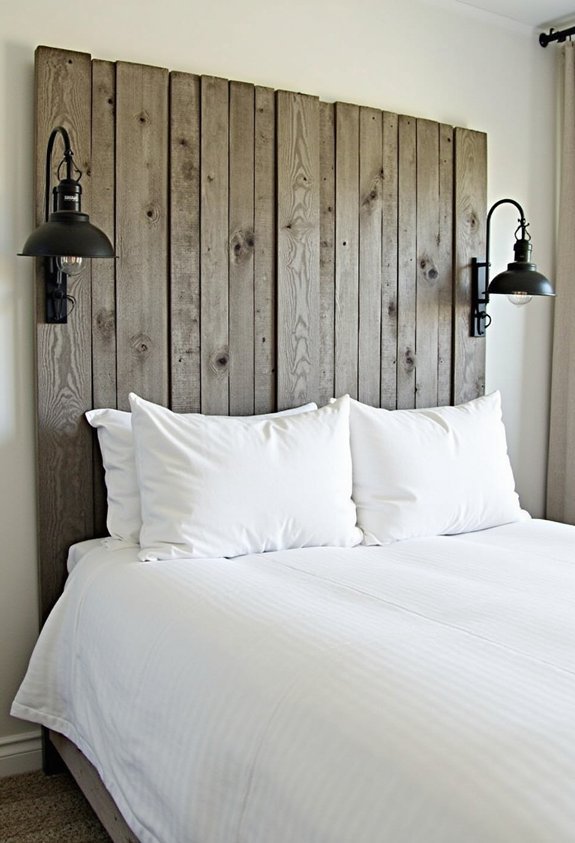
Snapping up free wooden pallets transforms your bedroom without draining your wallet. You’ll need two standard 48-by-40-inch pallets, sandpaper, and wood stain or paint. Start by sanding rough edges to prevent splinters and create a smooth surface.
Mount the pallets vertically behind your bed frame for instant rustic charm. Interior designer Maria Thornton notes, “Pallet headboards bring warmth and texture that expensive alternatives simply can’t replicate at this price point.” Secure them directly to wall studs using heavy-duty brackets.
Consider whitewashing for a coastal vibe or dark walnut stain for modern farmhouse appeal. The natural gaps between slats create visual interest and dimension. Add battery-operated LED strip lighting along the top edge for ambient illumination. This project typically costs $15-$30, leaving budget for decorative pillows.
Fabric-Covered Foam Board Headboard

Piecing together foam insulation boards with your favorite fabric creates a surprisingly upscale headboard for $25-$40. You’ll need two 1-inch thick foam boards from Home Depot, measuring 24×48 inches each for a queen bed. Lay them horizontally and wrap your chosen upholstery fabric around both panels, securing the edges with a staple gun on the back side.
Interior designer Maria Chen notes, “Foam board headboards deliver the custom look of professional upholstery without the hefty price tag.”
Consider velvet for texture or linen for a relaxed vibe. Mount the covered boards directly to your wall using heavy-duty adhesive strips. We can’t get enough of geometric fabric patterns that add visual interest. This lightweight option works perfectly for renters who need removable decor.
Also read: 17 Beautiful Fence and Deck Railing Ideas to Transform Your Outdoor Space
Macramé Wall Hanging Headboard
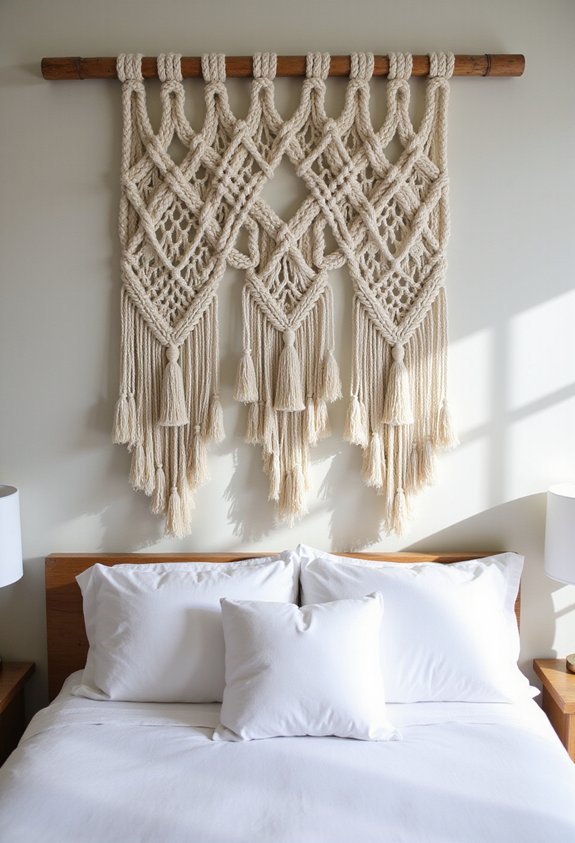
Hanging up macramé rope creates an artistic bohemian headboard for just $30-$45. You’ll need cotton cord from retailers like Michaels or Joann Fabrics, plus a wooden dowel rod. Mount the dowel 12-18 inches above your mattress using simple wall brackets.
Choose between pre-made panels or DIY knotting tutorials on YouTube. Pre-made options from Urban Outfitters range from 36-48 inches wide, perfect for twin or full beds. We can’t get enough of the textured, handcrafted look.
Designer Sarah Sherman Samuel notes, “Macramé adds warmth without overwhelming small spaces.”
Layer the piece with string lights for extra ambiance. The neutral tones complement any color scheme beautifully. This lightweight option works great for renters since it requires minimal wall damage.
Painted Plywood Geometric Headboard
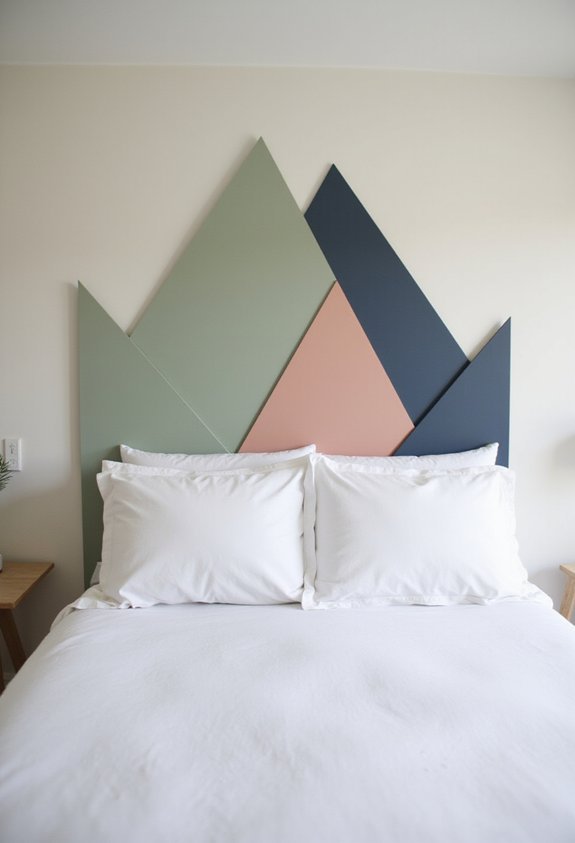
Transform a single sheet of half-inch plywood into a modern geometric headboard for under $40. Cut the 4×8-foot board down to your desired width, typically 60 inches for a queen bed. Sand the edges smooth with 120-grit sandpaper.
Create your geometric pattern using painter’s tape in triangles, hexagons, or chevrons. We can’t get enough of the bold contrast between soft pastels and crisp whites. Paint alternating sections with Behr Premium Plus Interior paint in complementary shades, removing tape while the paint’s still slightly wet.
“The key is letting each color dry completely before taping adjacent sections,” advises interior designer Maria Torres from Studio Refresh.
Mount the finished piece directly to your wall using heavy-duty picture hangers rated for 50 pounds minimum.
Upholstered Pegboard Headboard
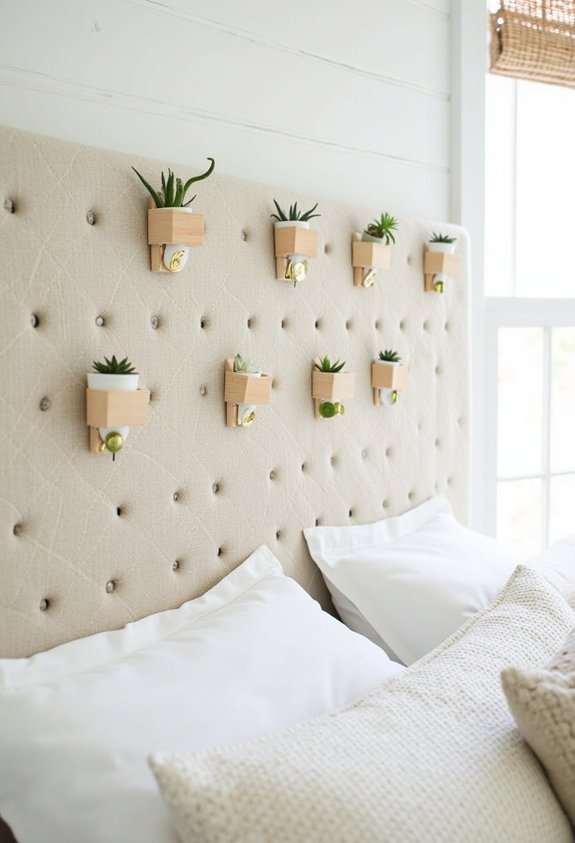
While geometric patterns bring visual drama, pegboard offers something equally striking: functional texture. You’ll transform standard pegboard into an upholstered statement piece for around $35.
Start with a 2×4-foot pegboard panel from your local hardware store. Wrap it with 2-inch foam padding, securing with spray adhesive. Choose budget-friendly fabric—linen or cotton work beautifully—and pull it taut across the foam, stapling on the back.
The holes remain functional through the fabric. Hang small planters or reading lights directly on your headboard. We can’t get enough of this dual-purpose design.
Mount it 6 inches above your mattress using wall anchors. The textured surface adds depth without overwhelming smaller bedrooms, and you’ve created storage space where blank wall once stood.
Woven Rope and Driftwood Headboard
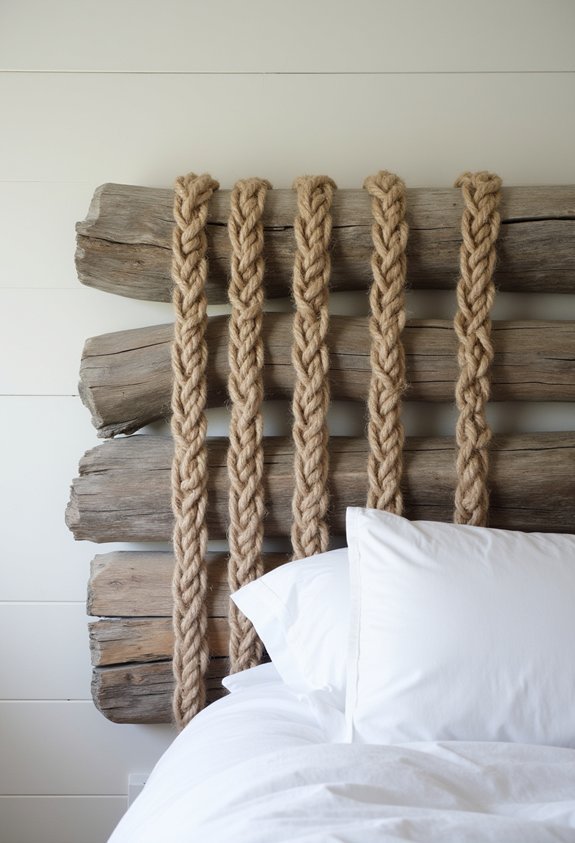
Natural materials bring coastal charm to your bedroom for just $40. You’ll need three pieces of driftwood from craft stores like Michaels, thick manila rope, and basic mounting hardware.
Start by cutting your driftwood to 48 inches long. Sand rough edges until they’re smooth to the touch. Position the pieces horizontally, spacing them 8 inches apart on your wall.
Weave the rope vertically between each driftwood section, creating a relaxed grid pattern that captures that beachy vibe we can’t get enough of. Secure ends with small screw eyes on the back.
Interior designer Rachel Morrison notes, “Rope headboards add texture without overwhelming small spaces.”
Mount the top piece first, then hang the lower sections. The natural wood tones complement any bedding style.
Vintage Door Headboard
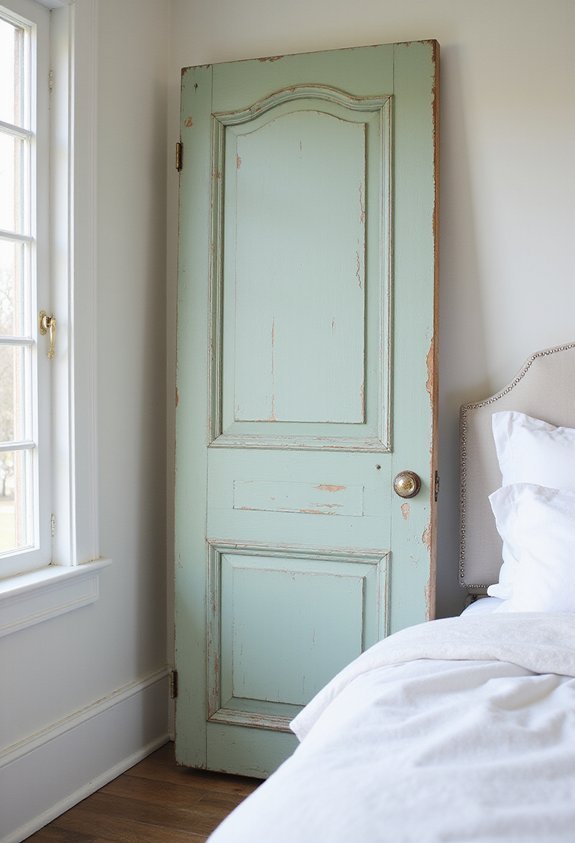
Why spend hundreds on a statement piece when salvaged doors create stunning headboards for under $45? Scout architectural salvage yards and flea markets for weathered wooden doors with original hardware still intact. You’ll want something between 60-72 inches wide to fit standard queen beds properly.
Sand down rough edges but preserve the chippy paint—that’s where the character lives. Mount your door horizontally using heavy-duty French cleats rated for 100 pounds. Designer Sarah Richardson notes, “Vintage doors bring instant history to modern bedrooms without looking too precious.”
We can’t get enough of doors with transom windows above them. They add unexpected visual interest while staying under budget. Pair yours with simple white bedding to let the headboard shine as your room’s focal point.
Frequently Asked Questions
How Do I Attach a DIY Headboard to My Bed Frame?
You can attach your DIY headboard using mounting brackets bolted to the bed frame, or drill holes through the headboard’s legs to align with existing frame holes. Alternatively, you’ll secure it directly to the wall using heavy-duty anchors.
What Tools Are Essential for Most DIY Headboard Projects?
You’ll need a drill/driver, measuring tape, level, pencil, and saw (circular or miter). Don’t forget sandpaper, wood screws, and a stud finder. These basic tools’ll handle most headboard projects efficiently and safely.
Can These Headboards Work With Adjustable Bed Frames?
Most DIY headboards can work with adjustable frames if you mount them to the wall instead of attaching them directly to the frame. You’ll need to position the headboard high enough to accommodate the bed’s movement range.
How Do I Ensure My Headboard Is Level When Mounting?
Use a level tool while marking your mounting holes. Mark both sides, then measure from the floor to guarantee equal height. Have someone hold the headboard while you check it’s straight before drilling pilot holes.
Will a DIY Headboard Damage My Wall When Installed?
You won’t damage your wall if you install your DIY headboard correctly. Use appropriate anchors for your wall type, avoid over-tightening screws, and fill any holes with spackle when you’re ready to remove it.
Conclusion
You’ve got seven budget-friendly headboard ideas that’ll transform your bedroom without draining your wallet. Each project stays under $50 and takes just a weekend to complete. Pick the style that matches your space—whether that’s rustic wood, bohemian macramé, or geometric patterns. Gather your materials, follow the steps, and you’ll create a custom focal point. Your bedroom deserves this upgrade, and you don’t need professional skills to pull it off.
