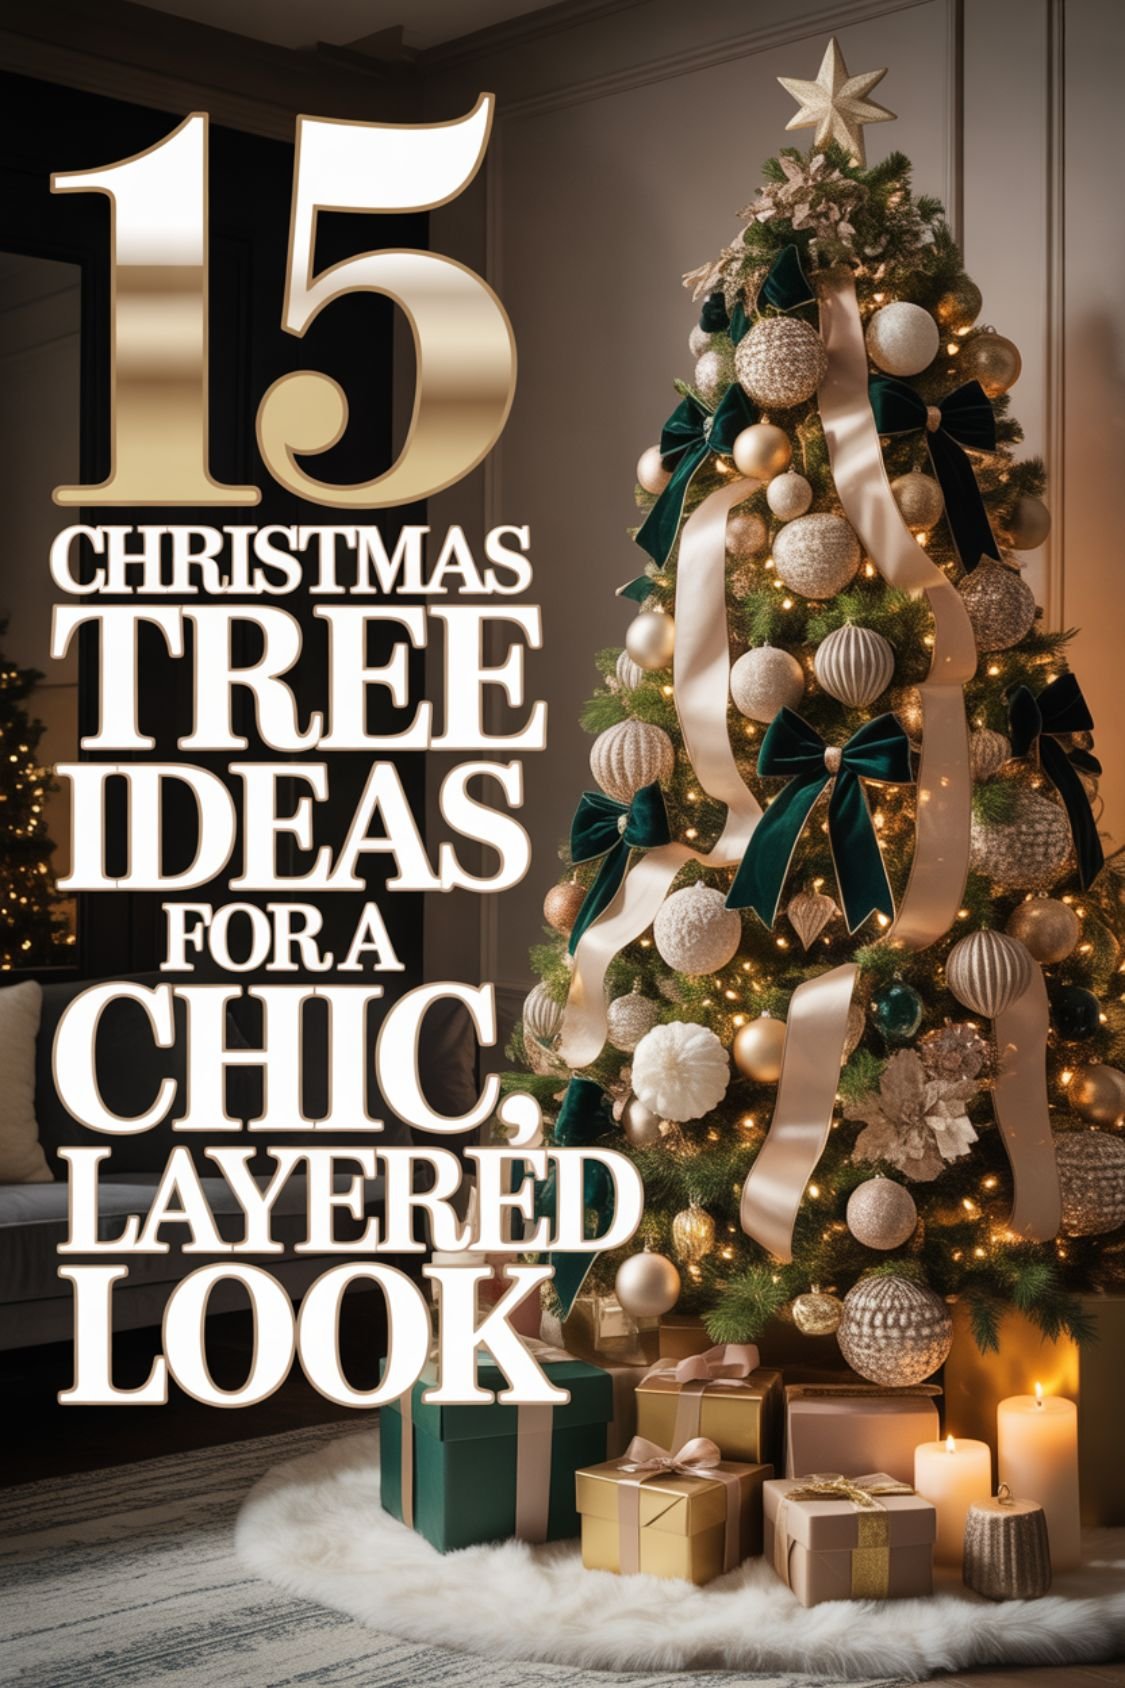
Your Christmas tree sets the entire tone for your holiday decor, and this year it deserves something beyond the same old routine. These 15 Christmas tree decor ideas span every style from rustic farmhouse charm to elegant modern minimalism, helping you create a centerpiece that truly reflects your family’s personality. Whether you’re working with a towering statement piece or a cozy tabletop version, discover fresh approaches to ornaments, lighting, and finishing touches that transform your tree from decorated to absolutely stunning without breaking your holiday budget.
Mix Metallic Finishes for Instant Glamour
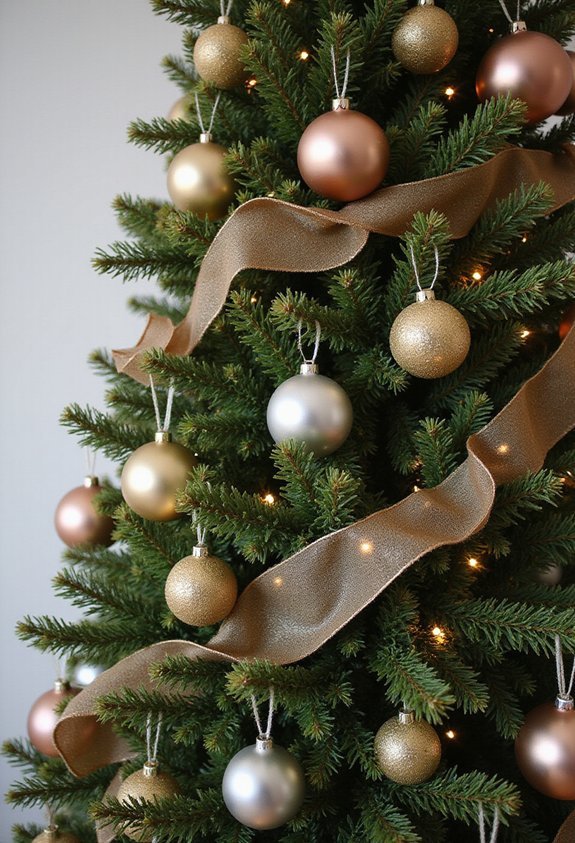
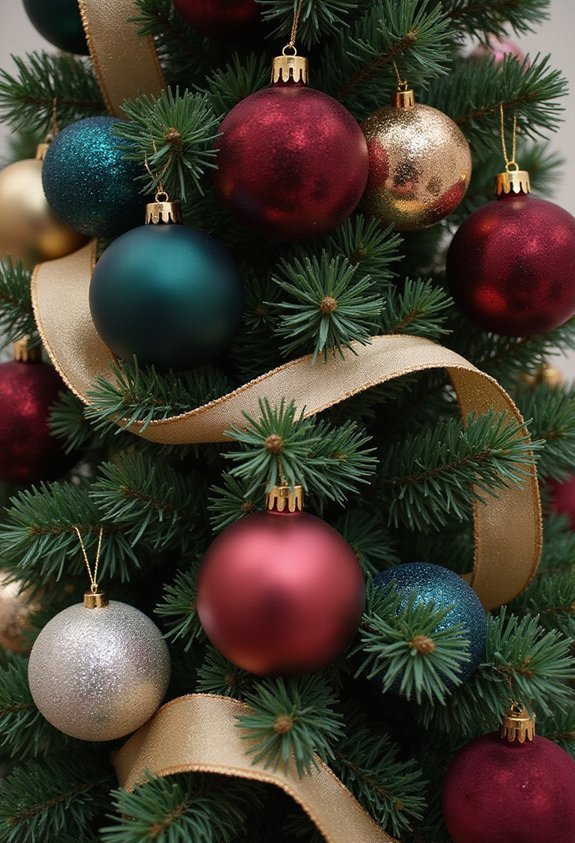
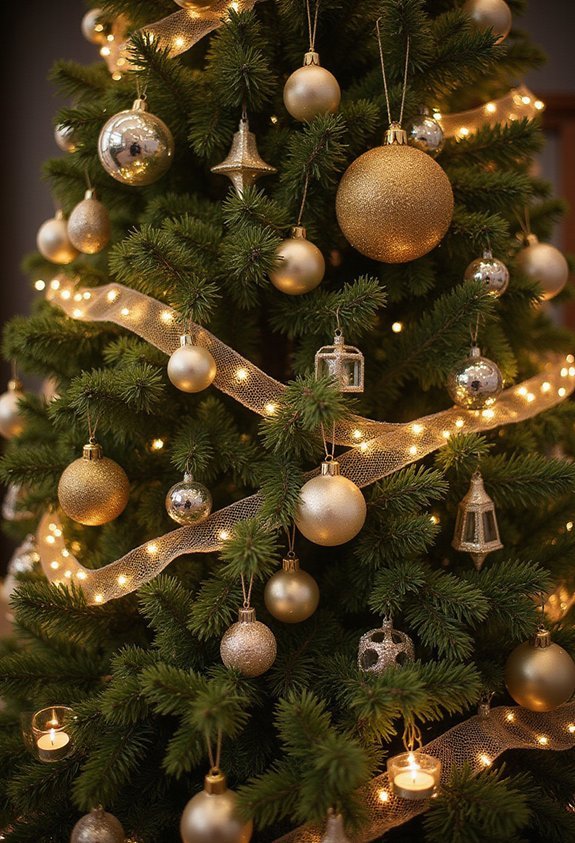
When you’re tired of looking at the same old boring tree, mixing metallic finishes is like giving your evergreen a fancy makeover—and trust me, your tree deserves to feel special too. I started combining gold, silver, and copper ornaments, and honestly? It’s a game-changer. Gold brings warmth. Silver adds sparkle. Copper makes everything feel cozy and sophisticated.
Here’s my trick: I drape gold garland around the middle sections, then weave silver ribbon through the branches. Copper bells dangle near the bottom. The contrast is chef’s kiss material. Your tree’ll look like it got dressed up for the fanciest party ever.
Mix matte and shiny finishes too. It prevents that “too matchy-matchy” vibe. Trust me, your living room’s about to become the envy of the neighborhood. Your tree’s ready for its close-up.
Also read: 7 Pottery Barn Christmas Decor Ideas to Recreate That Luxe-Casual Look at Home
Layer Your Ornaments by Size and Depth
The real magic happens when you stop throwing ornaments at your tree like you’re playing darts blindfolded. I learned this the hard way after my tree looked like a lumpy mess.
Here’s the trick: start with bigger ornaments, about 4-5 inches wide, placing them deeper inside the branches. They’re your tree’s skeleton. Then add medium ones, around 2-3 inches, in the middle layers. Finally, sprinkle tiny ornaments on the outer edges where everyone can admire them.
This creates depth that makes your tree look fuller and more intentional. I’m not gonna lie—it takes patience. But suddenly your tree transforms from “sad dorm room vibes” to “fancy magazine material.” The layering makes colors pop and prevents that flat, boring appearance.
Trust me, your tree’s gonna look absolutely ridiculous in the best way possible.
Incorporate Natural Elements Like Branches and Twigs
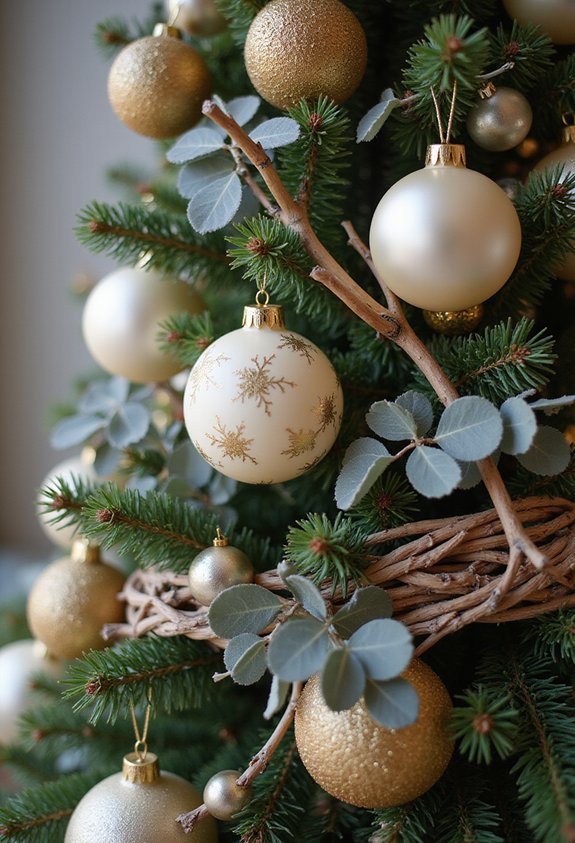
Now that your ornaments are looking sharp and layered like a pro, let’s talk about breaking up all that shiny ball action with some real forest vibes. Branches and twigs are basically nature’s free décor, and I’m here for it. Stick some curvy branches (literally stick them) into your tree at odd angles. They’ll poke out like your hair on Monday mornings, but in a chic way. Spray-paint them gold, silver, or leave them natural and earthy. Tuck in smaller twigs around your ornaments to add texture and depth. This move makes your tree look fuller without stuffing it like a Thanksgiving turkey. Trust me, these natural elements transform your tree from “nice” to “did you hire a decorator?” Your forest is showing, and it’s fabulous.
Use Dried Citrus and Botanical Accents
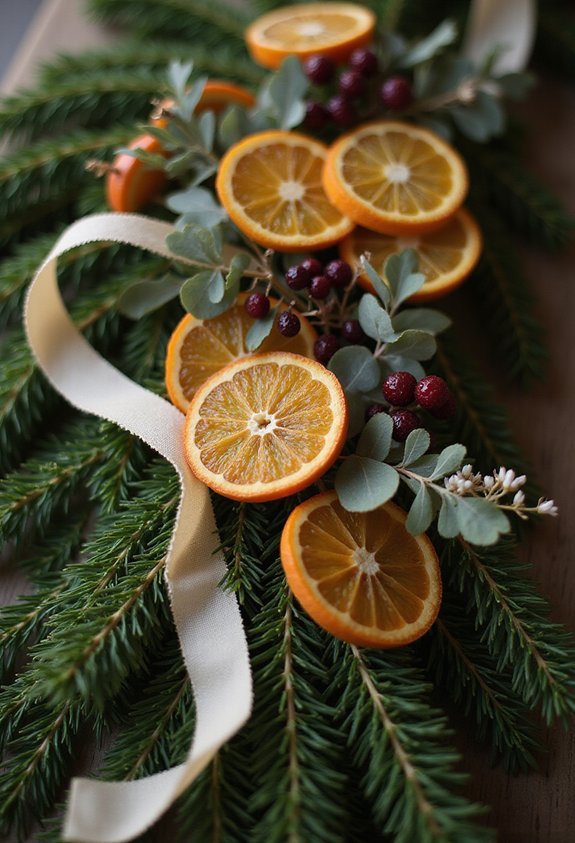
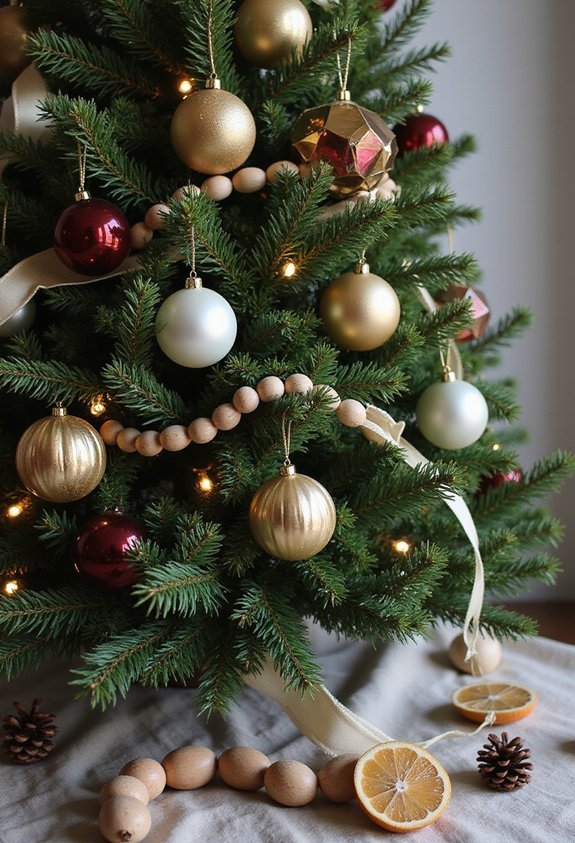
Since you’ve already got branches looking forest-fresh, let’s add some fruity flair that’ll make your tree smell like a holiday farmer’s market. I slice oranges and lemons paper-thin, then dry them in a 200-degree oven for three hours. They’re basically edible ornaments that won’t actually get eaten—unless your tree-loving dog has other plans.
String these golden discs throughout your branches using twine. They catch light beautifully and add warm, citrusy pops of color. Mix in some dried bay leaves and cinnamon sticks for botanical texture that’ll make your tree legitimately smell amazing.
Here’s the thing though: your house’ll smell so good, your guests might mistake your Christmas tree for a pie. I’m not complaining. This combo turns your tree into sensory overload—the delicious kind.
Play With Unexpected Color Palettes
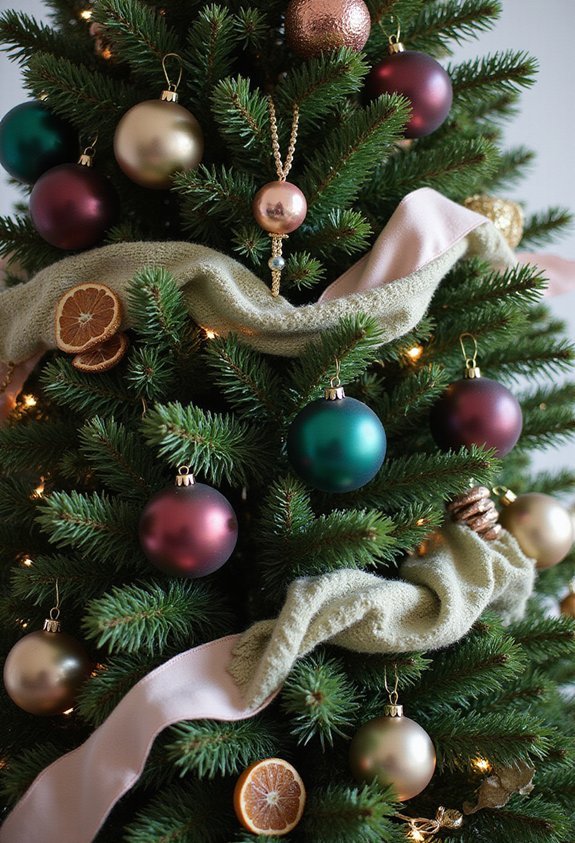
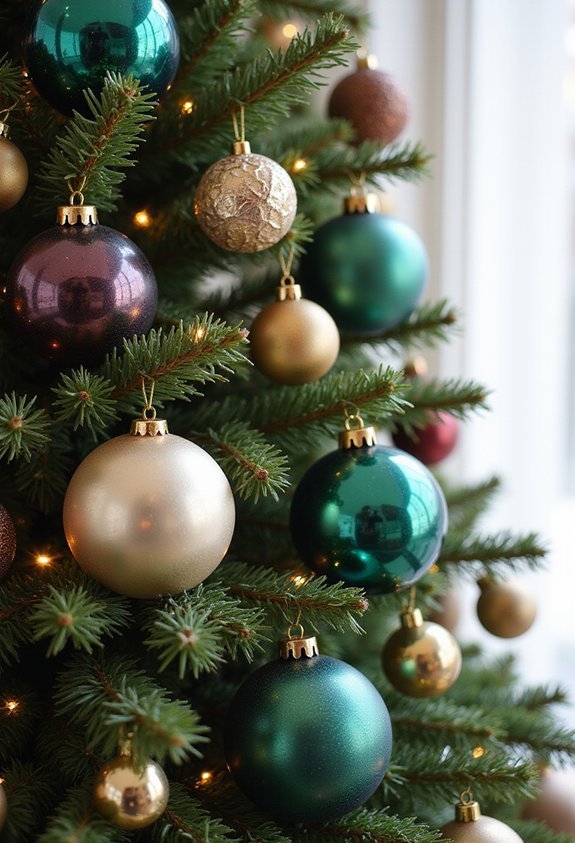
Why stick with red and green when you could make your tree look like it belongs in a fancy art gallery instead of your living room? I’m totally here for it.
Try going full purple and gold—it’s basically royalty vibes. Or go soft with blush pink, cream, and silver ornaments. I once did navy and white, and honestly, my tree looked like it sailed straight off a yacht. The best part? Nobody expects it.
You could even mix in metallics like rose gold or copper. These colors pop way better than traditional combos. Your tree becomes the conversation starter, not the background decoration.
Trust me, your guests will ask where you got your fancy taste. Spoiler alert: you just stopped overthinking it.
Add Oversized Statement Ornaments
Once you’ve nailed your color scheme, it’s time to stop playing it safe with those tiny ornaments that disappear into your branches. I’m talking massive, show-stopping baubles—think 4 to 6 inches wide. These giants won’t hide. They’ll actually make your tree look fuller without stuffing it like a Christmas turkey.
I mix huge metallic spheres with oversized matte finishes in complementary colors. A giant blush pink ball next to a champagne one? Chef’s kiss. Position your statement ornaments at varying heights and angles so they’re visible from every direction. Space them out strategically around the tree’s middle and lower sections.
The best part? Fewer ornaments mean less decorating time. Your arms won’t fall off, and neither will your sanity. Win-win.
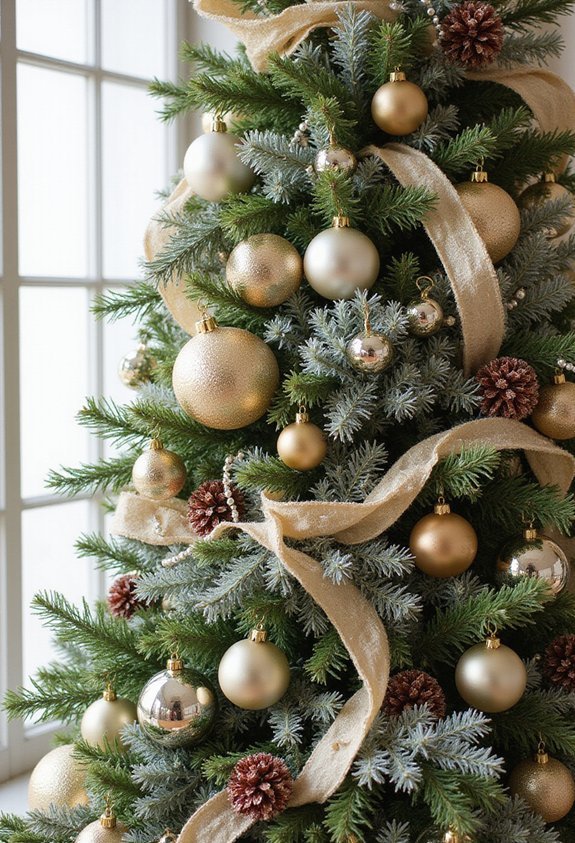
Create Texture With Ribbon and Fabric
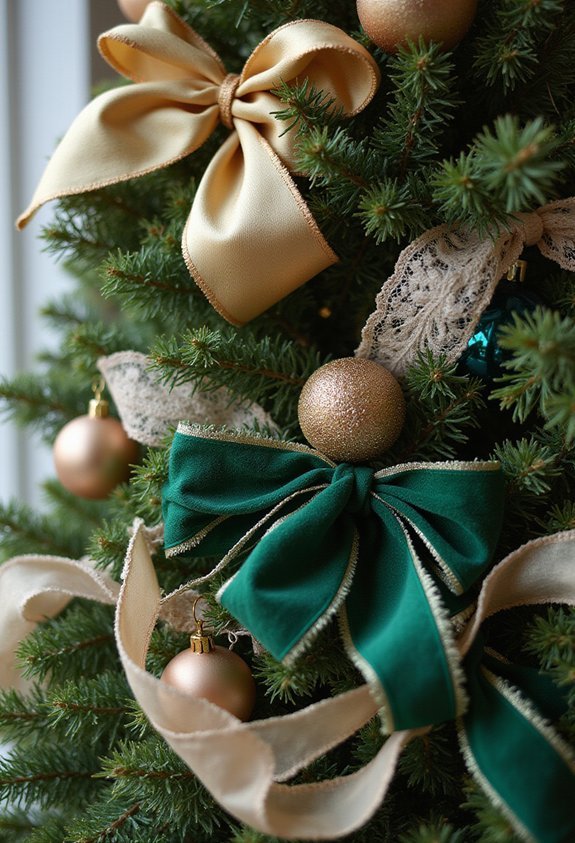
Your tree needs layers. I’m talking ribbon and fabric, friend. Drape 4-6 inch wide velvet ribbons in gold, burgundy, or emerald down the branches like you’re wrapping a present that won’t stop giggling. Weave them loosely—nobody wants a suffocated evergreen.
Fabric scraps work wonders too. I tucked vintage linen strips between ornaments and suddenly my tree looked magazine-worthy. Seriously, it’s basically cheating.
Mix textures boldly. Satin next to burlap creates visual pizzazz. Add sheer tulle for ethereal floofiness. Position ribbons asymmetrically so your tree doesn’t look like it’s standing at attention.
The secret? Layers create depth and dimension. Your tree transforms from sad to rad instantly. Trust me, this texture trick‘ll have guests asking questions.
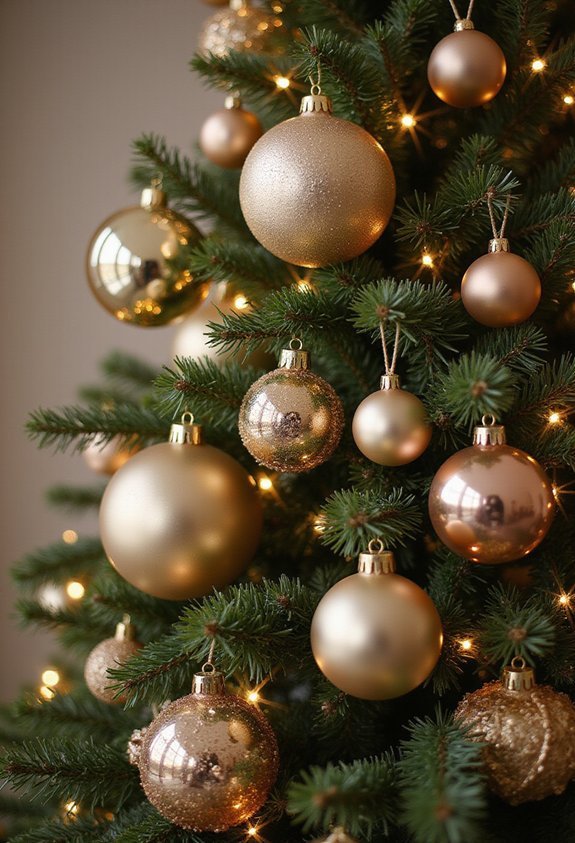
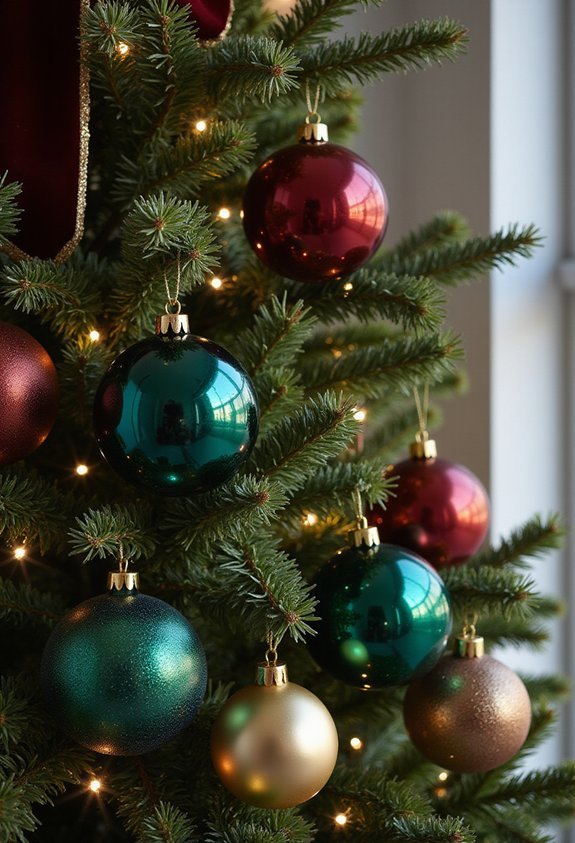
Combine Matte and Shiny Finishes
If you’ve been treating your tree like it’s all dolled up in one uniform finish, it’s time to shake things up. I’m obsessed with mixing matte and shiny ornaments because, honestly, it’s like giving your tree a personality transplant.
Grab those flat matte balls and pair them with glossy ones. The contrast is *chef’s kiss*—no actual drooling required, I promise. I cluster three matte red ornaments near shiny gold ones, and suddenly my tree doesn’t look boring anymore.
Here’s the thing: matte finishes absorb light and create calm areas. Shiny ones bounce light everywhere like they’ve had way too much eggnog. Together? They’re basically the tree version of a power couple.
Sprinkle them throughout different sections, mixing sizes too. Your tree’ll look intentional, layered, and genuinely fabulous.
String Beaded Garlands for Added Dimension
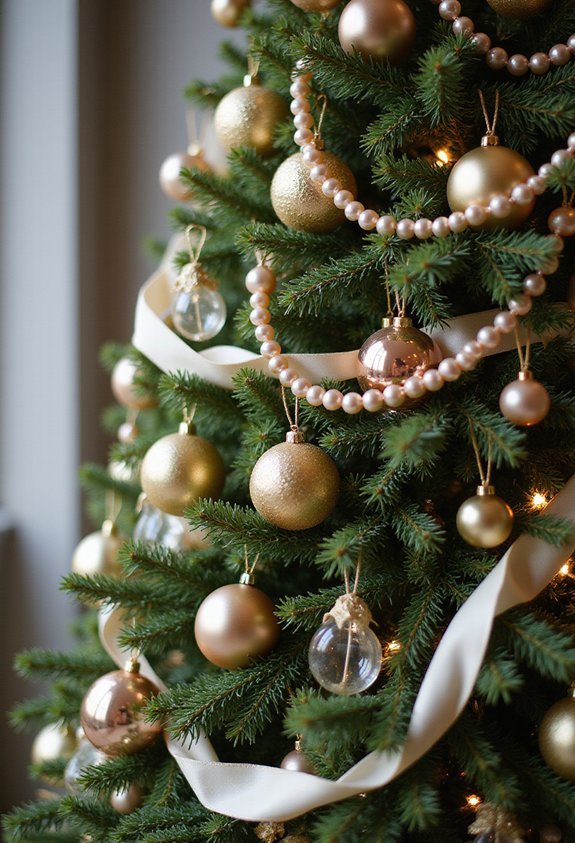
While those shiny and matte ornaments are doing their thing up there, let’s add some serious dimension with beaded garlands draped through the branches. I’m talking about those long strands of colorful beads that catch light like tiny disco balls. Drape them in swoops—not straight lines, because that’s boring and makes your tree look stiff. I use 6 to 8-foot strands per section, and honestly, I usually hold my breath while climbing the ladder because heights make me nervous. Gold and silver beads work with everything, but I love deep jewel tones too. Ruby reds, emerald greens, sapphire blues—they add serious pizzazz. Weave them in and around your ornaments for depth. Your tree’ll look professionally styled, not accidentally chaotic.
Introduce Vintage and Antique Ornaments
Vintage ornaments rule. I’m telling you, they’re basically time machines hanging from your branches. When I hunt through antique shops for 2-inch glass baubles in dusty rose or faded gold, I feel like an ornament archaeologist. My tree doesn’t just look decorated—it looks like it has actual memories.
You’ve gotta mix these treasures throughout your tree, not bunch them together like shy party guests. Tuck a 1950s mercury glass ball between branches. Hang a delicate ceramic figurine where it’ll catch light. These pieces tell stories your new ornaments never will.
The best part? They’re usually cheaper than fancy new stuff, and honestly, they’ve got more personality. Your tree’ll look expensive and elegant without making your wallet cry. That’s what I call a holiday win.
Mix Modern and Traditional Styles
Now here’s where things get really fun—blending old-school charm with shiny new stuff on your tree. I’m talking mixing your grandmother’s dusty glass balls with those trendy geometric ornaments. Your tree won’t know whether to wear pearls or sneakers, and honestly, that’s fabulous.
Try hanging vintage wooden beads next to modern metallic ones. String some antique tinsel between sleek LED garland. Position traditional red velvet bows alongside minimalist gold wire shapes.
The beauty? Your tree becomes this conversation starter that screams “I have taste and chill vibes.” It’s like wearing grandma’s brooch with ripped jeans. Nothing says sophisticated holiday style like respecting the past while embracing the present.
Your tree’s basically become a time machine. And that’s genuinely awesome.
Add Faux Fur and Plush Textures
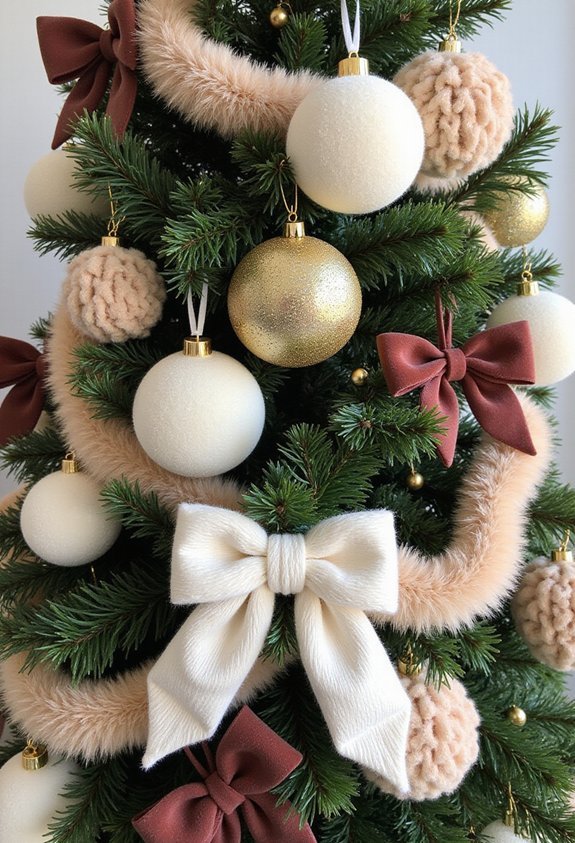
Because your tree’s been looking a little stiff and formal, it’s time to make it touchable—literally. I’m obsessed with draping faux fur garland around branches—it’s like giving your tree a cozy sweater. White or cream fur looks elegant, but don’t sleep on blush pink or champagne versions either. I wrap mine around the middle and let it cascade down, creating this gorgeous, fluffy waterfall effect. Add plush velvet ornaments in jewel tones or metallics for serious texture contrast. These soft balls catch light differently than shiny ones, and honestly, they’re so squishy I can’t stop squeezing them. Tuck faux fur between branches where branches look bare. Your tree transforms from “sorry, I’m rigid” to “come hug me.” That’s the vibe I’m chasing.
Layer Multiple Types of Lights
Three types of lights’ll seriously level up your tree’s glow game, and I’m not exaggerating. First, I wrap warm white string lights around the trunk—they’re like the cozy foundation. Then, I weave in cool blue LED lights through the middle branches for contrast. Finally, I tuck tiny fairy lights near the front where they’ll catch everyone’s eye. The result? Your tree’ll literally glow like it ate lightning (in the best way). I’m talking serious illumination here. Mix different light sizes and colors, and suddenly your tree goes from basic to brilliant. Trust me, I once used just one string and my tree looked sadder than my jokes. These layers totally fix that problem.
Incorporate Personalized and Heirloom Pieces
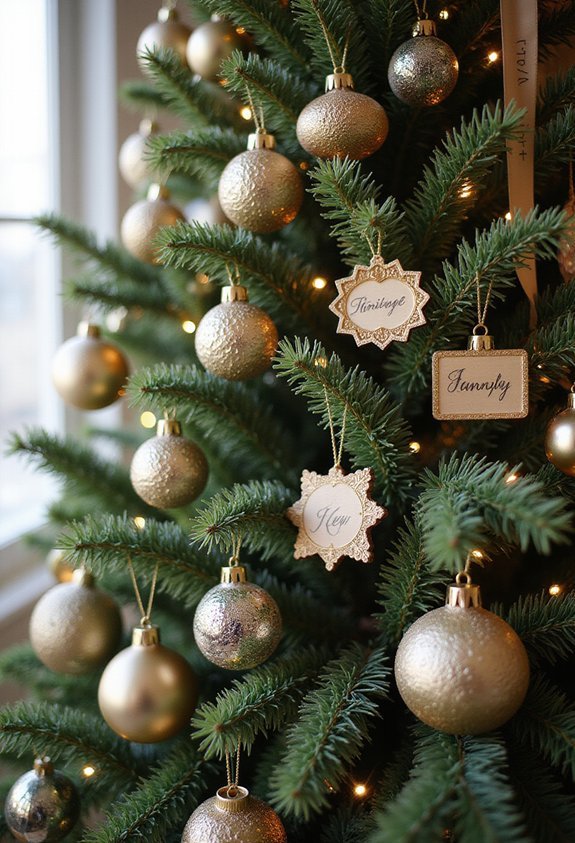
While fancy store-bought ornaments are nice, the ones that’ll really make your heart do a happy dance are the ones with actual memories attached to them. I hang my grandmother’s glass baubles right up front—they’re gorgeous and they make me feel like she’s decorating with me. Then I add my kids’ handmade ornaments from preschool, complete with glitter mishaps and crooked ribbon loops. They’re not perfect, but they’re perfectly mine. I tuck in old family photos inside clear ornament balls, creating little memory capsules dangling from branches. These pieces tell my story, you know? Your tree becomes way more interesting when it’s basically a visual scrapbook. Skip the cookie-cutter look. Make it weird. Make it yours.
Balance Symmetry With Organic Placement
Once you’ve loaded your tree with all those meaningful pieces, here’s where most people’s brains short-circuit: Do I make it look like a symmetrical masterpiece, or do I just wing it?
Here’s the secret: do both. I start by placing my biggest ornaments roughly opposite each other, which gives structure. Then I fill gaps with smaller treasures at random heights and angles. Think of it like seasoning—a pinch here, a dash there. Your tree shouldn’t look like a boring department store display. It needs personality. I intentionally leave some spots slightly bare because perfection feels fake. Asymmetrical trees look alive and collected, not staged. Trust me, “good enough” placement beats overthinking every single inch. Your guests won’t measure distances anyway.
Frequently Asked Questions
How Do I Prevent Ornaments From Sliding Down Branches on My Tree?
I’ll help you keep those ornaments in place. I recommend using floral wire or fishing line to secure ornaments directly to branches. You can also wrap small pieces of non-slip shelf liner around branch stems where ornaments sit, creating friction that prevents sliding.
What’s the Best Way to Store Delicate Decorations After the Holiday Season?
I’d recommend wrapping each delicate decoration individually in bubble wrap or tissue paper, then storing them in labeled compartment boxes. I keep mine in a cool, dry closet away from temperature fluctuations. You’ll protect your treasures and find them easily next year.
How Can I Make My Tree Look Fuller Without Buying Additional Ornaments?
I’d recommend layering branches strategically by fluffing out your tree’s limbs and angling them downward. You can also add greenery, ribbon, or string lights between ornaments. Varying heights and depths creates fullness without purchasing new decorations.
Should I Decorate My Tree Before or After Placing It in Water?
I’d recommend decorating your tree after you’ve placed it in water. This way, you’ll avoid damaging ornaments while positioning the tree, and you’ll guarantee it’s stable and upright before you start hanging your beautiful decorations.
How Do I Safely Hang Heavy Statement Ornaments on Lighter Tree Branches?
I’d recommend reinforcing lighter branches with floral wire or fishing line before hanging heavy ornaments. You can wrap the wire around the branch first, then secure your statement piece to it. This distributes weight better and prevents breakage.
Conclusion
Your tree’s about to become the neighborhood’s most jealous-worthy masterpiece. You’ve got shiny metals catching light, ornaments layered like a fancy lasagna, and natural branches making everything smell like a forest. Throw in some dried oranges and boom—you’re basically a professional decorator now. Your tree won’t just look good. It’ll make everyone’s basic decorations weep with envy. Go forth and bedazzle that evergreen beauty.
