DIY bedroom decor ideas help you shape a space that feels personal, warm, and stylish, using creative projects that add character while keeping costs low and choices flexible.
With DIY bedroom decor ideas, thoughtful touches like custom wall art, layered lighting, and refreshed furniture can change the mood of your room without major renovations.
DIY bedroom decor ideas also make decorating enjoyable, encouraging creativity, reuse, and simple upgrades that turn your bedroom into a calm, comfortable retreat you genuinely enjoy spending time in.
Paint an Accent Wall for Maximum Impact

When you’re tired of staring at the same boring beige walls, it’s time to grab a paintbrush and get bold. Picking one wall to paint—usually behind your bed—gives you maximum wow factor without the commitment of painting everything. Choose a deep jewel tone like emerald or navy blue, and watch your whole room transform. You’ll need primer, paint, a roller, and maybe some confidence (don’t worry, mistakes happen). Tape off your edges carefully, or you’ll end up with wavy lines that’d make a toddler laugh. Paint in smooth, overlapping strokes and don’t skimp on coats. Your accent wall‘ll become the room’s best feature, and honestly, you’ll feel like an interior design genius. Your wallet will also stay happy since you’re only painting one wall, not four.
Also read: Hippie Bedroom Decor | Bohemian & Free Spirit
Create a Gallery Wall With Printed Photos

Your accent wall‘s looking amazing, but now you’ve got a whole lot of blank space begging for attention. Time for a gallery wall! Print your favorite photos in various sizes—5x7s, 8x10s, whatever makes you giggle. Grab some cheap frames from thrift stores, mix wood and white finishes, and arrange them in a loose grid pattern. Honestly, my first attempt looked like a sneeze explosion, but I just added more photos and nobody noticed. Hang them about 57 inches from the floor to eye level. Use painter’s tape to map everything out first—trust me, your walls will thank you. Now your bedroom tells your story without draining your wallet!
Make Your Own Headboard From Reclaimed Wood

If you’ve ever dreamed of having a headboard that screams “I’m fancy and artsy,” reclaimed wood is totally your answer. Hunt down old wooden planks from flea markets or salvage yards. They’re basically furniture’s version of recycling—totally cool and guilt-free.
Arrange your planks in a fun pattern. Mix different wood colors and widths for serious visual interest. You can go straight and boring, or zigzag like you’re slightly unhinged. We won’t judge.
Secure everything to the wall behind your bed using sturdy brackets and screws. A 5-foot-wide headboard fits most queen beds perfectly. Sand rough edges so you don’t accidentally splinter yourself at 2 a.m.
Paint or stain your creation any color you want. Dark walnut? Bright white? Glittery purple? Your bedroom, your rules. This headboard costs way less than store-bought versions and looks infinitely cooler.
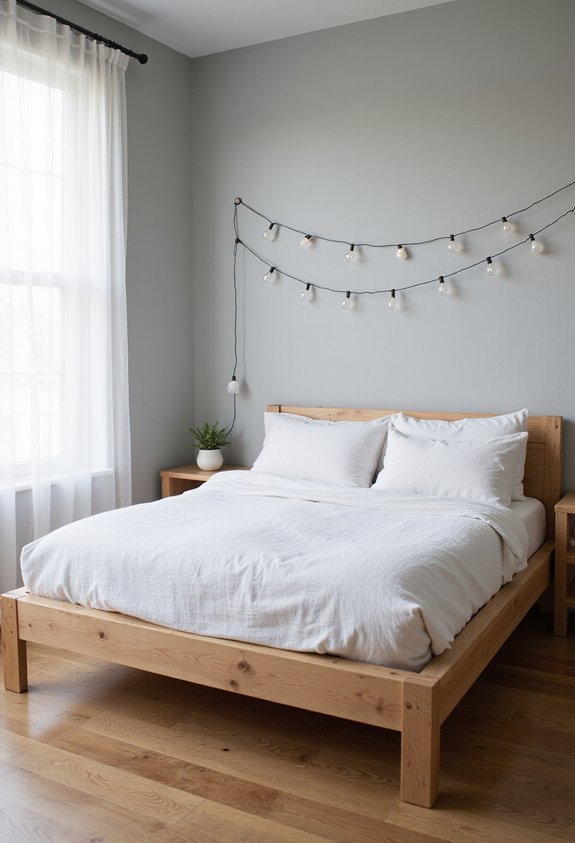
String Fairy Lights for Ambient Glow

Nothing transforms a bedroom quite like fairy lights—they’re basically magic in string form. You’ll drape these tiny glowing orbs around your headboard, along your walls, or across the ceiling. They’re the easiest way to feel fancy without breaking the bank.
String about 20 to 30 feet of warm white lights (seriously, warm white looks cozier than cold white). Tape them up with removable adhesive strips so you won’t anger your landlord. Drape them in loose swoops rather than straight lines—it looks more intentional and way less like you’re decorating for a hostage situation.
Turn them on at night and watch your boring room transform into a cozy cave of dreams. Your bedroom’s now basically a five-star hotel, except you’re still eating cereal for dinner.
Sew Simple Throw Pillows From Fabric Scraps

Now that your bedroom’s glowing like a cozy dream cave, it’s time to add some pillows that actually match your vibe. Grab those fabric scraps cluttering your craft drawer—you know, the ones you’ve been hoarding since 2019. Cut two 16-by-16-inch squares from your favorite patterns and colors. Pin them together with the pretty sides facing inward, then sew around three sides using a basic running stitch. Don’t worry if it’s wobbly; pillows are forgiving judges. Flip it inside-out through the opening and stuff it with old clothes or batting until it’s pillow-shaped. Fold the open edges inward and hand-stitch them shut. Boom! You’ve just created bedroom magic without spending actual money.
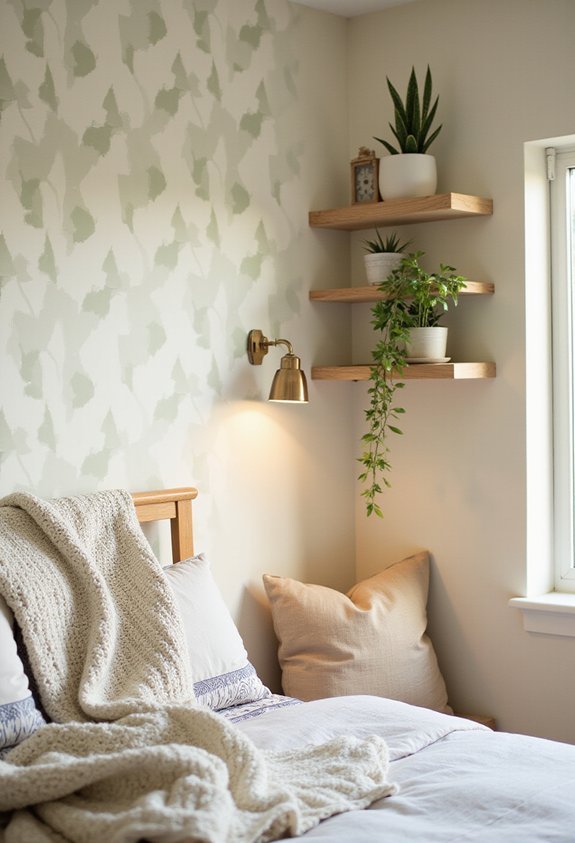
Hang Floating Shelves for Storage and Display
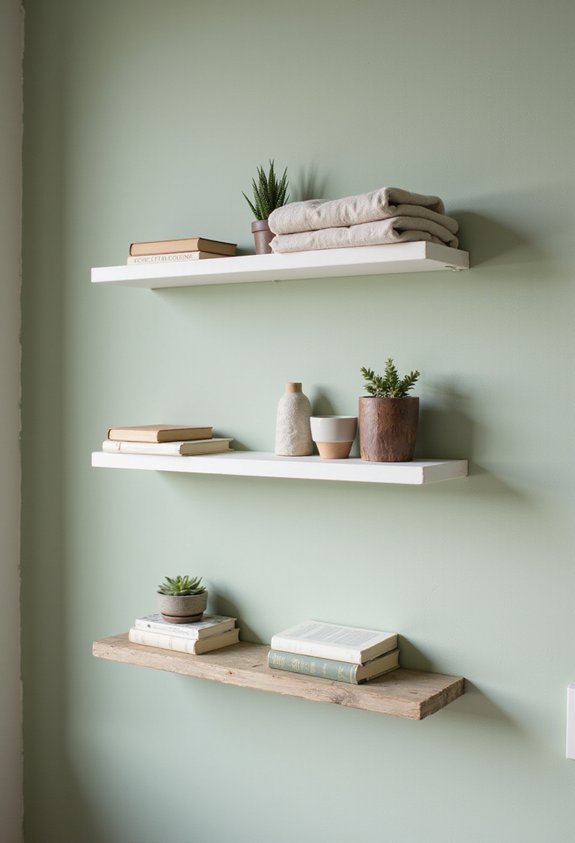
Once you’ve gotten cozy with your new throw pillows, your bedroom’s probably starting to look like an actual grown-up lives there—and that’s when you realize you’ve got nowhere to put stuff. Enter: floating shelves, your clutter’s new best friend.
These bad boys mount directly to your wall, no legs required. Grab some 12-inch or 24-inch shelves (depending on your wall space), a level, and some heavy-duty brackets. They’re honestly easier to install than assembling IKEA furniture, and way less rage-inducing.
Style them with books standing upright, small plants, framed photos, or that weird decorative item your aunt gave you. Mix heights and colors for visual interest. Your stuff finally has a home, and your floor will actually be visible again.
Stencil Geometric Patterns on Plain Walls
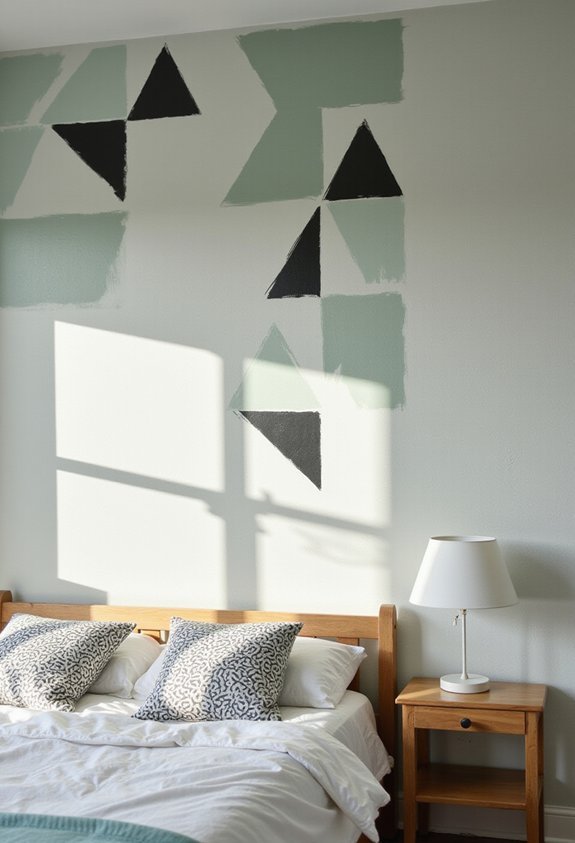
Your walls have been sitting there, plain and boring, just waiting for something more exciting than paint color number seventeen. Time to shake things up with stencils! You’ll grab some geometric stencil templates (grab a few different shapes), tape them securely to your wall, and go wild with acrylic paint. Triangle patterns look sharp along one accent wall. Hexagons create a honeycomb vibe that’ll make your bedroom feel like you’ve got your life together. Use contrasting colors—think white geometric shapes on soft blue or black patterns on cream. A six-by-six-inch diamond grid takes about an hour and transforms everything. Your walls won’t bore anyone anymore. Plus, you’ll feel like a legit artist, minus the messy studio hair situation. Pretty sweet transformation for under twenty bucks!
Craft a Macramé Wall Hanging
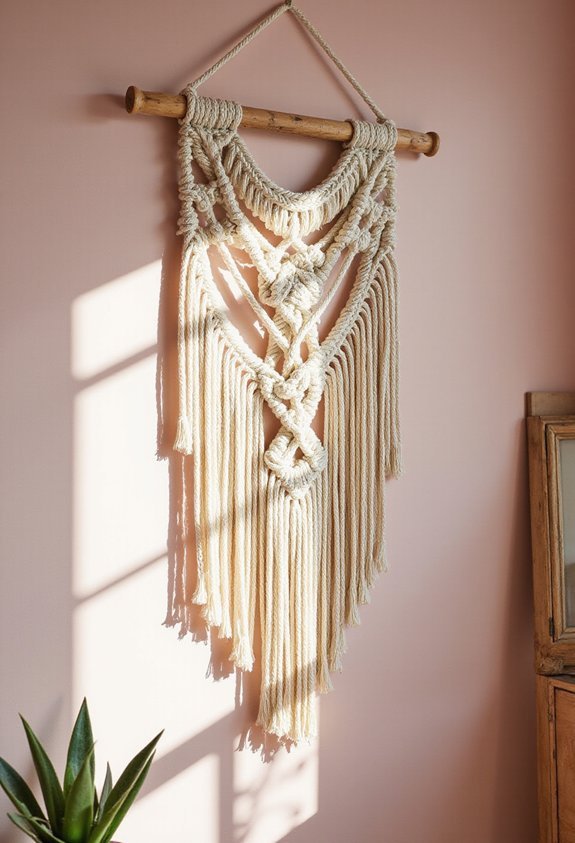
If you’ve conquered those geometric walls and you’re ready for your next bedroom glow-up, macramé wall hangings are calling your name. Grab some cotton rope (about 50 feet) and prepare for knot-tying glory. Start by creating a simple square knot pattern—it’s easier than you’d think and way less intimidating than it looks. Hang your finished piece above your bed or dresser for instant boho vibes. The best part? You’ll feel incredibly proud watching people admire your creation. Sure, your fingers might cramp slightly, but that’s just your hands applauding your effort. This 3-to-4-hour project transforms any plain wall into a statement piece. Your bedroom’s about to become seriously Instagram-worthy without breaking your budget.
Repurpose Vintage Frames as Wall Art
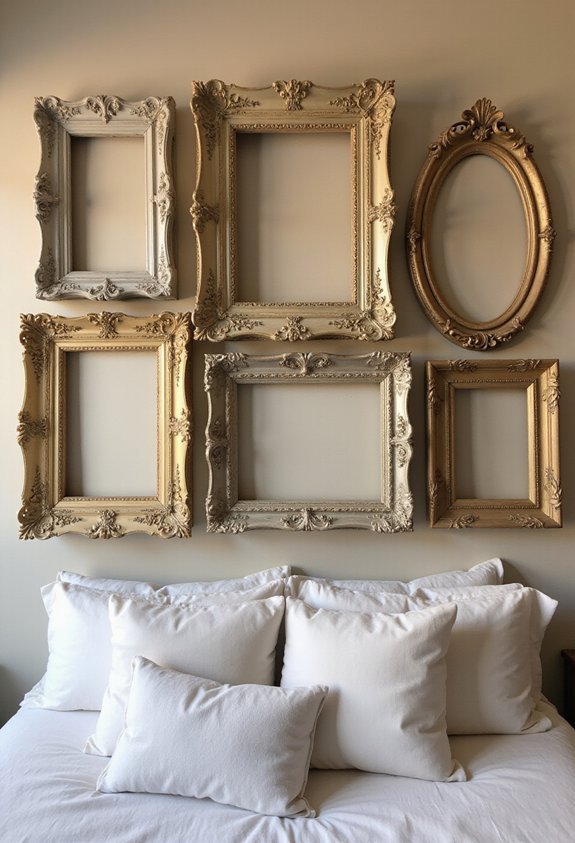
Now that you’ve mastered the art of knot-tying, it’s time to raid thrift stores and grandma’s attic for some seriously cool frames. You’ll find ornate gold ones, sleek silver frames, and those hilariously chunky wooden numbers from the ’80s. Pick frames in different sizes—mix 8x10s with smaller 5x7s for visual pizzazz. Paint them wild colors like deep teal or bubblegum pink if you’re feeling spicy. Fill them with colorful paper, magazine cutouts, or fabric scraps instead of actual photos. Arrange them in a grid pattern on your wall, or go chaotic and scatter them like you sneezed and they landed perfectly (they won’t, but pretend). Your walls’ll transform from boring to gallery-vibes instantly, and you’ve barely spent a dime!
Use Peel-and-Stick Wallpaper on a Budget
Forget about hiring professionals and spending your entire paycheck—peel-and-stick wallpaper is basically magic that comes in a roll. You’ll transform your bedroom walls without breaking the bank or your back.
Pick patterns that make you smile, whether it’s geometric shapes or botanical prints. Measure your walls carefully—seriously, grab that tape measure—then cut strips slightly longer than needed. Start at the top corner and smooth downward, pushing out air bubbles as you go. Your arms might get tired, but you’ll survive.
The best part? If you mess up, you peel it off and try again. No commitment required, just like your last relationship. Your walls go from drab to fab in hours, not days.
Create a Fabric Canopy Above Your Bed
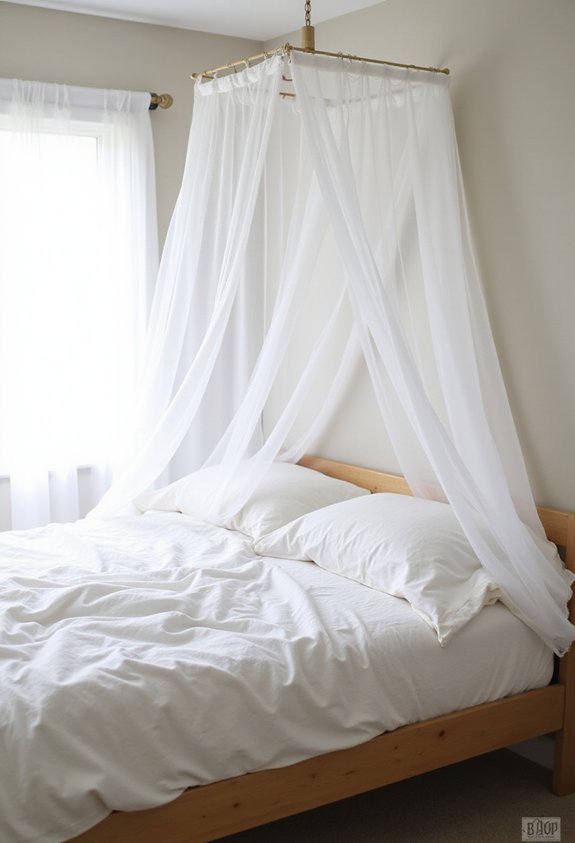
Ready to feel like royalty without the crown? Draping fabric above your bed is ridiculously easy and surprisingly magical. Grab some sheer curtain panels or lightweight fabric from any store. You’ll need a tension rod or sturdy string to hang it.
Mount your rod about eight feet high on opposite walls, positioning it just above your headboard. Drape the fabric loosely—don’t stress about perfection. Crumples look intentional and dreamy, not like you gave up halfway through. Choose soft colors like blush pink, sage green, or cream to create that luxe spa vibe without actually spending spa money.
The best part? You’ll feel fancy every single night. Your bedroom transforms into an elegant retreat where you can pretend you’ve got your life together. Even if you don’t.
Build a DIY Platform Bed Frame
Building your own platform bed frame is way easier than you’d think—and way cheaper than buying one. You’ll need four wooden legs, some two-by-ten boards, and basic tools. Stack those boards into a rectangle—roughly eighty inches by sixty inches for a queen. Screw everything together, and boom, you’ve got a sturdy base. No box spring needed, which means more money for, well, literally anything else. The best part? Your bed’ll sit low and look super sleek. Plus, you’ll sleep like you just won the lottery because you basically saved hundreds of dollars. Your back’ll thank you, and your wallet will do a happy dance. That’s a win-win situation right there.
Make String Art With Nails and Thread
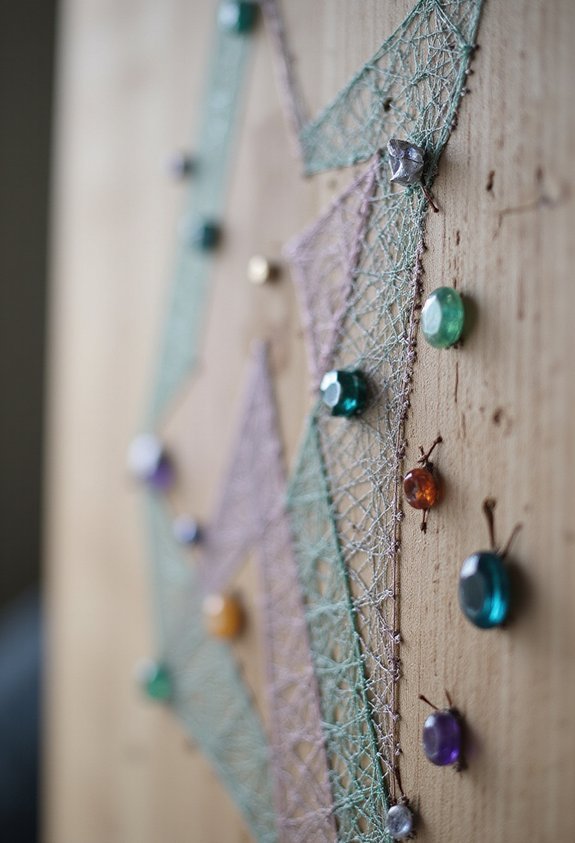
While you’re admiring your new platform bed, it’s time to make your walls just as awesome—and string art‘s your answer. Grab a wooden board, some nails, and colorful thread—you’ve basically got a masterpiece waiting to happen. Sketch your design lightly in pencil first, whether it’s a heart, star, or geometric pattern. Hammer nails around your outline, spacing them about half an inch apart. Now comes the fun part: wrap your thread around those nails in crisscross patterns. You’ll feel like a string-wielding artist (minus the messy paint explosions). Pick bold colors like hot pink or electric blue to really make your wall pop. Your bedroom’s about to look so good, you won’t want to leave it.
Upcycle Mason Jars Into Bedside Organizers

How many times have you knocked over your bedside cup of water at midnight? Yeah, we’ve all been there. Here’s a genius fix: Mason jars. Grab some clear 16-ounce jars and arrange them on your nightstand. They’re perfect for organizing your stuff without taking up tons of space. Fill one with pens and pencils, another with hair ties and bobby pins. Use a third for your phone charger and earbuds. Paint the lids fun colors like mint green or blush pink if you’re feeling fancy. These jars keep everything visible and within arm’s reach. Plus, they look way cuter than random clutter scattered everywhere. Your midnight bathroom runs‘ll be so much easier when you can actually find your glasses. Who knew organizing could be this simple?
Paint Your Nightstands a Bold New Color

If you’re tired of staring at the same boring nightstand color every single night, it’s time for a paint job. Seriously, your nightstands deserve better than that sad beige situation.
Grab some bold paint—maybe deep emerald or sunny yellow—and slap it on. You’ll need a brush, primer, and maybe two coats because let’s face it, your first coat probably won’t cover everything. Sand those nightstands first so the paint actually sticks around instead of peeling off like old sunburned skin.
Pick a color that makes you smile when you’re half-asleep at 3 a.m. Dark teal looks incredible next to white bedding. Bright coral brings serious energy to corner spaces.
Your bedroom’s vibe transforms instantly. Plus, you’ll finally have something interesting to look at besides your phone screen.
Craft a Woven Wall Tapestry

Every bedroom needs a statement piece that screams “I’ve got taste,” and a woven wall tapestry‘s your answer. Grab some yarn—bold blues, warm oranges, whatever makes you happy—and start weaving on a cardboard loom. Seriously, cardboard works great and costs basically nothing.
Your 2-foot-by-3-foot masterpiece doesn’t need to be perfect. Wonky lines? Character, my friend. Add texture by mixing thick and thin yarns together. The result looks expensive but feels like victory.
Hang it above your bed or dresser using simple nails or a dowel rod. Your tapestry instantly transforms bland walls into a cozy, artsy vibe. Plus, you’ll finally have something to brag about besides your Netflix binge-watching skills. Your bedroom just got cooler without breaking the bank.
Install Budget-Friendly LED Strip Lighting
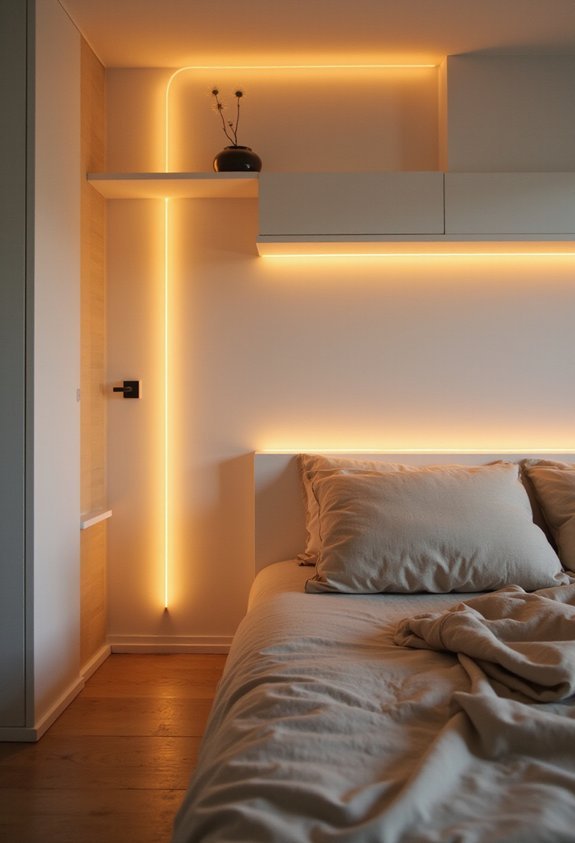
While you’re admiring your new tapestry, let’s talk about lighting that’ll make your room look like it belongs in a magazine—or at least a cool music video. LED strip lights are cheap and seriously awesome. You’ll find them online for like ten bucks. They stick right to your wall—no nails needed, thank goodness. Pick warm white or colorful ones depending on your vibe. Stick them behind your bed’s headboard or along shelves. The glow looks absolutely rad. Installation takes five minutes, and your room instantly transforms. You’ll basically become a lighting designer without the designer price tag. Plus, they use barely any electricity, so your parents won’t have a meltdown about the power bill. Your space just leveled up big time.
Make Throw Blankets From Old Sweaters
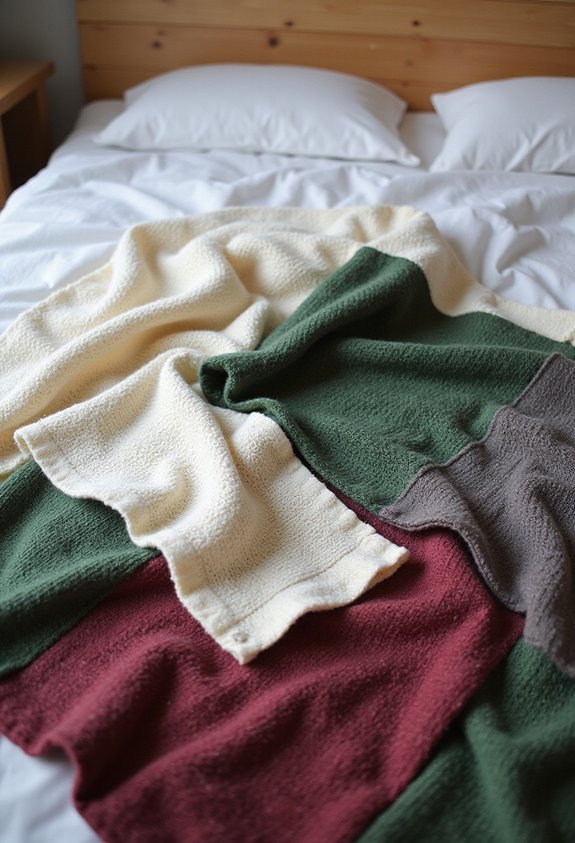
Now’s the time to raid your closet for those sweaters you’ve outgrown or stopped wearing—you know, the ones taking up space like they’re paying rent. Grab your scissors and a needle because we’re about to transform textile clutter into cozy gold.
Cut those old sweaters into rectangles, roughly 24 by 36 inches each. Stack two pieces together, fuzzy sides facing inward, and sew three sides shut. Leave one side open for stuffing. Grab some old pillows, blankets, or fabric scraps and pack that thing full. Then sew that final edge closed and boom—instant throw blanket.
You’ve just rescued your sweater graveyard and created bedroom comfort that actually costs nothing. Your broke-but-stylish self is officially unstoppable. Drape it over your bed corner or chair and bask in your DIY glory.
Create a Pegboard Wall for Functional Storage
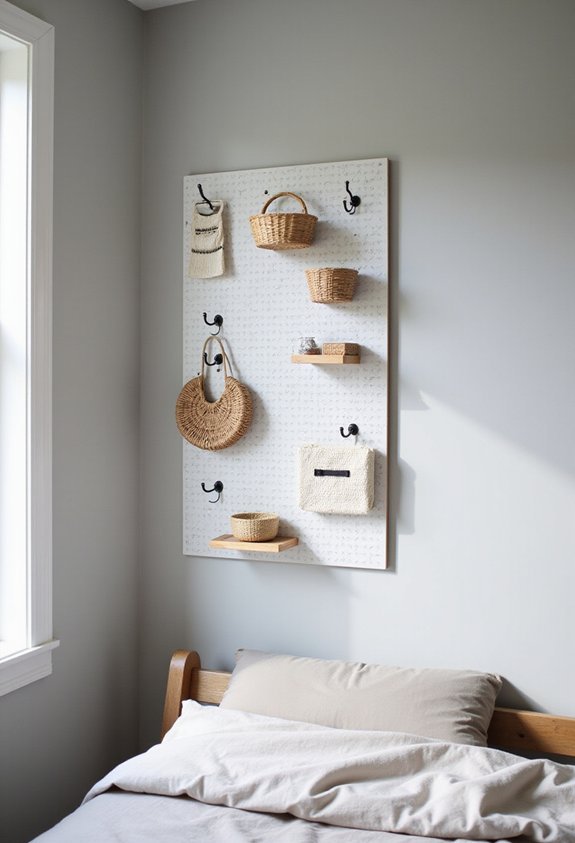
Pegboards are basically the Marie Kondo of wall storage—they help you organize your stuff and make you feel weirdly satisfied doing it. You’ll grab a standard 24×36-inch pegboard from any hardware store and mount it with some simple brackets. Then comes the fun part: you’re basically playing adult Tetris with hooks, baskets, and shelves. Arrange your phone chargers, jewelry, scarves, and books however you want. Paint it a fun color—soft pink, mint green, or even hot pink if you’re feeling bold. Add small wooden pegs for necklaces and metal hooks for bags. Your wall becomes organized AND cute. Plus, you can rearrange everything whenever you’re bored. It’s like interior design on easy mode!
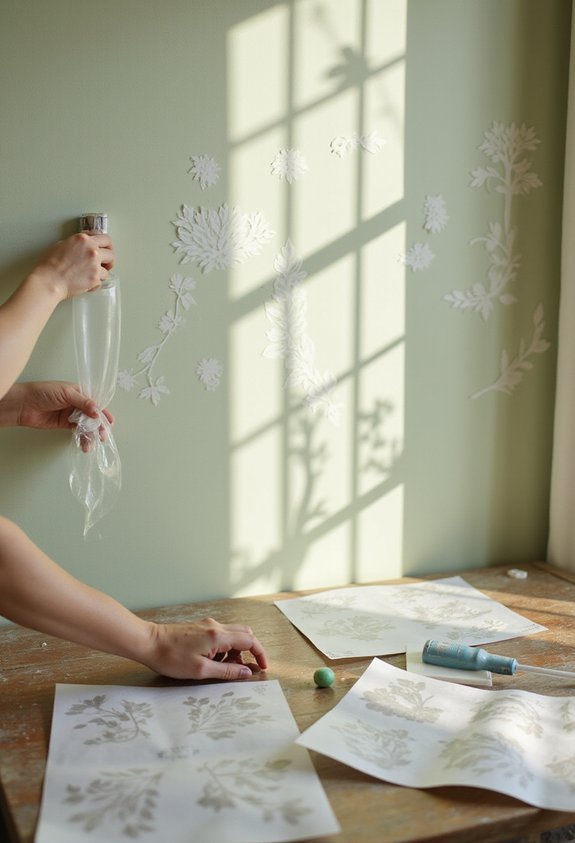
Paint Stenciled Designs on Your Dresser
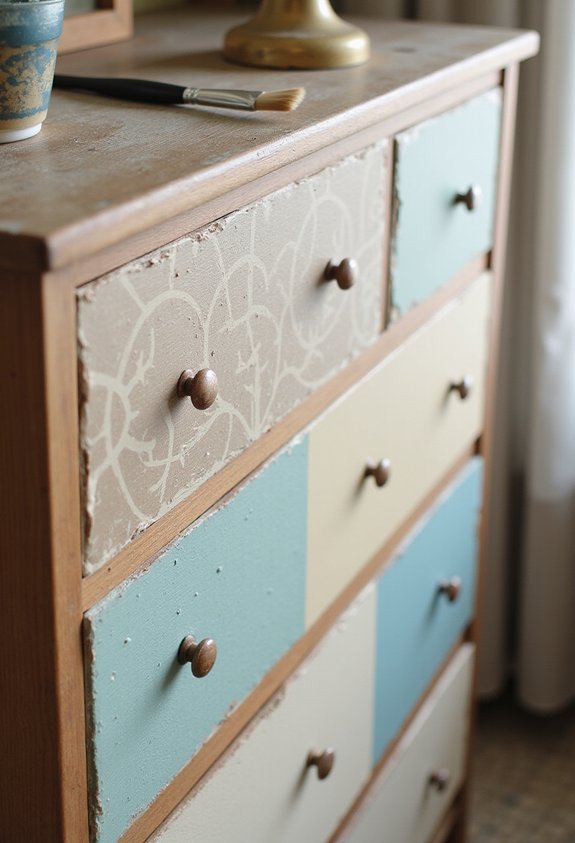
If your dresser’s looking as bland as plain oatmeal, it’s time to give it some personality with stenciled designs. Grab some stencils (dollar stores have tons), spray paint, and painter’s tape. Tape your stencil firmly to the dresser’s surface, then spray paint lightly and evenly. Don’t sneeze—seriously, paint everywhere isn’t the vibe. Let it dry completely before peeling off the stencil. You’ve basically just made your dresser cooler than you are, which is saying something. Try geometric patterns on drawer fronts, floral designs on top, or random shapes scattered around. Mix colors for extra pizzazz. Your old dresser now screams personality instead of whispering “please donate me.” Plus, you’ll save hundreds compared to buying new furniture.
Build a Wooden Ladder Shelf Display

You’ve conquered your dresser, and now it’s time to level up your room’s storage game—literally. Grab two wooden ladders (about four feet tall) and some sturdy shelves. Lean them against your wall at a slight angle—trust me, leaning beats falling, which’d be embarrassing. Space your shelves roughly twelve inches apart and secure everything so it won’t tumble down and bonk your head.
Now for the fun part: decorating! Stack colorful books, display your favorite plants in cute pots, and arrange photos in mismatched frames. Add string lights for cozy vibes. Toss in some quirky figurines or candles. Your ladder shelf transforms into an eye-catching focal point that screams “I’m creative and totally have my life together”—even if that’s not entirely true!
Hang Dried Flowers and Plants From the Ceiling

While your ladder shelf‘s stealing the show down below, it’s time to get your ceiling in on the action. Hang dried flowers and plants overhead for instant botanical vibes. You’ll need fishing line, thumbtacks, and whatever dried blooms you’ve got lying around—roses, pampas grass, eucalyptus, whatever makes your heart sing.
Cut 12-inch lengths of fishing line and attach them to your ceiling with tacks. Secure the dried stems to the line’s bottom using small knots. Space them 18 inches apart for a casual, natural look. Cluster different heights and colors together for visual interest.
Your room now looks like a fairy forest, minus the bugs. Plus, dried flowers won’t wilt on you. They’re basically the reliable friends of the plant world—low-maintenance and always looking decent.
Make a Cork Board From Wine Corks
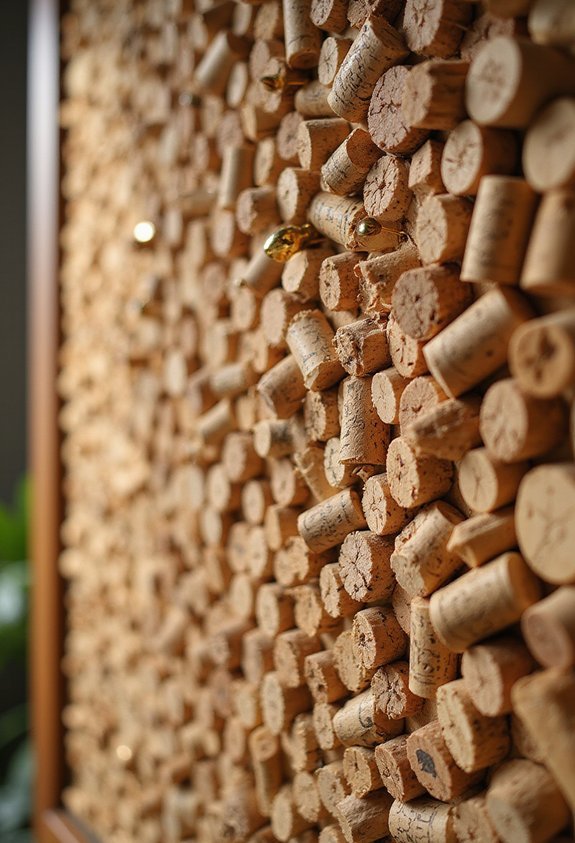
Now that you’ve turned your ceiling into a botanical wonderland, it’s time to tackle your walls with a project that’ll make you feel fancy—even if you’re just recycling last night’s wine bottles. Collect about thirty to forty corks and glue them together in a rectangle using strong adhesive. You’ve basically created a bulletin board that smells like a winery and looks intentionally artsy. Mount it with brackets, and boom—instant sophistication. The natural tan color works with any bedroom vibe. You can push pins through the soft cork to hang photos, reminders, or motivational quotes. Your wall just went from boring to “where’d you get that?” Your guests won’t believe you made this masterpiece from trash.
Create Fabric Drawer Dividers

Because messy drawers are basically a crime against your sanity, it’s time to organize them with fabric dividers that’ll make you actually want to open your dresser. Grab some cardboard boxes and colorful fabric scraps. Cut the cardboard into rectangles about 4-6 inches tall. Wrap each piece with fabric using hot glue, and boom—you’ve got custom dividers. Slide them into your drawers and create sections for socks, underwear, and shirts. Your socks’ll finally have a home instead of breeding like rabbits in the dark. The best part? They’re dirt cheap and super customizable. Pick fabrics that match your vibe—bold patterns, pastels, whatever makes you smile. Now your drawer opens like a perfectly organized rainbow instead of a disaster zone.
Paint Wooden Crates for Rustic Storage
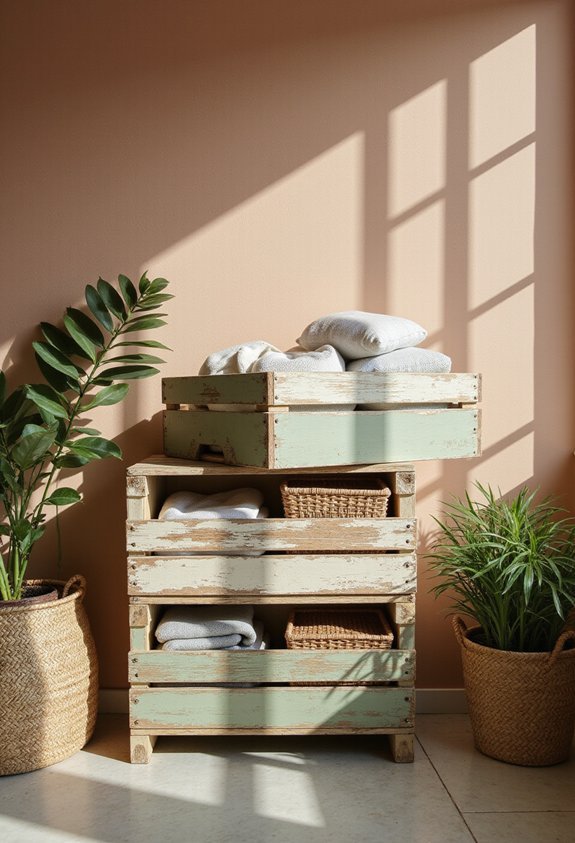
Your drawers are looking sharp now, so let’s tackle the rest of your room with some seriously cool storage that doesn’t scream “boring.” Wooden crates are about to become your new best friend—they’re cheap, stackable, and way more interesting than those bland plastic bins gathering dust in your closet.
Grab some paint in colors you actually like. Soft whites, warm grays, or deep blues all work great. Paint your crates with a roller or brush, then let them dry completely. Stack two or three together and boom—instant rustic storage that looks intentional, not accidental.
Use them for blankets, books, or that pile of stuff you don’t know what to do with. Your room’s about to go from “I’m still unpacking” to “I’ve got my life together.” Well, at least storage-wise anyway.
Hang Sheer Curtains to Soften Windows
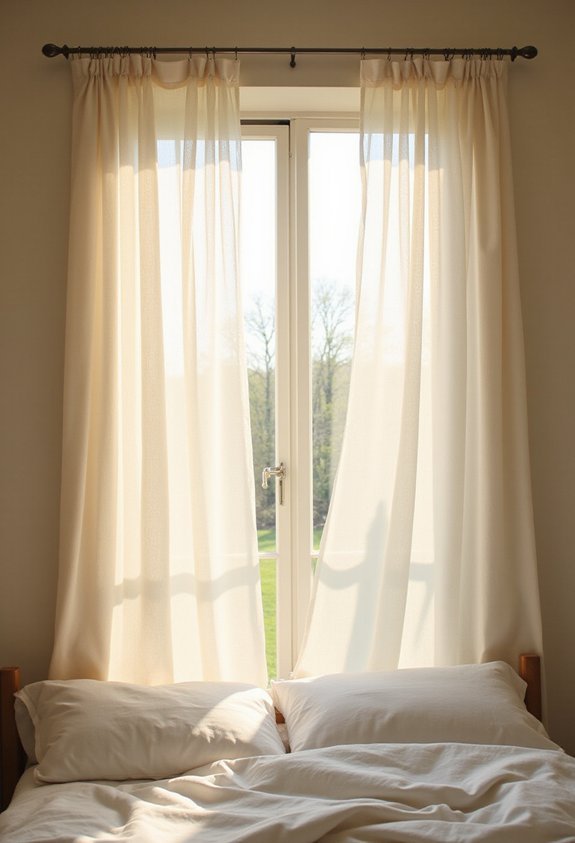
Once you’ve got your storage situation locked down, it’s time to make those windows stop looking like they’re glaring at you 24/7. Sheer curtains are your secret weapon here. They’re basically see-through fabric superheroes that soften harsh sunlight without turning your room into a cave. Grab some lightweight material—think gauzy, flowy stuff that makes you feel fancy. Hang them high and wide on your curtain rod. We’re talking nearly ceiling to floor for maximum drama. White, cream, or pale gold works beautifully. They’ll diffuse light like a dream and add instant softness to any bedroom. Plus, they’re cheap! Your windows’ll finally look like they belong in an actual home instead of a stark interrogation room.
Make a Vision Board Above Your Desk
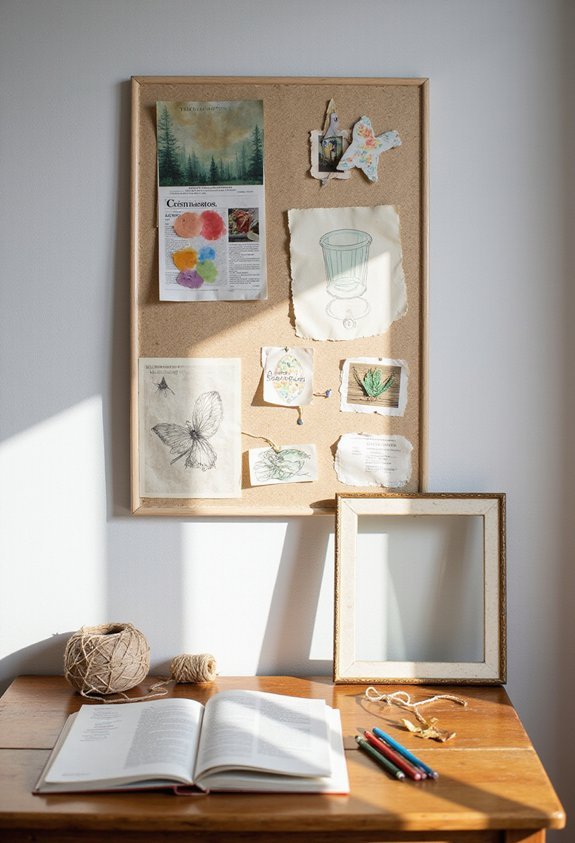
Every bedroom needs a little dose of inspiration hanging right above the desk, and a vision board is basically your personal cheerleader in collage form. Grab a cork board or foam board around 18×24 inches. Then hunt through magazines for pictures that make you smile. Dreams of travel? Snip those beach photos. Career goals? Find inspiring quotes in bold colors. Cut out images and arrange them however you want—there’s no wrong way to do this, unlike when you tried cooking that casserole. Stick everything down with glue or push pins. Now you’ve got daily motivation staring back at you, reminding yourself what you’re working toward. Your future self will thank you for this burst of colorful inspiration.
Craft Personalized Wall Letters
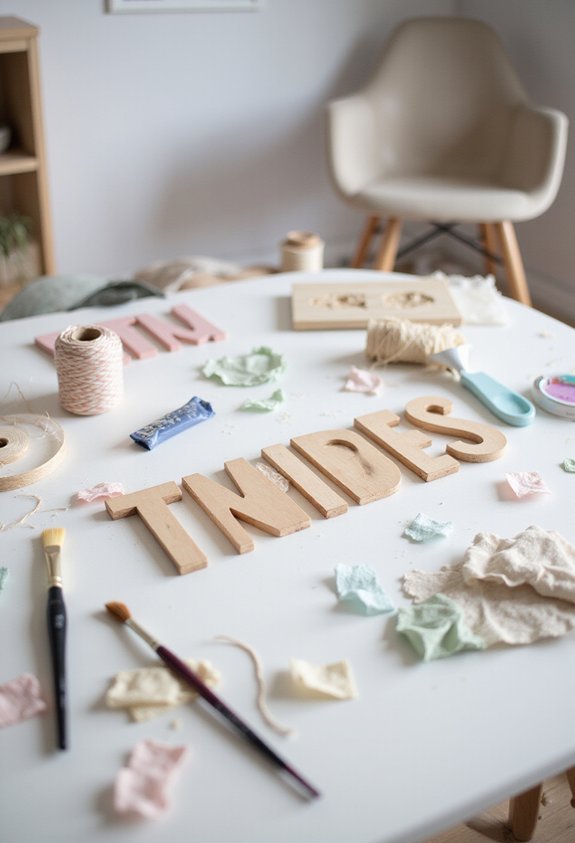
While your vision board‘s been busy motivating you, there’s still plenty of blank wall space just sitting there looking lonely. Time to give those walls some personality! Grab wooden letters from the craft store—they’re cheap and totally customizable. Paint them your favorite colors. Go wild with hot pink, ocean blue, or even tie-dye patterns if you’re feeling extra. Spell out your name, a motivational word like “Dream,” or something hilarious like “Nap Queen.” Arrange letters 4-6 inches apart on your wall, mixing uppercase and lowercase for visual interest. Hang them at eye level using removable adhesive strips so you won’t destroy your security deposit. Your walls’ll finally stop judging your life choices.
Build Floating Nightstands From Wood Shelves

If you’ve been using a milk crate as a nightstand (no judgment), it’s time to upgrade. Floating shelves are your secret weapon for bedroom glow-up on a budget.
Grab a 24-inch wood shelf and some sturdy brackets from your local hardware store. They’ll run you about thirty bucks. Mount that bad boy at arm’s reach height—roughly 28 inches from your bed. Use a level, seriously. Nobody wants a lopsided lamp situation at 2 a.m.
Now style it up. A small lamp, your phone charger, and maybe a book create the perfect nightstand vibe. The floating effect looks expensive and fancy, but you’re basically just screwing wood to your wall.
Your bedroom’s about to look intentional. Your knees will also thank you for ditching that milk crate.
Create a Bookshelf Nook With Cushions
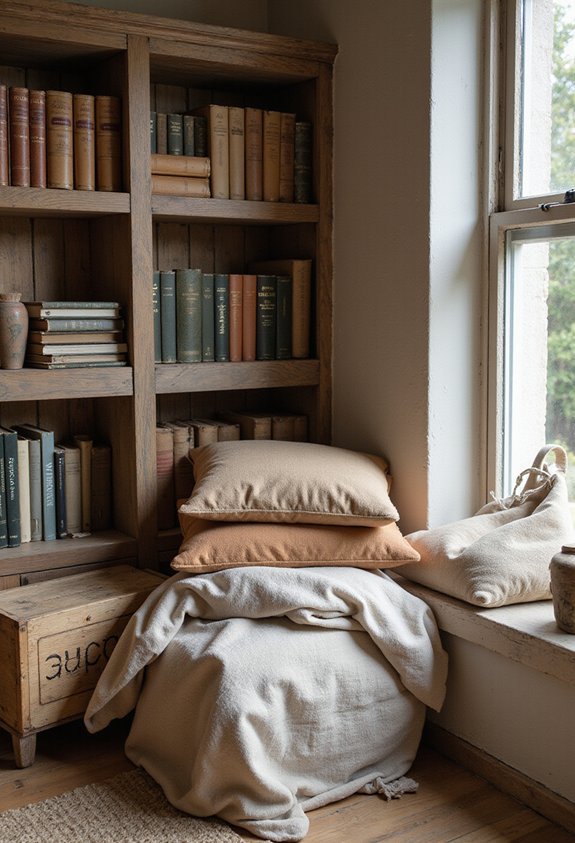
Your bedroom’s looking sharp with that floating nightstand, but now you need a cozy spot to actually read those books stacked on it. Enter: the bookshelf nook with cushions. Grab an affordable bookshelf (we’re talking $40-60) and wedge it into a corner. Stack colorful throw pillows—2 to 3 should do it—against the back and sides. Toss in a reading lamp and boom, you’ve got literary paradise. The cushions are your secret weapon here. They transform a boring bookshelf into a fort-like hideaway where you can disappear with your favorite stories. Your back’ll thank you, and your books finally get the throne they deserve. Plus, nobody judges you for eating snacks in there. It’s basically a pillow fort for adults who own furniture.
Make Window Treatments From Fabric Remnants

Because those fabric scraps are basically calling your name from the craft drawer, it’s time to give them a second life as window treatments. Grab your remnants and start sewing panels together—no sewing machine? Hand-stitch them and pretend you’re getting a workout. You’ll create custom curtains that won’t break the bank or your dignity.
Mix colors and patterns for a fun, eclectic vibe. That neon floral paired with stripes? Absolutely works. Hang your creation with a simple rod and watch sunlight dance through your masterpiece.
Want roman shades instead? Fold those fabric squares, add some cardboard strips for structure, and boom—instant sophistication. Your window’s never looked so good, and your wallet’s definitely thanking you for this budget-friendly genius move.
Paint Your Ceiling a Soft Accent Color

Most folks don’t think twice about their ceiling—it’s just that boring white thing up there, right? Well, it’s time to flip the script. Literally.
Painting your ceiling a soft accent color transforms your entire bedroom. Try pale sage green, dusty blue, or warm cream. These hues won’t give you a headache like bright colors might.
You’ll need a roller on an extension pole—unless you enjoy neck cramps and regret. Grab some drop cloths too. Trust me, ceiling paint drips everywhere like your ceiling’s sweating.
Start with primer, then two coats of your chosen color. The soft tones create a cozy, intimate vibe that makes your room feel like a hug.
Your ceiling’s finally getting the respect it deserves.
Craft a DIY Dream Catcher
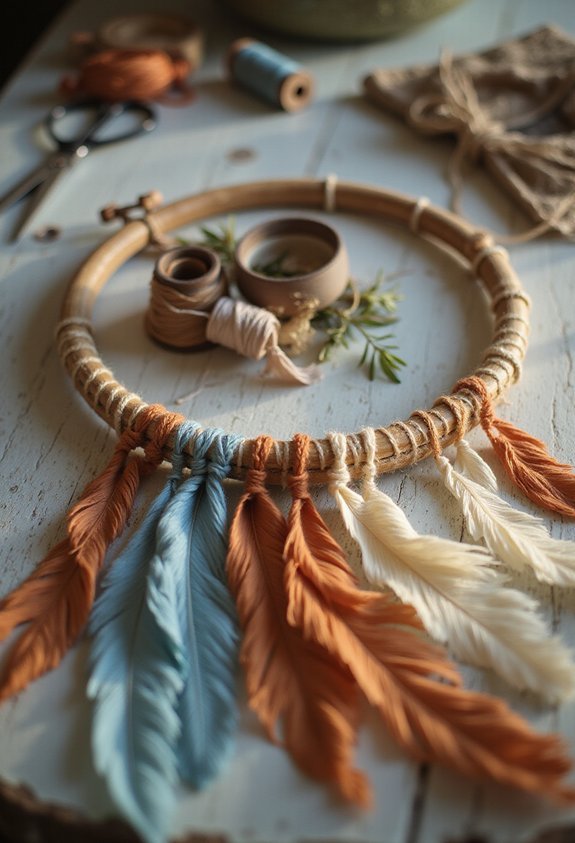
Dream catchers aren’t just cool wall hangings—they’re basically art you can actually make without a fancy degree. You’ll need a wire hanger, string, and beads. Seriously, that’s it.
Bend your hanger into a circle and wrap colorful yarn around it until it looks intentional. Now comes the fun part: create a web inside using string. Crisscross it back and forth, tying knots at random spots. Add beads wherever you want—above the web, dangling below. Your bedroom will look like you actually know what you’re doing.
Hang it above your bed or in a corner where it catches light. The whole project takes maybe thirty minutes, and honestly, if you mess up, nobody needs to know. Dream catchers are forgiving like that. Your wall just got way cooler without breaking the bank.
Build Under-Bed Storage Boxes

The space under your bed? It’s basically a goldmine you’re totally ignoring. Grab some plastic storage boxes—the 12-by-18-inch ones work great—and slide them under there like you’re hiding snacks from your siblings (which, honestly, you might be).
Paint them fun colors. Blue, pink, sunshine yellow—whatever makes you happy. Slap labels on each box so you actually remember what’s stuffed inside. Nobody wants to excavate under their bed at midnight searching for that one sweater.
These boxes hold seasonal clothes, extra blankets, old journals, whatever you need out of sight. Roll your clothes instead of folding them—they take up way less space and won’t get wrinkled.
You’ve just created hidden storage without spending much cash. Your room’s instantly cleaner, and you’re basically a storage genius now. Pretty stellar, right?
Create Ambient Lighting With Candles and Holders
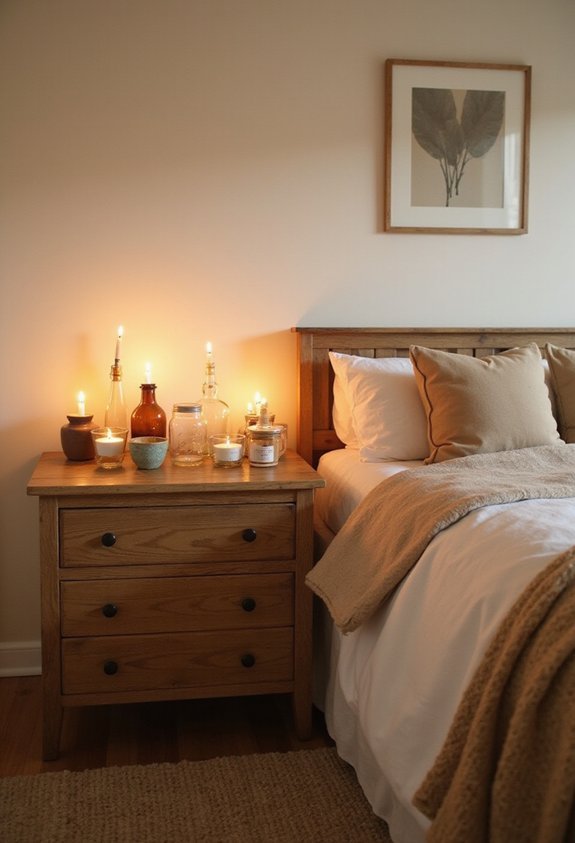
If you’ve been living in a bedroom that feels like a cave, it’s time to fix that with some serious candle magic. Grab mason jars, tin cans, or dollar store holders and fill ’em with pillar candles in warm whites and soft golds. Arrange clusters on your nightstand, dresser, or shelf—three candles look fancier than one lonely stick. String fairy lights through glass holders for extra pizzazz without the fire hazard anxiety. Battery-operated candles work too if you’re paranoid about burning your house down. The flickering glow makes everything look Instagram-worthy and way less depressing. Your room’ll transform from dungeon vibes to cozy spa faster than you can say “mood lighting.” Plus, vanilla-scented air beats stale socks every single time.
Make a Fabric-Covered Cork Board
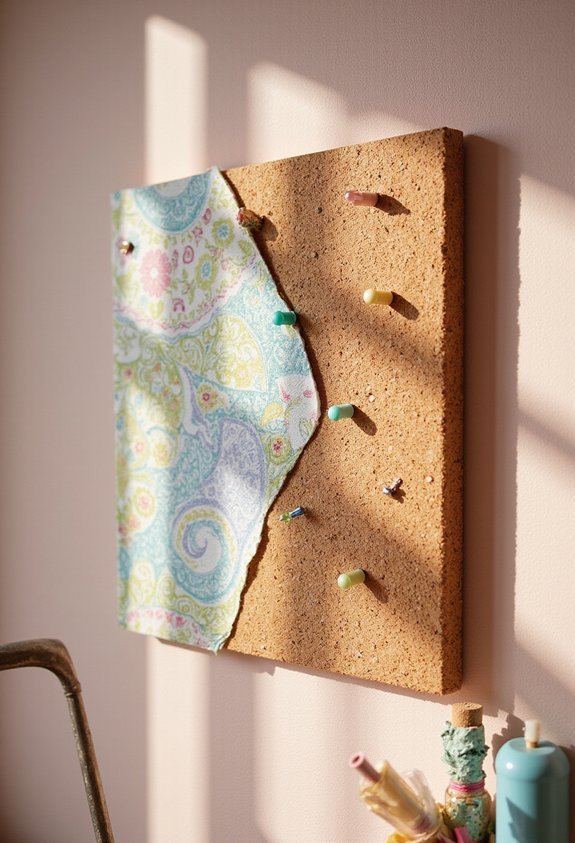
Now that your room’s glowing like a cozy dream, let’s give your walls some personality too. Grab a cork board (12×16 inches works great) and fabric you actually like. Maybe something colorful or patterned that doesn’t make you sneeze. Cut your fabric slightly larger than the board, then wrap it around like you’re gift-wrapping a present—except messier is totally fine. Staple the edges on the back. You’ve basically just created a bulletin board that won’t bore you to tears. Hang it above your desk or dresser. Now you can pin up photos, ticket stubs, or motivational quotes without looking like you raided a office supply store. Your walls finally have some flair, and you didn’t break the bank. That’s a win.
Paint and Decorate Plain Lampshades

Plain lampshades are basically blank canvases just begging for a makeover, and you’re about to give them one. Grab some acrylic paint, fabric markers, or even permanent markers—whatever you’ve got lying around. Paint stripes, polka dots, or geometric patterns directly onto your shade. You’ll sneeze from the dust (sorry about that), but it’s totally worth it.
Want to get fancy? Glue on ribbons, lace, or decorative tape around the edges. Hot glue guns are your best friend here. You could also wrap fabric around the shade for a completely different vibe.
The best part? Your lampshade now matches your personality instead of looking like it came from a hospital waiting room. Plus, you spent like five bucks instead of fifty. That’s the dream, right there.
Build a Simple Wooden Bench for Your Bed

While your lampshade’s looking fresh and fabulous, your bed’s probably still missing that one thing that’d make it feel extra cozy—a wooden bench sitting right at the foot.
Here’s the good news: you don’t need carpentry superpowers. Grab two wooden crates, a plank of wood (about 36 inches long), and some screws. Stack those crates, attach your plank on top, and boom—instant seating. Paint it whatever color matches your vibe: soft gray, deep blue, or cheerful yellow works great.
This bench isn’t just pretty. It’s totally practical too. You can toss blankets there, sit while putting on socks (no more awkward hopping), or use it for extra storage underneath. Your guests’ll think you’re basically an interior design genius. Spoiler alert: you’re not, but they don’t need to know that.
Create Personalized Wall Decals With Vinyl
Your wooden bench is looking sharp, but those blank walls above your bed? They’re basically screaming for help. Enter vinyl wall decals—basically stickers for grown-ups who’ve got taste. You’ll grab some adhesive vinyl sheets (they’re cheap!), sketch your design, and cut it out with a craft knife. Maybe you’re into geometric shapes, inspirational quotes, or a giant pizza slice. Honestly, the options won’t bore you to tears. Stick your creation onto that sad wall, smooth out air bubbles like you’re burping a baby, and boom—instant personality. Your friends’ll think you hired a designer. You’ll know the truth: you just didn’t mess up too badly. Vinyl decals transform rooms faster than your mood swings.
Make Decorative Baskets From Woven Materials
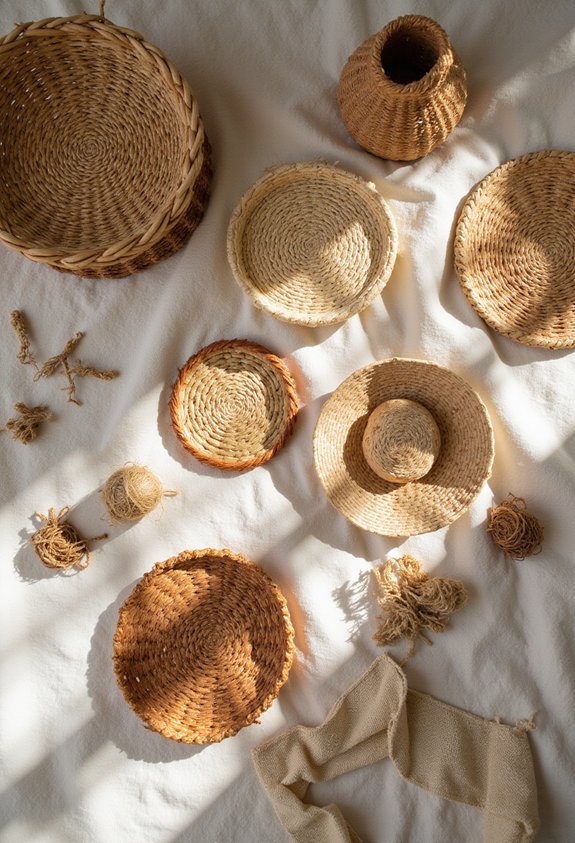
If you’ve got some woven materials lying around—like old baskets, placemats, or fabric scraps—you’re basically sitting on a goldmine of decor. Stack two or three mismatched baskets on your shelf and boom—instant storage that doesn’t scream “I’m disorganized!” Paint them cream, tan, or soft gray for a cohesive look. You can also weave fabric strips through plain baskets to add personality. Position them near your bed’s foot or in corner nooks. They’ll hold blankets, books, or stuff you’d rather keep hidden (no judgment here). The best part? This project won’t drain your wallet or require fancy skills. Your bedroom will look intentionally styled, not chaotic. That’s the real treasure.
Paint a Mural on Your Largest Wall

A mural’s basically a giant masterpiece that’ll make your wall actually interesting—and it doesn’t need to be a photorealistic portrait of your cat (though hey, no judgment). Pick your largest wall and grab some paint. Sketch your design lightly in pencil first, or just wing it if you’re feeling brave (or reckless). Use bold colors like deep blues, sunset oranges, or forest greens. A simple geometric pattern takes maybe two afternoons. Abstract designs hide your mistakes beautifully. Mountains, stars, or wildflowers work great too. Don’t stress about perfection—wonky lines add character. You’ll feel ridiculously proud staring at your creation. Your friends’ll think you’re secretly an artist. Plus, it costs way less than buying expensive wall art.
Arrange Plants and Greenery Throughout Your Space
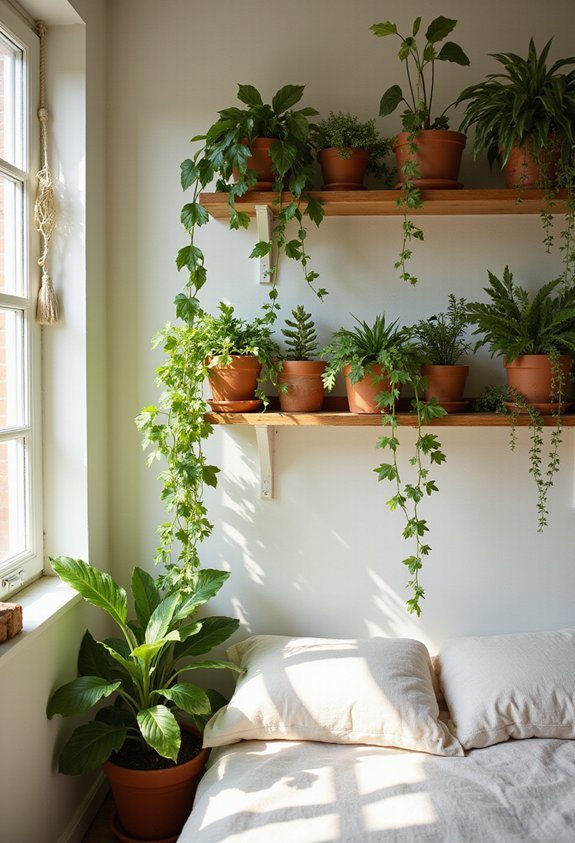
Plants are basically the lazy person’s solution to making your bedroom look alive—literally. You don’t have to water them daily (okay, maybe you will forget), but they’re still less demanding than a pet. Stick a pothos vine on your shelf and watch it cascade down like a green waterfall. Corner a tall snake plant in that awkward empty spot, and boom—instant sophistication. Small succulents on your nightstand add color without taking up much real estate. Hang a macramé planter with a trailing string of pearls from your ceiling, and you’ve got yourself a botanical masterpiece. Your room’ll feel fresher, you’ll breathe better, and plants won’t judge you for your messy floor. Win-win.
Frequently Asked Questions
How Do I Ensure Paint Colors Coordinate Well With Existing Bedroom Furniture and Décor?
You’ll want to pull color samples directly from your existing furniture and décor pieces. Hold paint swatches against them in natural lighting, then test larger patches on your walls. You’ll easily spot which hues complement your current pieces best before committing.
What Tools and Safety Precautions Are Essential for Beginners Tackling DIY Bedroom Projects?
You’ll need basic tools like a paintbrush, roller, drop cloth, and tape. Wear safety glasses, gloves, and a mask. Guarantee proper ventilation by opening windows. You should read all product instructions carefully and keep a first-aid kit nearby.
How Can I Make My Small Bedroom Appear Larger Using Budget-Friendly Decorating Techniques?
You’ll maximize your small bedroom by using mirrors to reflect light, choosing light paint colors, organizing clutter, and arranging furniture strategically. You can also hang curtains high, use vertical storage, and select multifunctional pieces to create an open, airy feel.
Where Can I Source Affordable Materials Like Reclaimed Wood, Fabric Scraps, and Vintage Items?
You’ll find affordable materials at thrift stores, estate sales, and online marketplaces like Facebook Marketplace and Craigslist. You can also check local construction sites for reclaimed wood, fabric shops for scraps, and community groups for free vintage items.
How Do I Maintain and Clean Delicate DIY Décor Items Like Macramé and Dried Flowers?
You’ll want to dust your macramé and dried flowers gently with a soft brush or cloth weekly. Avoid moisture and direct sunlight to prevent damage. Store them in cool, dry places, and handle them carefully since they’re fragile. Consider using glass cases for extra protection.
Conclusion
You’ve got this! Transform your bedroom without breaking the bank. Paint that accent wall, hang some photos, and string up fairy lights like you’re creating your own cozy cave. Toss in some plants and DIY pillows. Your room’ll look so good, you won’t want to leave it—which is perfect because your bed’s probably more comfortable than your couch anyway. Budget decorating? You’re basically a design genius now!
